Technologies
DuckDuckGo: Meet the Privacy-Focused Rival to Google Search
What is DuckDuckGo, and how does it work? Here’s everything to know about the privacy-minded search engine.

Online trackers can be annoying. You search for a product or click on an advertisement one time, and then ads for that product seem to follow you to the ends of the internet, even across devices. Sometimes, you just want a little privacy in your browsing. Enter DuckDuckGo, a search engine that pledges to keep your search activity anonymous and not track you online.
There are other private browsers, such as Brave and the Mullvad Browser, that block others from monitoring your online activity. But DuckDuckGo — which has spent heavily on an advertising campaign — sees itself as a direct competitor to Google Search, complete with a mobile app and extensions for Chrome, Firefox, Safari and other browsers, as well as a Mac browser in public beta.
After major incidents like the Cambridge Analytica scandal, people have become more aware of how much personal information is available to tech companies and advertisers — and are opting out of being tracked when they can. While it doesn’t track users, DuckDuckGo’s app was downloaded more than 50 million times between July 2020 and June 2021 — more than all other years combined since its 2008 launch.
Here’s what you need to know about DuckDuckGo and how it tries to keep your searches more secure.
What is DuckDuckGo?
DuckDuckGo is a search engine that offers a mobile browser app and a desktop extension, both aimed at allowing you to browse the internet without companies gobbling up your personal data. It promises to keep your searches private, anonymous and offers built-in tracker blocking, so the sites you visit have a harder time collecting information about you.
Read more: Best VPNs of 2023
How does DuckDuckGo work?
For starters, DuckDuckGo does not track searches made through its browser extension or mobile app. Other browsers, including Chrome, allow you to use private or incognito windows that don’t track your search history, but their default windows do. (That’s the basis of every «embarrassing search history» joke.) Instead of making you navigate to a different version of its app, DuckDuckGo never tracks your search history.
Searches made through DuckDuckGo also automatically connect you to the encrypted versions of websites wherever possible, making it harder for anyone else to see what you’re looking at online. This is another scenario where both options (encrypted and unencrypted) exist on other search engines, but the default isn’t always the privacy-friendly option. DuckDuckGo saves you the extra steps of manually navigating to encrypted connections.
DuckDuckGo was criticized in May 2022 when researchers discovered some Microsoft tracking scripts while using DuckDuckGo’s browsers. The presence of Microsoft trackers seemed to fly in the face of the search engine’s privacy promise, and DuckDuckGo’s founder and CEO clarified on Reddit that the company was «currently contractually restricted by Microsoft» from stopping Microsoft scripts from completely loading. This is because the company uses Microsoft’s Bing to power its search results. The company followed up in August, however, by announcing that it would further restrict Microsoft trackers in its browsers.
However, DuckDuckGo remains ahead of other popular privacy options when it comes to blocking tracking data, and the company has clarified its app store descriptions to better clarify limitations in its privacy protections. DuckDuckGo had also previously disclosed its partnership with Microsoft, and its CEO said in the Reddit post that the company is working to get that restriction changed.
DuckDuckGo also actively blocks external trackers from following you around online. For a more detailed explanation of DuckDuckGo’s privacy features, check out DuckDuckGo’s blog.


The DuckDuckGo search engine emphasizes privacy.
Screenshot by Stephen Shankland/CNETHow is DuckDuckGo different from Google Search? What about Incognito mode and private browsing?
DuckDuckGo essentially takes the opposite approach compared to other big tech companies like Google and Facebook, which have traditionally made money by targeting ads based on your browsing history and personal data. While Google has said it’s going to stop this practice, the platform still collects a ton of data about you, including your location and search activity — yes, even in incognito mode.
Incognito mode simply deletes information related to your browsing session from your computer: your history, cookies and any info you’ve entered into fields. Notably, it only does that after you end your session by closing out all your tabs. So if you leave your incognito tabs open for hours or days at a time, that information will still build up. And no matter what, Google can save your searches — and companies, internet service providers and governments can still track you across the internet, even when you’re using incognito mode.
DuckDuckGo is different because it doesn’t store your browsing data at all, and it blocks trackers while you’re browsing.


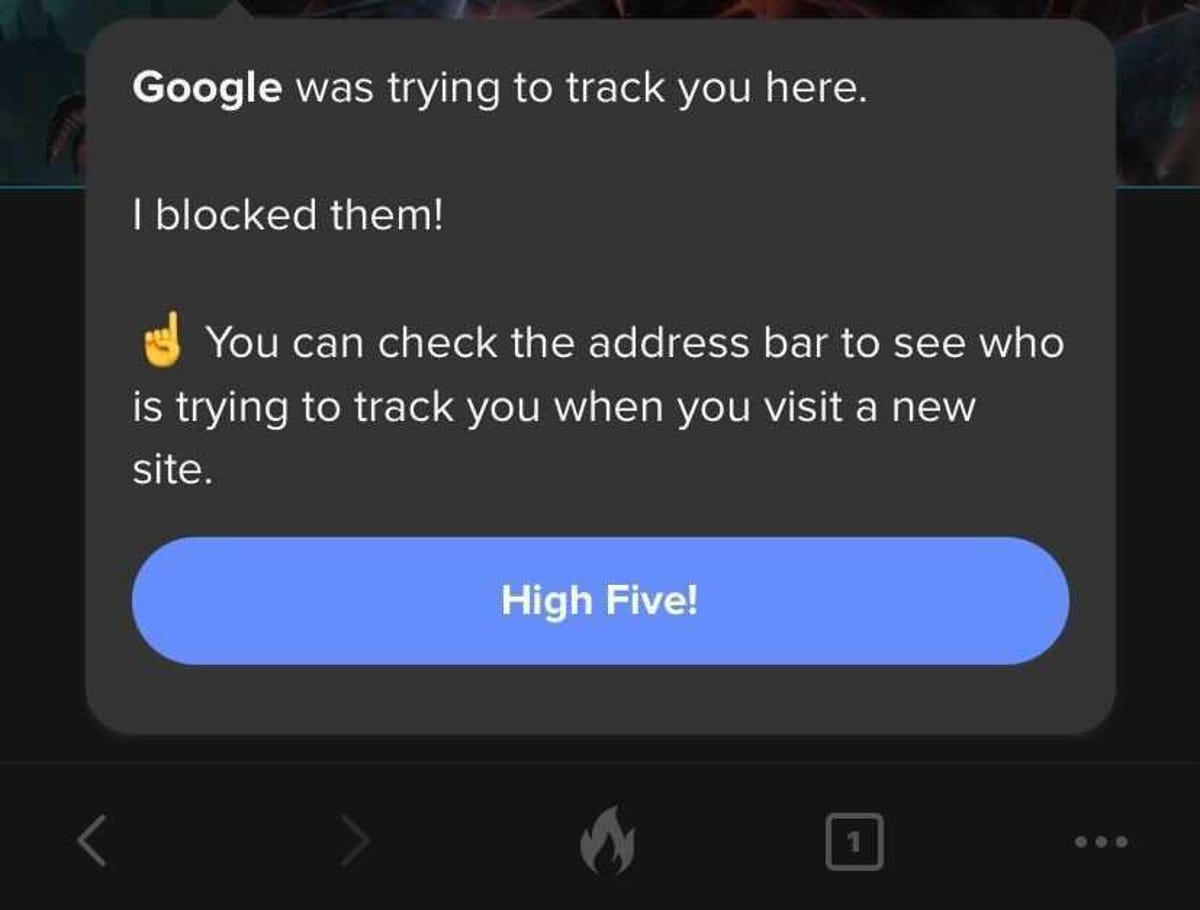
When you first use the DuckDuckGo Privacy Browser, the app will walk you through the different ways it protects your privacy.
Screenshot from Adam Benjamin/CNETIf it isn’t targeting ads, how does DuckDuckGo make money?
DuckDuckGo still makes money from advertising — it just doesn’t use targeted ads. The search engine shows you ads based on the keywords you search for, which aren’t connected to your personal data like your browsing or purchase history. Essentially, you’ll only see ads for whatever you’re currently searching for, not the weird product your friend sent you a link to last week that you now can’t get away from.
How can I use DuckDuckGo?
On mobile devices, simply open your app store and search for «DuckDuckGo.» You’ll be able to download the DuckDuckGo Privacy Browser app and use it the same way you’d use Chrome or Safari. At the bottom center of your app, you’ll see a fire icon, which you can press at any time to close all your tabs and clear all personal data.
On desktop, go to duckduckgo.com, where you’ll see a button to add DuckDuckGo to your browser. On Chrome, you’ll be directed to the Chrome webstore page to download the extension for free. On Safari, you’ll be instructed on how to set DuckDuckGo as your default search engine or to manually activate a search using DuckDuckGo.
For more about online privacy, check out the five reasons to ditch Google for DuckDuckGo, what to know about DuckDuckGo’s free AI feature DuckAssist and how DuckDuckGo’s app tracking protection beta is available to Android users.
Technologies
Before Apple’s Expected iOS 19 Reveal, Here’s What to Know About iOS 18.5
Here are all the new features you should know about in the latest iPhone update.

Apple is holding its Worldwide Developers Conference on June 9, where we will likely get a glimpse of the upcoming iOS 19. Before that announcement, Apple released iOS 18.5 on May 12, more than a month after the company released iOS 18.4. While iOS 18.4 brought more emoji to all iPhones, this latest update adds just a few small changes and a new Pride wallpaper to your iPhone. The update also includes some bug fixes and security patches everyone should download to help keep their device secure.
Read more: What CNET’s Experts Hope to See in iOS 19
You can download iOS 18.5 by going to Settings > General > Software Update, then tapping Update Now and following the prompts on your screen.
Here’s what iOS 18.5 brings to your iPhone. Just a reminder, only people with an iPhone 15 Pro, Pro Max or the iPhone 16 lineup can access Apple Intelligence for now. If you have any other iPhone, you won’t have access to those features.
New Pride wallpaper
Apple releases a new Pride wallpaper ahead of Pride Month every year, and this year is no different. iOS 18.5 includes the latest iteration of the wallpaper, «Pride Harmony,» which features bold stripes that shift and change position as you move.
iOS 18.5 tweaks Mail options
Apple introduced a few Mail app updates in iOS 18.5. One of those updates makes it easier to adjust the app’s settings by showing or hiding contact photos in Mail. Contact photos are the images to the left of emails that help identify senders.
Mail will show Contact Posters by default, but you can turn them off from within the app with iOS 18.5. To do so, open Mail, tap the three dots (…) in the top-right corner of your screen, and then tap Show Contact Photos. Now, all your emails will just show the subject line and a preview of the message, similar to how Mail looked before iOS 18.
This option is in iOS 18.4, but it’s buried in Settings and not easy to locate.
Another update concerns Categories. If the mode is enabled, you can see a small tab on the right side of your screen near the other categories. Swipe the categories bar near the top of Mail to the left, and this small tab will expand to reveal the category All Mail. When you swipe left to view All Mail, it will automatically be selected, and you’ll need to tap one of the other Categories to unselect All Mail.
This category isn’t new; you could find it in iOS 18.4. But, there was no small tab on the right side of your screen to signal it was present off-screen. Therefore, All Mail flew under the radar — I didn’t even know the option was there until beta versions of iOS 18.5.
This category appears to be a way to simultaneously enable Categories and List View — the pre-Categories view of Mail. When you use All Mail, you’re viewing your messages without any categorization, like in List View.
Satellite features for all iPhone 13 models
Apple’s iOS 18.5 also brings certain satellite features, like messaging, to the iPhone 13 lineup. That means if you go off the grid, you could still text people to let them know where you are. However, these features on iPhone 13 models are carrier dependent, and currently only T-Mobile offers them in the US via Starlink.
T-Mobile Starlink is in beta, and the beta is free and open to anyone until July, including people on other carrier plans. After July, it will be part of the T-Mobile Experience Beyond and Go5G Next plans. People with other carriers, like Verizon and AT&T, will then be able to access the system for $10 a month.
Back Tap banner
The iOS 18.5 update also introduces the option to display a banner using the Back Tap function. Back Tap turns the Apple logo on the back of your iPhone into a usable button that can open your camera, take a screenshot and more when you double- or triple-tap it. And with iOS 18.5, you can make your iPhone display a banner whenever you use Back Tap.
To enable the banner, go to Settings > Accessibility > Touch > Back Tap and tap the toggle next to Show Banner. If you enable the banner and use Back Tap, the banner will appear across the top of your screen and read, «Back Tap Double/Triple Tap detected.»
iOS 18.5 release notes
Here are the full release notes for iOS 18.5.
This update also includes the following enhancements and bug fixes:
- A new Pride Harmony wallpaper.
- Parents now receive a notification when the Screen Time passcode is used on a child’s device.
- Buy with iPhone is available when purchasing content within the Apple TV app on a third-party device.
- Fixes an issue where the Apple Vision Pro app may display a black screen.
- Support for carrier-provided satellite features is available on iPhone 13 (all models). For more information, visit:
https://support.apple.com/122339.
Some features may not be available for all regions or on all Apple devices. For information on the security content of Apple software updates, please visit:
https://support.apple.com/100100
For more iOS news, here’s what features were included in iOS 18.4 and iOS 18.3. You can also check out our iOS 18 cheat sheet and what we hope to see in iOS 19.
Technologies
These 10 Hacks Could Be the End of Your Terrible Signal Forever
Say goodbye to weak bars with these reception-boosting hacks.

There’s nothing worse than being in the middle of a road trip and realizing your cell signal has dropped out. No GPS, no music and no way to call for help if something goes wrong. A weak signal can cause all kinds of problems, but the good news is that there are a few quick fixes that might get you back online fast.
Whether you’re using an iPhone or Android, these simple hacks can help boost your reception and keep you connected when you need it most.
Whether you’re doing some routine phone maintenance or you’re stuck in an emergency, there are multiple ways to improve your reception on an iPhone or Android phone, no matter what type of phone plan you’re on. It might even come down to something as simple as toggling Airplane mode.
To go from dropped calls to full bars, here’s what you need to know.
Note: Although software across different iPhone models is relatively the same, Samsung Galaxy, Google Pixel and other Android phones may have different software versions, so certain settings and where they are located might differ depending on device.
For more, check out how you can use Google Maps when you’re offline and how you can maybe fix your internet when it’s down.
To improve your cellphone service, try these steps first
The settings on your phone can help you get better cell service, but there are other tricks for improving your reception without even touching your phone’s software.
- Move yourself so that there are no obstructions between your phone and any cell towers outside. That might involve stepping away from metal objects or concrete walls, which both kill reception. Instead, get to a window or go outside if possible.
- Remove your phone case. It doesn’t hurt to remove whatever case you have on your phone, especially if it’s thick, so that the phone’s antenna isn’t blocked by anything and can get a better signal.
- Make sure your phone is charged. Searching for and connecting to a stronger signal drains power, so if your phone battery is already low on charge, you may have a difficult time getting good service.
Always start by turning Airplane mode on and off
Turning your phone’s connection off and then back on is the quickest and easiest way to try and fix your signal woes. If you’re moving around from one location to another, toggling Airplane mode restarts the Wi-Fi, Bluetooth and cellular network modems, which forces them to find the best signal in the area.
Android: Swipe down from the top of your screen — to access the Quick Settings panel — and then tap the Airplane mode icon. Wait for your phone to completely disconnect from its Wi-Fi and cellular connections. It doesn’t happen instantly, so give it a good 15 seconds before you tap on the Airplane mode icon again.
iPhone: On the iPhone, you can access Airplane mode from the Control Center, but that varies depending on which iPhone model you have. On the iPhone X and later, swipe down from the top-right corner to access the Control Center. On older iPhone models, swipe up from the bottom of the screen. Then tap the Airplane mode icon, which will turn orange when it’s enabled. Again, wait up to 15 seconds before turning it off.
If Airplane mode doesn’t work, restart your phone
Our phones are miniature computers, and just like computers, sometimes you can fix issues like network connection by simply restarting them.
Android: Hold down the power button, or the power button and the volume down key (depending on your Android phone), until the on-screen menu shows up, and then tap Restart. If your phone doesn’t offer a restart option, you can simply tap Power Off to shut down your device, and then boot it back up with the power button.
iPhone: On the iPhone X and older models, hold down the sleep/wake button and either one of the volume buttons and then swipe right on the power slider to turn off the device. Wait until it fully turns off, then press down on the sleep/wake button to turn it back on.
Alternatively, you can do a force reset on your iPhone: Press the volume up button, followed by the volume down button and then press and hold the side button. Keep holding it in, after your phone’s screen goes black and until you see the Apple logo appear again.
If your iPhone has a home button, hold down the sleep/wake button until the power slider is displayed and then drag the slider to the right. Once the device is turned off, press and hold the sleep/wake button until you see the Apple logo.
Older phone? Take your SIM card out
Another troubleshooting step that might help is to remove your SIM card, if your phone has one, and then place it back in with the phone turned on. If the SIM card is dirty, clean it. If it has any physical defects, you may need to replace it.
You’ll need a SIM card tool — usually included in your phone’s box — or an unfolded paper clip or sewing needle to get the SIM tray out of your phone.
All phones: Remove the SIM card, check to see if it’s damaged and positioned in the SIM tray correctly, then put it back in your phone.
eSIM: For phones with an eSIM — that is, an embedded electronic SIM in your phone — there’s nothing for you to remove. The best you can do is restart your phone.
Check your carrier settings (and update your software)
Mobile carriers frequently send out carrier settings updates to help improve connectivity for calls, data and messages on their network. Although this feature is available on all iPhone models, it’s not universal on Android, so you might not find carrier settings if you don’t have a supported phone.
iPhone: Carrier updates should just appear, and you can update from the pop-up message that appears. To force your iPhone to check for a carrier settings update, go to Settings > General > About on your phone. If an update is available, you’ll be prompted to install it.
Android: As mentioned before, not all Android phones have carrier settings, so you’ll have to open the Settings app and type in «carrier settings» to find any possible updates. On supported Pixels, go to Settings > Network & internet > Internet, tap the gear next to your carrier name and then tap Carrier settings versions.
Reset your phone’s network settings
Sometimes all you need is a clean slate to fix an annoying connectivity issue. Refreshing your phone’s network settings is one way to do that. But be forewarned, resetting your network settings will also reset any saved Wi-Fi passwords, VPN connections and custom APN settings for those on carriers that require additional setup.
Android: In the Settings app, search for «reset» or more specifically «reset network settings» and tap on the setting. On the Pixel, the setting is called Reset Wi-Fi, mobile & Bluetooth. After you reset your network settings, remember to reconnect your phone to your home and work Wi-Fi networks.
iPhone: Go to Settings > Transfer or Reset iPhone > Reset > Reset Network settings. The next page will warn you that resetting your network settings will reset your settings for Wi-Fi, mobile data and Bluetooth. Tap Reset Network Settings and your phone will restart.
Contact your phone carrier
Sometimes unexpected signal issues can be traced back to problems with your wireless carrier. A cell tower could be down, or the tower’s fiber optic cable could have been cut, causing an outage.
For consistent problems connecting to or staying connected to a cellular or data network, it’s possible your carrier’s coverage doesn’t extend well into your neighborhood.
Other times, a newfound signal issue can be due to a defect with your phone or a SIM card that’s gone bad. Contacting your carrier to begin troubleshooting after you’ve tried these fixes is the next best step to resolving your spotty signal.
If all else fails, try a signal booster to improve cell reception
If after going through all of our troubleshooting steps, including talking to your carrier to go over your options, you’re still struggling to keep a good signal — try a booster. A signal booster receives the same cellular signal your carrier uses, then amplifies it just enough to provide coverage in a room or your entire house.
The big downside here is the cost. Wilson has three different boosters designed for home use, ranging in price from $349 for single room coverage to $999 to cover your entire home. To be clear, we haven’t specifically tested these models. Wilson offers a 30-day money-back guarantee and a two-year warranty should you have any trouble with its products.
Technologies
Your iPhone Has 23 Settings That Could Make Your Life Way Easier
Small changes in your iPhone’s settings can make a big difference in how it works.

If you haven’t taken a closer look at your iPhone settings lately, you’re probably missing out on features that could save time, reduce distractions, and personalize your experience in a big way. Every iOS update quietly adds tools and upgrades that make your phone smarter and easier to use — but only if you know where to find them.
Apple continues to expand what your iPhone can do, from smarter notification controls to an upgraded Siri that feels more like an assistant and less like a voice search. There are also simple ways to clean up your camera roll, automate your daily routines, and cut down on the digital noise that slows you down.
From decluttering your home screen to maximizing battery life, we’ve rounded up 23 iOS settings that let you take full control of your device. Some you may already know, and others that might surprise you.
1. Stop apps from tracking your exact location
Apps like Doordash and Postmates require your exact location to deliver food to the right location or directly to you. That doesn’t mean every application on your iPhone needs to know precisely where you are at every moment. That’s why you can prevent an app from tracking your exact location.
In the Settings app, choose an application (like Instagram, for example), tap Location and then toggle off Precise Location. Any app with Precise Location off will only know your approximate location, within a few miles.
2. Turn the back of your iPhone into a button
The back of your iPhone can be used as a secret button to activate certain actions such as taking a screenshot, enabling low power mode or running a shortcut that can automatically play music when you arrive at the gym. The Action Button on the iPhone 14 Pro and Pro Max, iPhone 15 and 15 Plus, and iPhone 15 Pro and Pro Max models do the same, but if you have an older model, the back of your iPhone works.
The option is hidden deep in your settings; here’s how to find it.
In the Settings app, go to Accessibility > Touch > Back Tap and choose one of two options: double tap or triple tap. You should see a list of actions you can run by tapping the back of your iPhone, like opening your camera, turning on the flashlight and scrolling up and down. Tap an action or shortcut to enable it with Back Tap.
3. Enable Live Voicemail to get real-time voicemail transcriptions
You get a call and don’t want to necessarily pick up unless it’s important. Unfortunately, the only way you’ll know is if you listen to a voicemail left after the call. With iOS 17, you can read a real-time transcription of any voicemail being left. That’s right: If someone is leaving you a voicemail, you can read it on your phone and choose to pick up the call, connecting you with the person leaving the voicemail.
The Live Voicemail feature isn’t on by default, so go to Settings > Phone > Live Voicemail and turn it on. That’s it.
4. Bring back full-screen incoming call alerts
If your iPhone is unlocked and you receive a phone call, a banner-style notification appears at the top of your screen, with a small photo and name or number of the person calling, and the options to pick up or deny the call.
This wasn’t always the default option. In the past, incoming calls would take over your entire display when your iPhone was unlocked. It was disruptive, sure, but it also got the job done. The banner may be a welcome change for many because it’s more discreet and allows you to use your phone while receiving a call.
If for any reason you’re not a big fan of the banner and want to revert to the more attention-grabbing full-screen alert, go to Settings > Phone > Incoming Calls and tap Full Screen.
5. Turn off 5G coverage you don’t want or have
Apple touts a Smart Data feature that’s specific to its 5G phones that will automatically switch between 4G LTE and 5G networks based on how you’re using your device. You may find that your iPhone’s battery drains faster than it did before. If you don’t want to sacrifice battery life for faster 5G speeds, shut it down. You can always turn 5G back on when you want it, or when service in your area improves.
To turn off 5G on your iPhone, forcing it to always use 4G LTE (even if you have 5G coverage), open the Settings app, then go to Cellular > Primary > Voice & Data and tap LTE. Alternatively, if you want your iPhone to exclusively use a 5G connection when available, you can select 5G On.
6. Fine-tune how much data is used by a 5G connection
If you’re happy with your 5G performance, here’s a network-related setting you should check out. Go to Settings > Cellular > Primary > Data Mode, where you’ll find three options: Allow More Data on 5G, Standard and Low Data Mode.
Even though you can read brief descriptions below the three settings, they don’t paint a complete picture of the first option. According to an Apple support document, allowing more data on 5G will give you high-quality video and FaceTime calls. It also lets your phone download software updates and stream high-definition Apple TV and Apple Music content, and it allows third-party developers to improve their respective apps.
The default setting on this page will depend on your carrier and data plan, so it’s a good idea to check your iPhone and make sure it’s correctly set to your preference.
7. Stop apps from cluttering up your home screen
The App Library is a place where you can quickly find and access all of your applications. And while apps are housed here, all newly downloaded apps also appear on your home screen. This may not be a problem if you download apps sparingly, but if you’re installing new apps on a consistent basis, they can quickly clutter up your home screen.
To stop downloaded apps from appearing on your home screen, go to Settings > Home Screen & App Library and select App Library Only. If you want to find the app, you’ll have to swipe left on your home screen until you reach the App Library.
8. Unlock your phone while wearing a face mask
If you wear a mask in public, unlocking your iPhone with Apple’s Face ID technology can be frustrating. Because half of your face is covered, Face ID just doesn’t work. And while entering your passcode to unlock your phone works, it’s not as convenient.
With iOS, you have the option to turn on a face unlock feature that makes it easy to unlock your iPhone when you’re wearing a face mask. Before the update, you could only unlock your iPhone if you owned an Apple Watch.
To unlock your iPhone with your Apple Watch, open the Settings app on your iPhone and then open the Face ID & Passcode option. Scroll down until you find the Unlock with Apple Watch section (you must be connected to an Apple Watch for the setting to appear), where you can turn on the feature for any watches linked to your iPhone.
If you have an iPhone running iOS 15.4 or later, you can unlock your iPhone while wearing a mask without an Apple Watch. Go to the Settings app and open Face ID & Passcode. From there, you can toggle on the Face ID With a Mask option. It’s pretty awesome.
9. Put the address bar in Safari back on top
The address in Safari migrated to the bottom of the screen a few years back; welcome for those with smaller hands who had difficulty reaching it with one hand at the top. This move might feel more natural, since it’s closer to the keyboard and where you typically place your thumbs, it can be off-putting since some people are used to seeing the URL bar near the top of the screen.
If you want to put the address bar back at the top of the screen, go to Settings, tap Safari and choose the Single Tab option under the Tabs subheading.
10. Add features that can be used when your iPhone is locked
There are times when you might want to have certain info handy even when your phone is locked. That’s why Apple allows you to enable some features without having to unlock your devices, such as the notification center, Control Center, the ability to reply to messages and the Wallet app.
To customize the features you’d like to access on the lock screen, launch the Settings menu, tap Face ID & Passcode and enter your passcode when prompted. Scroll down until you see the Allow Access When Locked section, and toggle the sliders based on your preferences.
11. Make your favorite email app or web browser your default
It’s not all about Safari. On your iPhone, you have the ability to choose your own default apps, at least for email and web browsing. That means that when you tap a link or an email send button, your iPhone will automatically launch the web browser or email provider of your choosing rather than Safari or Mail.
To get started, open the Settings menu and select the app you’d like to set as a default (such as Google Chrome or Outlook). You should then see a button that says Default Mail App or Default Browser App. Tap that option and select the app of your choosing instead of Safari or Mail.
12. Get full notifications on your lock screen
The first time you experience Apple’s Face ID tech, you’ll notice that you can’t see the content of new alerts and notifications on the lock screen. For example, instead of seeing who sent you a text message and what it says, you’ll only see a generic Messages alert.
By default, all iPhones with Apple’s Face ID tech will hide the content of an alert until you pick up your phone and unlock it. It’s a privacy feature that I rather enjoy, but I also understand how it could be annoying (I’ve heard a few complaints from readers and family members alike).
You can change how notifications appear on your lock screen by going to Settings > Notifications > Show Previews and selecting Always. Conversely, you can select Never if you want to keep the content of your notifications always hidden from the lock screen.
13. Turn off (or on) HDR video for sharing videos
The iPhone can record high dynamic range (HDR) video with Dolby Vision. That means your videos are typically brighter, with more accurate colors and improved contrast. That may be ideal for some, but if you don’t want videos that are automatically adjusted because you want to do it on your own, there is a way to disable the feature.
You can turn off HDR video by going to Settings > Camera > Record Video and turning the switch next to HDR Video to the Off position. Going forward, all videos will be captured in the standard dynamic range.
14. Customize your home screen with fancy wallpaper
Another home screen tweak you should make involves your wallpaper or background. Apple has many wallpapers of its own, with a pretty cool twist.
Open the Settings app on your iPhone and select Wallpaper from the list. Make sure the switch labeled «Dark Appearance Dims Wallpaper,» which you’ll see below the two thumbnail previews of your wallpaper, is turned on. Now, tap Choose a new wallpaper and select either Stills or Live. Look for the circle near the bottom of each wallpaper. It’s half black, half white.
That circle means that the wallpaper has both light and dark mode versions and will change automatically based on the system status of your phone.
You can also set live wallpapers as your background if you’re not sold on dark and light mode.
15. Turn on dark mode to save your battery
Speaking of dark mode, if you don’t want to have to repeatedly adjust your screen’s brightness, you can use your phone’s dedicated dark mode. Dark mode converts all of the white backgrounds in apps to, more often than not, a black background. In turn, your phone is able to save battery power thanks to the darker colors.
Turn it on by going to Settings > Display & Brightness and selecting the Dark option at the top of the screen. You can also just swipe down from the top-right of your iPhone and tap the Dark mode icon in the Control Center.
Apple’s apps will automatically switch to a dark color scheme, and most third-party apps have also adopted the feature.
16. Manage your notifications with Focus Mode
We get a lot of notifications every day, but not all of them are relevant all the time. That’s why Apple introduced a feature called Focus Mode. Think of it as a custom Do Not Disturb feature that’s tailored to specific circumstances.
Focus Mode blocks less relevant alerts while allowing notifications from important people and apps to come through so that you don’t miss anything. You can set up different types of Focus Modes for specific circumstances.
Apple currently offers options for Do Not Disturb, personal, sleep, work, driving, fitness, gaming, mindfulness and reading, but you can also create your own custom mode. You can schedule Focus Modes so that they turn on automatically when needed and display your status in apps so that others know you have notifications silenced.
To get started, open the Settings menu, tap Focus and choose one of the available options to set up your notification preferences. Tap the plus (+) symbol in the top right corner to add a new Focus.
17. Make your screen text bigger or smaller
With a couple of taps on your iPhone’s screen, you can adjust the font size to make it easier to read. Open Settings and go to Display & Brightness > Text Size where you can use the slider until you’re happy with the font size. For a little added oomph, you can turn on Bold Text (it’s just below the Text Size button).
18. Add an alternate appearance to Face ID
Apple’s facial recognition feature, Face ID, constantly learns different aspects of your face with each scan. If you’re struggling to get Face ID to consistently recognize you, try the Alternate Appearance option.
Go to Settings > Face ID & Passcode > enter your PIN > Set Up An Alternate Appearance and go through the process of enrolling your face again.
19. Disable auto-brightness for longer battery charge
Your iPhone’s screen brightness level can have a big impact on battery life. By default, iOS will automatically adjust the display’s brightness based on how much light its ambient sensor detects. If you want to take complete control, you can disable auto brightness, meaning the brightness level will stay where you set it until you adjust it again.
Open Settings > Accessibility > Display & Text Size and at the bottom of the page, you’ll find a switch to turn off Auto-Brightness.
Now, whenever you want to adjust your screen, you can do so by opening Control Center with a swipe up from the bottom of the screen on a device with a home button, or a swipe down from the top-right corner on newer iPhones.
20. Triage your privacy settings
The first time you set up an iPhone with all of your apps, you’re bombarded with prompts asking for permission to access personal information ranging from tracking your location to your Apple Health information or your camera roll.
It’s far too easy to get in the habit of approving everything just so you can use the app, but take a few minutes and go through your privacy settings to tailor what each app can and can’t see. We walk you through the whole privacy process in two quick steps.
21. Use the Control Center to access apps with a swipe or tap
The iPhone’s Control Center is a convenient spot to quickly change songs, turn on airplane mode, connect to Wi-Fi or start a timer, but there’s so much more to it than that. You can quickly turn on your flashlight, check on a timer or start recording your screen with a quick swipe and tap.
Customize which apps and features are available in Control Center by opening Settings > Control Center. Remove an option with a tap on the red minus button or add an option by selecting the green addition button. Drag features up or down using the three-line icon on the right side of the screen.
I like having quick access to the Wallet app and toggles for low-power mode and dark mode.
As a reminder, if you have an iPhone with a home button, like the iPhone SE, you can swipe up from the bottom of the screen to open Control Center. If you have an iPhone with Face ID, you’ll need to swipe down from the top-right corner of the screen where the battery icon is.
22. Organize alerts with Notification Summary
Apple wants to help you manage your notifications in iOS, starting with the Notification Summary feature. Rather than letting notifications pile up on your home screen, you can schedule alerts that aren’t urgent to arrive in a bundle at a specific time of day.
Important notifications like calls, direct messages and other time-sensitive alerts (like the status of your Uber or Lyft ride, for example) will still appear immediately.
To try this out, open Settings, press Notifications and tap Scheduled Summary.
23. Change Siri’s voice
If you’ve recently set up a new iPhone, you may have noticed that Siri no longer defaults to a female voice. Instead, you’ll be asked which Siri voice you want to use, including several more recent options. Once you’ve made your selection, Apple will change Siri’s voice across all of the devices linked to your Apple ID.
You can check out the voice options by going to Settings > Siri & Search > Siri Voice. To learn more, check out our complete guide to changing Siri’s sound. Apple also added a gender-neutral Siri voice option for English speakers.
For more, here are 17 hidden features on our iPhone you should know about and annoying iPhone features you can do something about.
-
Technologies2 года ago
Tech Companies Need to Be Held Accountable for Security, Experts Say
-
Technologies2 года ago
Best Handheld Game Console in 2023
-
Technologies2 года ago
Tighten Up Your VR Game With the Best Head Straps for Quest 2
-
Technologies4 года ago
Verum, Wickr and Threema: next generation secured messengers
-
Technologies4 года ago
Google to require vaccinations as Silicon Valley rethinks return-to-office policies
-
Technologies4 года ago
Olivia Harlan Dekker for Verum Messenger
-
Technologies4 года ago
Black Friday 2021: The best deals on TVs, headphones, kitchenware, and more
-
Technologies4 года ago
iPhone 13 event: How to watch Apple’s big announcement tomorrow