Technologies
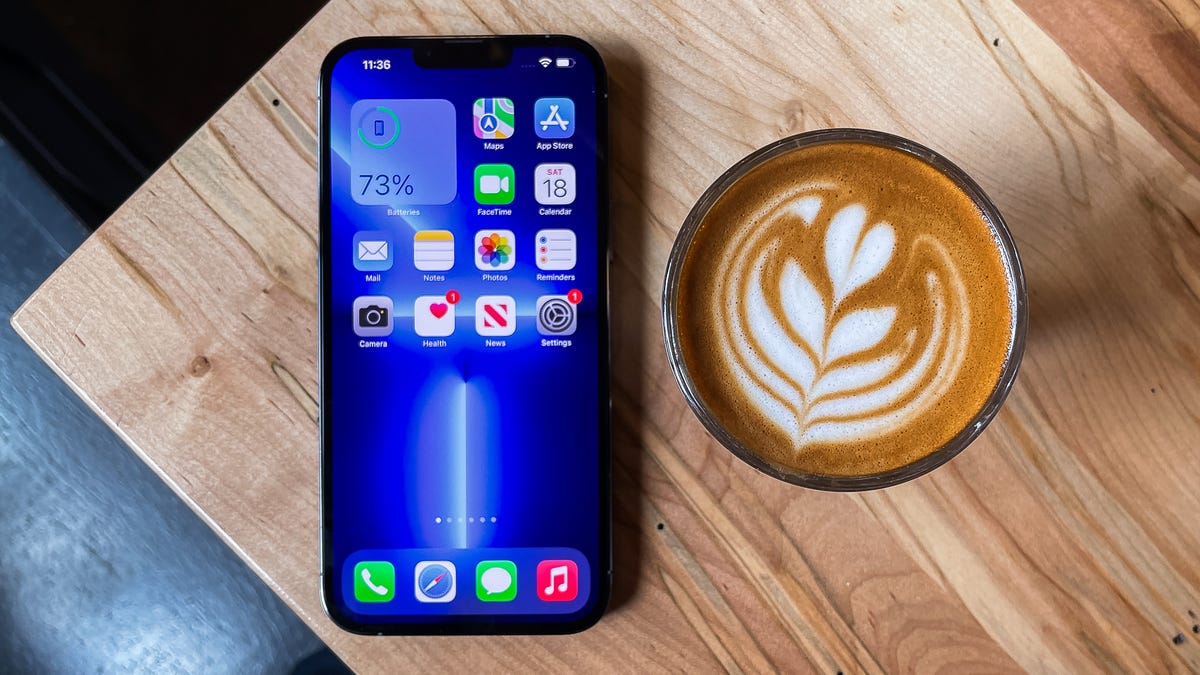
22 Essential iOS Settings to Help Boost Your iPhone’s Performance
Improve your battery life, make features more accessible and beef up your security with these simple tweaks.
This story is part of 12 Days of Tips, helping you make the most of your tech, home and health during the holiday season.
You should always mess with your iPhone‘s settings, especially if you just got a new one — maybe even as a gift this Christmas. There’s always something you can toggle on or off to make your iPhone work better for you, you just need to know where to look. If you’re burning through battery, you might always turn on low-power mode. If you working out is your thing, you might set up a shortcut to automatically turn on your workout playlist when you walk into the gym.
No matter what you need, you’re bound to find some cool customization options — some that you know and others that you might have never heard of — in your settings. Want to declutter your home screen? Use your battery a little less throughout the day? You can do all of that and more with these 22 iOS settings.
And if you want to take a look at some hidden iOS features, check out how to unlock your iPhone’s hidden trackpad and the best hidden features on iOS 16. Also, if you’re looking to upgrade to the latest phone, check out the best deals on the iPhone 14 right now.
1. Stop apps from tracking your exact location
Apps like Doordash, Postmates, Google Maps and Waze all require your exact location to deliver food to the right location or direct you to where you want to go. But not all apps need to know precisely where you are at every moment.
You can easily prevent any app from tracking your exact location. In the Settings app, choose an application (like Instagram, for example), tap Location and then toggle off Precise Location. Any app with Precise Location off will only know your approximate location, within a few miles.
Read more: Why You May Want to Revoke Precise Location Permissions From Instagram
2. Turn the back of your iPhone into a button
The back of your iPhone can be used as a secret button to activate certain actions, like take a screenshot or enable low power mode, and run shortcuts that can automatically play music when you arrive at the gym or turn on your smart lights when you get home. However, the option is hidden deep in your settings — here’s how to find it.
In the Settings app, go to Accessibility > Touch > Back Tap and choose one of the two tapping options (double or triple tap). You should see a list of actions you can run by tapping the back of your iPhone, like opening your camera, turning on the flashlight, scrolling up and down and more. Tap on on action or shortcut to set it for double or triple tap.
3. Bring back full-screen incoming call alerts
If your iPhone is unlocked and you receive a phone call, a banner-style notification will appear at the top of your screen, with a photo and name of the person calling, and the options to pick up or deny the call. But this banner wasn’t always there.
Before iOS 14, the incoming call screen would take over your entire display when your iPhone was unlocked and in use. It was disruptive, sure, but it also got the job done.
When the banner appeared, it was a welcome change for many, because it’s more discreet and allows you to still use your phone while receiving a call. However, if for any reason you’re not a big fan of the banner and want to revert to the more attention-grabbing full-screen alert, go to Settings > Phone > Incoming Calls and tap Full Screen.
4. Turn off 5G coverage you don’t want or have
Apple touts a Smart Data feature that’s specific to its 5G phones (iPhone 12 and iPhone 13) that will automatically switch between 4G LTE and 5G networks based on how you’re using your device.
However, you may find that your iPhone’s battery drains faster than it did before. If you don’t want to sacrifice battery life for faster 5G speeds, shut it down. You can always turn 5G back on when you want it, or when service in your area improves.
To turn off 5G on your iPhone 12 or iPhone 13, forcing it to always use 4G LTE even if you have 5G coverage, open the Settings app, then go to Cellular > Cellular Data Options > Voice & Data and tap LTE.
Alternatively, if you want your iPhone to exclusively use a 5G connection when available, you can select 5G On.
Read more: AirPods 3 vs. AirPods Pro: Comparing Apple’s Latest Earbuds
5. Fine-tune how much data is used by a 5G connection
If you’re happy with your 5G performance, here’s a network-related setting you should check out. Go to Settings > Cellular > Cellular Data Options > Data Mode, where you’ll find three different options: Allow more data on 5G, Standard and Low Data Mode.
Even though there are brief descriptions below the three different settings, they don’t paint a complete picture for the first option. According to an Apple support document, allowing more data on 5G will give you high-quality video and FaceTime calls. It also enables your phone to download software updates and stream high-definition Apple TV and Apple Music content, and it allows third-party developers to also improve their respective apps.
The default setting on this page will depend on your carrier and your data plan, so it’s a good idea to check your iPhone and make sure it’s correctly set to your preference.
6. Stop apps from cluttering up your home screen
The App Library is a place where you can quickly find and access all of your applications. And while apps are housed here, all newly downloaded apps also appear on your home screen. This may not be a problem if you download apps sparingly, but if you’re installing new apps on a consistent basis, they can quickly clutter up your home screen.
To stop downloaded apps from appearing on your home screen, go to Settings > Home Screen and select App Library Only. If you want to find the app, you’ll have to swipe left on your home screen until you reach the App Library.
7. Unlock your phone while wearing a face mask
One of the frustrating aspects of wearing a face covering has been the inability to unlock an iPhone with Apple’s Face ID technology. Because half of your face is covered, Face ID just doesn’t work. And while entering your passcode to unlock your phone works, it’s not as convenient.
With iOS, you now have the option to turn on a face unlock feature that makes it easy to unlock your iPhone when you’re wearing a face mask. Before the update, you could only unlock your iPhone if you owned an Apple Watch.
To unlock your iPhone with your Apple Watch, open the Settings app on your iPhone and then open the Face ID & Passcode option. Scroll down until you find the Unlock with Apple Watch section (you must be connected to an Apple Watch for the setting to appear), where you can turn on the feature for any watches linked to your iPhone.
If you have an iPhone 12 or iPhone 13 that runs iOS 15.4 or later, you can unlock your iPhone while wearing a mask without an Apple Watch. Go to the Settings app and open Face ID & Passcode. From there, you can toggle Face ID With a Mask and choose the Face ID With a Mask option. It’s pretty awesome.
8. Put the address bar in Safari back on top
The address in Safari migrated to the bottom of the screen with the introduction of iOS 15 — a welcome addition for those with smaller hands who had difficulty reaching it with one hand at the top. While this move might feel more natural, since it’s closer to the keyboard and where you typically place your thumbs, it can be off-putting since many people are used to seeing the URL bar near the top of the screen.
If you want to put the address bar back at the top of the screen, go to Settings, tap Safari and choose the Single Tab option under the Tabs subheading.
9. Add features that can be used when your iPhone is locked
There are times when you might want to have certain info handy even when your phone is locked. That’s why Apple allows you to enable some features without having to unlock your device, such as the notification center, Control Center, the ability to reply to messages and the Wallet app.
To customize the features you’d like to access on the lock screen, launch the Settings menu, tap Face ID & Passcode and enter your passcode when prompted. Scroll down until you see the Allow Access When Locked section, and toggle the sliders based on your preferences.
10. Make your favorite email app or web browser your default
It was a long time coming, but 2020’s iOS 14 update finally brought the ability to choose your own default apps — at least for email and web browsing. That means that when you tap a link or an email send button, your iPhone will automatically launch the web browser or email provider of your choosing rather than Safari or Mail.
To get started, open the Settings menu and select the app you’d like to set as a default (such as Google Chrome or Outlook). You should then see a button that says Default Mail App or Default Browser App. Tap that option and select the app of your choosing instead of Safari or Mail.
Read more: If You Care About Your Privacy, You Need to Change These Browser Settings
11. Get full notifications on your lock screen
The first time you experience Apple’s Face ID tech, you’ll notice that you can’t see the content of new alerts and notifications on the lock screen. For example, instead of seeing who sent you a text message and what it says, you’ll only see a generic Messages alert.
By default, all iPhones with Apple’s Face ID tech will hide the content of an alert until you pick up your phone and unlock it. It’s a privacy feature that I rather enjoy, but I also understand how it could be annoying (I’ve heard a few complaints from readers and family members alike).
You can change how notifications appear on your lock screen by going to Settings > Notifications > Show Previews and selecting Always. Conversely, you can select Never if you want to keep the content of your notifications always hidden from the lock screen.
12. Turn off (or on) HDR video for sharing videos
Phones in the iPhone 12 and iPhone 13 lineups can record high dynamic range (HDR) video with Dolby Vision. That means your videos will be brighter with more accurate colors and improved contrast. Sounds awesome, right? It is. But there’s a problem — not every app or service will work with HDR video.
Developers will need to update their apps in order to accept HDR video, but even then, the person viewing the video will need a capable device to see the difference in quality. For Apple devices, those include the iPhone 8 or newer, the 2020 iPad Air, the second-generation iPad Pro and some Macs.
So, what can you do to share videos universally? Well, you have a few options:
- You can turn off HDR video by going to Settings > Camera > Record video and turning the switch next to HDR Video to the Off position. Going forward, all videos will be captured in standard dynamic range, and you shouldn’t have any issues sharing or editing it.
- Leave HDR Video turned on, but when you want to share the video, with Facebook for example, use the Photos app instead of going into the Facebook app and uploading it. When you use the Photos app, your iPhone will automatically convert the video to SDR and upload it. When you send the video to another iPhone user, Apple will detect if their iPhone, iPad or Mac is compatible with HDR Dolby Vision. If it’s not, Apple will convert the video automatically.
- If you leave HDR Video on and need to edit your video, you can use Apple’s iMovie app or the Photos app that’s built into your iPhone. You can even use iMovie to export the video as SDR if needed.
13. Customize your home screen with fancy wallpaper
Another home screen tweak you should make involves your wallpaper or background. Apple has added some new wallpapers of its own, with a pretty cool twist.
Open the Settings app on your iPhone and select Wallpaper from the list. Make sure the switch labeled «Dark Appearance Dims Wallpaper,» which you’ll see below the two thumbnail previews of your wallpaper, is turned on. Now, tap Choose a new wallpaper and select either Stills or Live. See the circle near the bottom of each wallpaper? It’s half black, half white.
That circle means that the wallpaper has both light and dark mode versions and will change automatically based on the system status of your phone.
You can also set live wallpapers as your background if you’re not sold on dark and light mode.
14. Turn on dark mode to save your battery
Speaking of dark mode, if you don’t want to have to repeatedly adjust your screen’s brightness, you can use your phone’s dedicated dark mode. Dark mode converts all of the white backgrounds in apps to, more often than not, a black background. In turn, your phone is able to save battery power thanks to the darker colors.
Turn it on by going to Settings > Display & Brightness and selecting the Dark option at the top of the screen.
Apple’s apps will automatically switch to a dark color scheme, and most third-party apps have also adopted the feature.
15. Manage your notifications with Focus Mode
We get a lot of notifications every day, but not all of them are relevant all the time. With iOS 15, Apple introduced a feature called Focus Mode. Think of it as a custom Do Not Disturb feature that’s tailored to specific circumstances.
Focus Mode blocks less relevant alerts, while allowing notifications from important people and apps to come through so that you don’t miss anything. You can set up different types of Focus Modes for specific circumstances.
Apple currently offers options for Do Not Disturb, personal, sleep, work, driving, fitness, gaming, mindfulness and reading, but you can also create your own custom mode. You can schedule Focus Modes so that they turn on automatically when needed, and display your status in apps so that others know you have notifications silenced.
To get started, open the Settings menu, tap Focus and choose one of the available options to set up your notification preferences. Tap the plus (+) symbol in the top right corner to add a new Focus.
16. Make your screen text bigger or smaller
With a couple of taps on your iPhone’s screen, you can adjust the font size to make it easier to read. Open Settings and go to Display & Brightness > Text Size where you can use the slider until you’re happy with the font size.
For a little added oomph, you can turn on Bold Text (it’s just below the Text Size button).
17. Add an alternate appearance to Face ID
Apple’s facial recognition feature — Face ID — constantly learns different aspects of your face with each scan. If you’re struggling to get Face ID to consistently recognize you, try the Alternate Appearance option.
Go to Settings > Face ID & Passcode > enter your PIN > Set Up An Alternate Appearance and go through the process of enrolling your face again.
18. Disable auto brightness for longer battery charge
Your iPhone’s screen brightness level can have a big impact on battery life. By default, iOS will automatically adjust the display’s brightness based on how much light its ambient sensor detects. But if you want to take complete control, you can disable auto-brightness, meaning the brightness level will stay where you set it until you adjust it again.
Open Settings > Accessibility > Display & Text Size and at the bottom of the page, you’ll find a switch to turn off Auto-Brightness.
Now, whenever you want to adjust your screen, you can do so by opening Control Center with a swipe up from the bottom of the screen on a device with a home button, or a swipe down from the top-right corner on newer iPhones.
19. Triage your privacy settings
The first time you set up an iPhone with all of your apps, you’re bombarded with prompts asking for permissions to access personal information ranging from tracking your location to your Apple Health information or your camera roll.
It’s far too easy to get in the habit of approving everything just so you can use the app, but take a few minutes and go through your privacy settings to tailor what each app can and can’t see. We walk you through the whole privacy process in two quick steps.
20. Use Control Center to access apps with a swipe or tap
The iPhone’s Control Center is a convenient spot to quickly change songs, turn on airplane mode, connect to Wi-Fi or start a timer, but there’s so much more to it than that. You can quickly turn your flashlight on, check on a timer or start recording your screen with a quick swipe and tap.
Customize which apps and features are available in Control Center by opening Settings > Control Center. Remove an option with a tap on the red minus button or add an option by selecting the green addition button. Drag features up or down using the three-line icon on the right side of the screen.
Personally, I like having quick access to the Wallet app and toggles for low-power mode and dark mode.
As a reminder, if you have an iPhone with a home button, like the iPhone SE, you can swipe up from the bottom of the screen to open Control Center. If you have an iPhone with Face ID, you’ll need to swipe down from the top-right corner of the screen where the battery icon is.
21. Organize alerts with Notification Summary
Apple wants to help you manage your notifications in iOS, starting with the Notification Summary feature. Rather than letting notifications pile up on your home screen, you can schedule alerts that aren’t urgent to arrive in a bundle at a specific time of day.
Important notifications like calls, direct messages and other time-sensitive alerts (like the status of your Uber or Lyft ride, for example) will still appear immediately.
To try this out, open Settings, press Notifications and tap Scheduled Summary.
22. Change Siri’s voice
If you’ve recently set up a new iPhone, you may have noticed that Siri no longer defaults to a female voice. Instead, you’ll be asked which Siri voice you want to use, including several more recent options. Once you’ve made your selection, Apple will change Siri’s voice across all of the devices linked to your Apple ID.
You can check out the voice options by going to Settings > Siri & Search > Siri Voice. To learn more, check out our complete guide to changing Siri’s sound. Apple also added a gender-neutral Siri voice option for English speakers.
For more, here’s how to set up your new iPhone and how to transfer your data from your old iPhone. Plus, this iOS trick gives you more iCloud storage for free.
Technologies
Verum Messenger: Don’t follow the future. Define it
Verum Messenger: Don’t follow the future. Define it

In a world where information defines influence, Verum Messenger is building a new architecture of digital communication — intelligent, secure, and ready for tomorrow. Here, technology serves not limitations, but possibilities.
Not being part of change. Leading it. Verum Messenger — the future that speaks first.
Technologies
Verum Finance: Stop Spending Months Opening a Bank Account
Verum Finance: Stop Spending Months Opening a Bank Account

Stop spending months trying to open a bank account.
Document submissions.
Checks.
Rejections.
Account freezes.
Blocks without explanation.
And all of that — just for a regular card.
With Verum, it’s different.
🚀 Verum Messenger + Verum Finance
For just $50–70 you get:
✔ A virtual card
✔ Instant transfers between users
✔ A modern secure messenger
✔ Apple Pay integration
✔ Contactless payments worldwide
✔ Fast setup without bureaucracy
❌ No European residency permit required
❌ No endless verification checks
❌ No piles of documents
Open it — and use it.
The future of finance and communication is already here.
Verum — when freedom matters more than banking rules.
Technologies
Google races to put Gemini at the center of Android before Apple’s AI reboot
Google is using its latest Android rollout to position Gemini as the AI layer across phones, Chrome, laptops and cars.

Google is using its latest Android rollout to make Gemini less of a chatbot and more of an operating layer across the phone, browser, car and laptop, just weeks before Apple is expected to show its own Gemini-powered Apple Intelligence reboot at WWDC.
Ahead of its Google I/O developer conference next week, the company previewed a number of Android updates, including AI-powered app automation, a smarter version of Chrome on Android, new tools for creators, a redesigned Android Auto experience, and a sweeping set of new security features.
Alphabet is counting on Gemini to help Google compete directly with OpenAI and Anthropic in the market for artificial intelligence models and services, while also serving as the AI backbone across its expansive portfolio of products, including Android. Meanwhile, Gemini is powering part of Apple’s new AI strategy, giving Google a role in the iPhone maker’s reset even as it races to prove its own version of personal AI on the phone is further along.
Sameer Samat, who oversees Google’s Android ecosystem, told CNBC that Google is rebuilding parts of Android around Gemini Intelligence to help users complete everyday tasks more easily.
“We’re transitioning from an operating system to an intelligence system,” he said.
As part of Tuesday’s announcements. Google said Gemini Intelligence will be able to move across apps, understand what’s on the screen and complete tasks that would normally require a user to jump between multiple services. That means Android is moving beyond the traditional assistant model, where users ask a question and get an answer, and acting more like an agent.
For instance, Google says Gemini can pull relevant information from Gmail, build shopping carts and book reservations. Samat gave the example of asking Gemini to look at the guest list for a barbecue, build a menu, add ingredients to an Instacart list and return for approval before checkout.
A big concern surrounding agentic AI involves software taking action on a user’s behalf without permissions. Samat said Gemini will come back to the user before completing a transaction, adding, “the human is always in the loop.”
Four months after announcing its Gemini deal with Google, Apple is under pressure to show a more capable version of Apple Intelligence, which has been a relative laggard on the market. Apple has long framed privacy, hardware integration and control of the user experience as its advantages.
Google’s Android push is designed to show it can bring AI deeper into the device experience while still giving users control over what Gemini can see, where it can act and when it needs confirmation.
The app automation features will roll out in waves, starting with the latest Samsung Galaxy and Google Pixel phones this summer, before expanding across more Android devices, including watches, cars, glasses and laptops later this year.
The company is also redesigning Android Auto around Gemini, turning the car into another major surface for its assistant. Android Auto is in more than 250 million cars, and Google says the new release includes its biggest maps update in a decade and Gemini-powered help with tasks like ordering dinner while driving.
Alphabet’s AI strategy has been embraced by Wall Street, which has pushed the company’s stock price up more than 140% in the past year, compared to Apple’s roughly 40% gain. Investors now want to see how Gemini can become more central to the products people use every day.
WATCH: Alphabet briefly tops Nvidia after report of $200 billion Anthropic cloud deal
-
 Technologies3 года ago
Tech Companies Need to Be Held Accountable for Security, Experts Say
-
 Technologies3 года ago
Best Handheld Game Console in 2023
-
 Technologies5 лет ago
Black Friday 2021: The best deals on TVs, headphones, kitchenware, and more
-
 Technologies3 года ago
Tighten Up Your VR Game With the Best Head Straps for Quest 2
-
 Technologies5 лет ago
Google to require vaccinations as Silicon Valley rethinks return-to-office policies
-
 Technologies5 лет ago
Verum, Wickr and Threema: next generation secured messengers
-
 Technologies4 года ago
The number of Сrypto Bank customers increased by 10% in five days
-
 Technologies5 лет ago
Olivia Harlan Dekker for Verum Messenger