
Technologies
Ditch Your Wallet: These States Let Your iPhone Be Your Driver’s License
The ID of the future is here, but only if you live in one of these states.
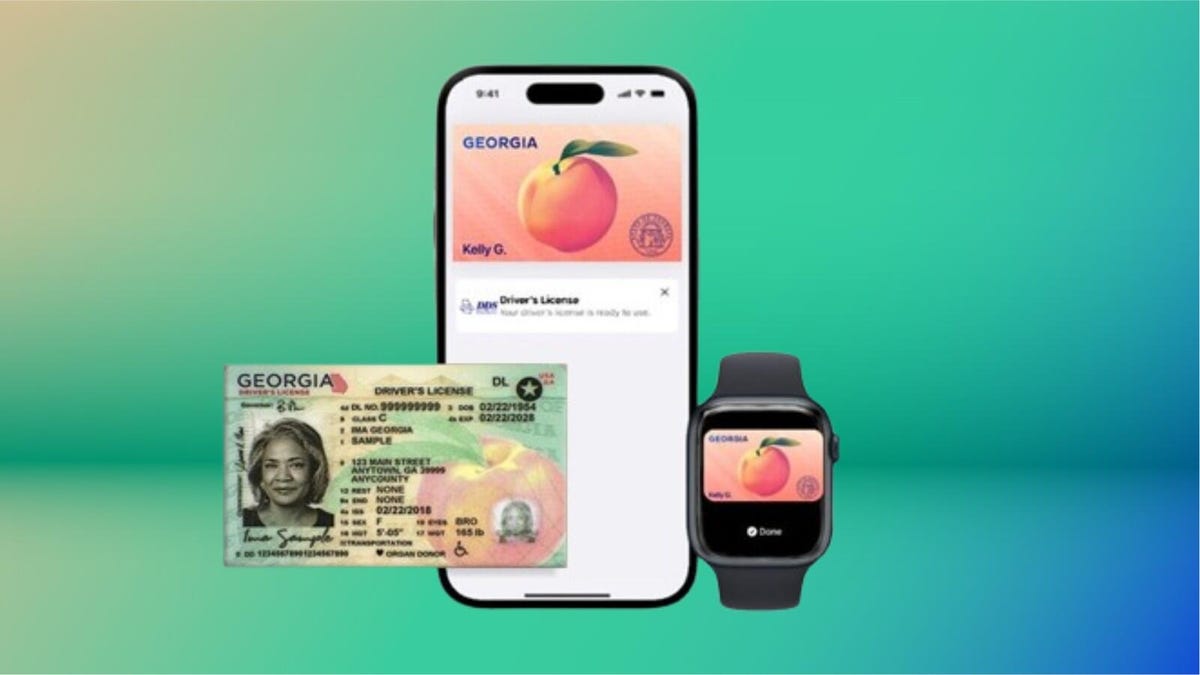
Getting through airport security can be one of the most stressful parts of travel, but Apple is trying to streamline the process with a new digital ID feature. In select states, you can now add your driver’s license or state ID to Apple Wallet on your iPhone or Apple Watch. That means no more fumbling for your wallet at Transportation Security Administration checkpoints — just tap your device, and you’re good to go.
We’re not too far away from a future where you can easily swipe from your flight’s boarding pass to a digital ID, right from your iPhone. If you live in certain states, that future is already here, and you can add your ID to your iPhone for a faster way through the airport security line. While this feels more like a proof of concept, it paves the way for a broader tapestry of use cases in the future.
It’s a convenient upgrade if you live in one of the supported states and have a compatible iPhone. I tested the feature in California, and the setup process was surprisingly simple. Just keep in mind that you’ll need an iPhone 8 or newer running the right version of iOS, and depending on your state’s rollout, some users may hit snags. Still, it’s a small tech shift that can make your travel day a whole lot smoother.
Right now, digital IDs are primarily used to go through TSA checkpoints in certain airports when flying domestically, but that’ll likely change in the future. Want to use your digital ID at your favorite bar or nightclub? We’re not there yet.
Below, I describe my experience, the hiccups I encountered on the way and things that you should know if you plan on adding your driver’s license to Apple Wallet. I’ll also break down how you can add your ID to your iPhone, step by step.
For more, don’t miss these low-key iOS 26 features we’re excited for.
These states support digital IDs on iPhones right now
Only a handful of states support digital IDs in Apple Wallet. One key factor is how each state implements its Mobile Driver’s License system. For instance, Louisiana, New York, Utah and Virginia all support mobile driver’s licenses but require separate apps for digital IDs.
States and regions that support digital IDs in Apple Wallet:
- Arizona
- California
- Colorado
- Georgia
- Hawaii
- Iowa
- Maryland
- New Mexico
- Ohio
- Puerto Rico
Some states originally announced to support Apple’s digital ID haven’t quite gotten there yet.
The number of states supported in Apple Wallet is about half of what the TSA currently allows. Collectively, it accepts digital IDs across Apple Wallet, Google Wallet, Samsung Wallet and state-based mobile apps in 15 states.
What are the iPhone requirements to add your driver’s license to Apple Wallet?
Where you live is just the start. You also have to have the right iPhone model and the right software setup.
Here are the minimum requirements that Apple lists:
- An iPhone 8 or later with the latest version of iOS
- Have Face or Touch ID enabled on your device
- Have two-factor authentication enabled on your Apple account
- A license or ID from a participating state or territory
- Your device’s region set to the United States
I’ll have more to say in a bit about that iPhone 8 and iOS requirement and a catch I ran into.
My experience adding my ID to my iPhone was easy
For testing purposes, I used the iPhone 16E.
The process of adding the ID was simple. I scanned the front and the back of my ID and the next step was to verify my identity. This wasn’t nearly as nerve-wracking as I thought it would be. Instead, it took a live photo of my face for 2.5 seconds.
After that, more verification was required. This came in a series of different photos, with prompts directing me to close my eyes, open my mouth, smile and tip my head down. This verification process took about three minutes. (Or longer in my case, as I got distracted writing notes about the process and then found I had to restart the whole process.)
Then, after I submitted those photos, there was another verification step, presumably with the photos relayed to the California DMV. A screen message told me that I would receive a notification when there was an update. I expected this to take a long time, but not even 10 minutes later, a notification telling me that my ID was ready to use popped up. That was easy.
What about older iPhones?
So, not every phone you think might work will actually do so. The first time I tested adding my ID, I was using an iPhone 8 Plus. But when I arrived at the setup page within Apple Wallet, I was given eight states to choose from, and California wasn’t one of them.
That surprised me. I’d found a helpful Apple support article that explained the requirements for adding a driver’s license or state-issued ID to Apple Wallet and it seemed like I shouldn’t have any trouble.
At first, I thought the roadblock was that I hadn’t set up Touch ID yet. But no, California was still not on my list of eight states. (Equally confusing, a colleague of mine also tried this with an iPhone 8 and Apple Wallet only listed four states.)
I went back to the Apple support article and looked for fine print, and sure enough, there it was. I’d ignored the asterisk in the requirements, because California has had its Mobile Driver’s License program set up for some time now.
The fine print at the very bottom of the page states, “For California, ID in Apple Wallet requires iPhone XS or later with iOS 17.5 or later.” (For Puerto Rico, if you want to add your driver’s license or ID to Apple Wallet, you’ll need to have an iPhone XS or later with iOS 18.1.)
So if you’re holding onto an iPhone 8 or iPhone X and live in California, you won’t be able to add your driver’s license to your iPhone because of the lack of software support. iOS 16 is the last supported version of the operating system for iPhone 8 and X models.
How to add your ID or driver’s license to Apple Wallet
If you live in a state that supports digital IDs for Apple Wallet, it’s easy to add one. After it’s added, you’ll need to verify your identity, which can take a little longer but it’s still a straightforward process.
- Open Apple Wallet.
- Tap the Add button.
- Tap Driver’s License or ID and select your location.
- If applicable, choose whether you want to add your ID to your iPhone only or your iPhone and your Apple Watch.
- Follow the steps to scan your license or ID.
(Make sure you scan your ID in a well-lit environment and that the image is in focus.)
Once it’s scanned, you’ll be prompted to confirm your identity with a selfie photo. According to Apple, you may be asked to complete a number of facial or head movements for identification purposes.
To ensure an easier verification process, Apple suggests that you:
- Stand in front of a plain background with neutral, light paint.
- Be in a well-lit area, ideally indoors.
- Take off sunglasses, masks, hats or other accessories that could block your face.
- Hold your iPhone steady.
When you’re finished, submit your information by confirming with Touch or Face ID. Your biometrics will be bound to the ID, so only you can use it.
How to transfer your digital ID to another iPhone
If you upgrade your iPhone, you’ll need to transfer your ID or driver’s license to it.
- During initial setup, tap Wallet.
- Select your ID.
- Follow the steps.
- Tap to confirm you want to move your driver’s license or ID to the new device.
So, now what?
Your digital ID isn’t just a photo of your ID that you can pull up within Apple Wallet. In fact, you don’t even see a full image of your physical ID. In order to actually view your information from your digital ID, you’ll need to tap on your ID “card” in Apple Wallet, tap the “i” at the top-right of the screen, and then tap State ID info or Card Information (the wording may be different depending on what version of iOS your iPhone is running). From there, it will show your ID photo as well as essential pieces of information from your physical ID.
TSA checkpoints that support digital IDs require a dedicated scanner, so the process may not necessarily feel like it’s faster than showing your physical ID to the agent.
Here’s a video of the process via the Maryland Department of Transportation:
The idea of a digital ID is pretty convenient but overall, it probably won’t save you a meaningful amount of time. Couple that fact with its incredibly limited use cases right now and the fact that merchant or event adoption will require investment in proper hardware and it’s pretty easy to see just how far off we are from ditching physical IDs.
Selling or trading in your iPhone? Do this first.
When you move on from a phone that has your ID on it, you’ll want to do the same thing you do with other sensitive info like credit or debit cards and passwords: Remove it.
So before you wipe your iPhone to sell or trade it in, you should manually remove your ID first. Here’s how to do it.
- Go to Apple Wallet and tap your ID in the list
- Tap the “i” button at the top right of the screen
- Tap Remove State ID (or Driver’s License)
- Read the warning that pops up and tap Remove
Digital passports are coming to Apple Wallet with iOS 26
While states are taking time to implement digital ID systems, Apple announced a feature coming in iOS 26 this year: You can add a digital passport to Apple Wallet.
When that feature is available, iPhone users will be able to scan their passports to create a digital version for identity verification during domestic travel. You won’t be able to use it for international travel and it’s not a full replacement for a physical passport (so keep your physical one on you) but it should work at the 250-plus supported TSA checkpoints.
During its WWDC keynote in June, Apple said that the digital ID made from your passport can also be used “in apps and in person” but it didn’t give any specifics.
This is essentially what can be done on Android through Google Wallet.
Verify with Wallet ID verification could make ordering alcohol easier
Also headed to iPhones this fall is an easier way for you to prove your age using your digital ID. Say you want to have a bottle of wine sent to your place via Uber Eats. Typically, when the driver arrives, you’ll need to present your ID and have it scanned to complete the transaction but with the new Verify with Wallet, your stored digital ID will be used to verify your age. (I do wonder if things might get more complicated when the delivery arrives if you’re not the one receiving it.)
Verify with Wallet will be supported by Chime, Turo, Uber Eats and U.S. Bank.
For more, don’t miss what you should know about flying domestically without a Real ID in 2025.
Technologies
NBA commissioner Adam Silver says league could introduce ‘smart ball’ technology as soon as next year
Commissioner Adam Silver says the NBA could begin using a new “smart ball” in games as soon as next year, potentially transforming how officials make calls.
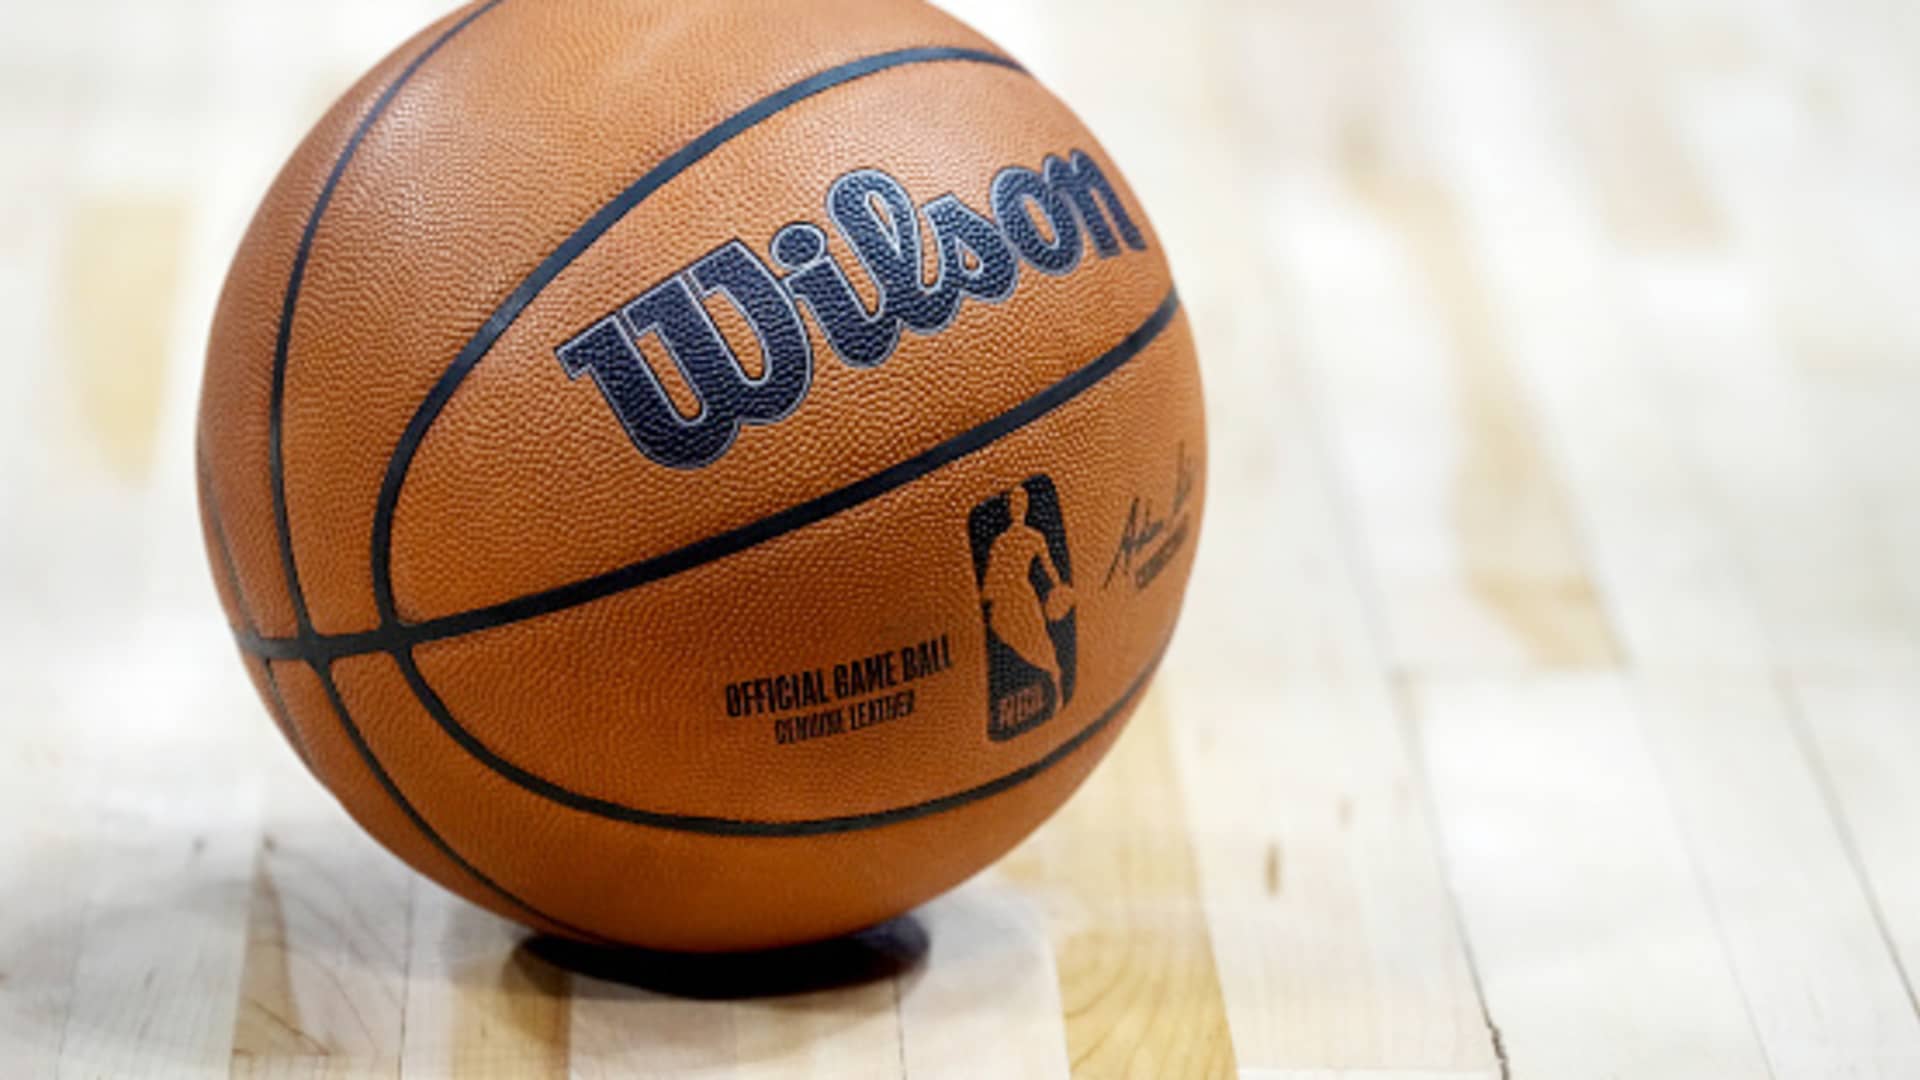
NBA Commissioner Adam Silver says the league could begin using a new “smart ball” in games as soon as 2027, potentially transforming how officials make calls on the basketball court.
In an interview with CNBC’s Contessa Brewer, Silver revealed that the NBA is working with official basketball manufacturer Wilson to develop a ball embedded with a tiny microchip Bluetooth sensor that can track movement, spin and changes in trajectory.
“We’re experimenting with putting a small chip in the ball that weighs roughly a gram,” Silver said.
The technology has already been tested in the NBA’s G League, Summer League, and some preseason games, where players used basketballs both with and without the chip. Silver said players have been pleased with the results.
“Nobody could tell the difference. So that’s a good sign,” he said.
The chip weighs just one gram, compared with the roughly 620-gram or 1.4 pound basketball. Silver said the league wanted to ensure that even the most experienced players wouldn’t notice a change in how the ball feels or bounces.
One of the most immediate applications could be officiating.
Silver said the technology could help referees determine whether a player touched the ball before it went out of bounds by detecting subtle changes in its spin. It could also help identify whether a shot’s trajectory was altered.
“I think you could see as soon as next year us using it for officiating in our games,” Silver said.
Beyond officiating, Silver sees a significant opportunity to bring the technology to consumers, allowing basketball players of all ages to analyze and evaluate their shooting mechanics.
For example, a player taking hundreds of shots could use data collected by the chip to understand which shooting angles and ball rotations are most likely to result in a basket.
“You’ll then see the graph, and you’ll see for which the angle of the shots that went in, they’re more likely to go in,” Silver said.
While the officiating application could arrive as soon as next year, Silver said a consumer version may take longer.
“I think the consumers version [of the smart ball] is a few years away, but it’s a really exciting opportunity.”
NBA players’ union raises concerns over wearables
The league is also exploring the use of wearable technology during games, but negotiations with the National Basketball Players Association have yet to produce an agreement.
The NBA says officials experimented with wrist wearables in select preseason and summer league games this year in a “successful pilot program,” but it will not extend into the season. The technology allowed the referees to communicate with the replay center about reviews, scoring changes and clock malfunctions.
Silver said players routinely use wearable devices off the court to monitor everything from sleep to physical performance, but concerns remain over how data collected during games could be used by teams.
“I think we have to come to some agreement on exactly how the information is used. But it seems everybody wants that information,” Silver said.
The biggest sticking point is whether that information could affect contract negotiations, Silver said.
“If you could see a player was slowing down or something like that, they’re worried that that could get used in bargaining, and I get that,” he said.
Silver acknowledged those concerns and said the league needs to reach an agreement with the players’ union on how the information would be used.
Still, he suggested that allowing wearables during games is a logical next step as athletes increasingly rely on technology to monitor their performance.
“I think the players are in a position right now where they’re essentially wearing wearables 22 hours a day, and the only time they’re not wearing them is when they’re playing in the game,” Silver said. “So that can’t make sense.”
“We’ll work something out with them,” he added.
Technologies
AI’s quiet safety gatekeepers are stepping into the spotlight
The intensifying AI safety debate is bringing a small group of third-party evaluators into the center of a multitrillion-dollar industry.
Two months ago, independent evaluators occupied a relatively sleepy corner of the multitrillion-dollar artificial intelligence industry. Now they’re being asked to come to its rescue.
While Anthropic and OpenAI are the heart of a fierce debate over whether they can safeguard their advanced models and grow their businesses simultaneously, the companies are seeking support from a handful of small third-party groups like Model Evaluation and Threat Research (METR), Apollo Research and Transluce.
The evaluators, which mostly operate as nonprofits, are still finding their footing in an industry where capital is flowing at historic levels and new models are rolling out faster than ever. Their primary role has been to assess AI model capabilities and risks, and to call attention to instances where the technology behaves badly.
In the absence of a federal push for regulations, evaluators have taken on outsized importance. Anthropic CEO Dario Amodei pledged to embed independent evaluators in his company last month – a move that OpenAI CEO Sam Altman quickly endorsed.
President Donald Trump supported the idea, as did most of the largest U.S. tech companies. But left unanswered are questions about how those third parties should be funded, what level of access they will have and what the reporting structure will ultimately look like.
“To a degree, the problem, as always, is money,” Suresh Venkatasubramanian, a computer science professor at Brown University, told CNBC in an interview. “Who is paying for these companies to do their work? How are they going to support them? You need an ecosystem, you need a viable business model for this.”
Right now, Anthropic, OpenAI and the infrastructure partners that are profiting from the AI boom are writing the rules. Critics say that’s like asking the biggest banks to protect us from a financial crisis or allowing pharmaceutical companies to put drugs on the market without regulatory clearance.
President Trump recently lauded AI executives for their “tremendous self-policing,” and signaled that he intends to leave companies to their own devices, unwilling to impede the growth of the industry that’s driving the economy and stock market. Trump encouraged AI companies to “partner with an independent external auditor or evaluator” as part of a voluntary accord he presented in late September.
It’s a conversation that Amodei kicked off In his viral essay last month, when he called for a “slower pace” in advanced model development after researchers left his company and voiced their concerns about the existential threats the technology poses.
As the AI labs move to put evaluators in place, friction is already starting to emerge.
OpenAI fired three employees last week for “violating our policies on accessing and handling sensitive company information,” according to a spokesperson. Two of those employees, Mikita Balesni and Tomek Korbak, said they believe they were dismissed because of how they communicated with third-party evaluators.
“My former colleagues are telling me they are confused about what to believe,” Balesni wrote in a post on X on Thursday. “They also are afraid to speak, and worry their personal phones will be searched for messages to us and third parties. I worry the pervading fear to speak up and engage with third parties will mean OpenAI will cut corners on safety behind closed doors.”
OpenAI disputed that characterization and said in a post on Friday that it’s “actively finalizing contracts with third-party safety assessors and will announce details in the coming weeks.”
“We are committed to embedding external assessors and continue to make close collaboration with independent safety organizations a core part of our safety work,” OpenAI wrote.
An OpenAI spokesperson said in an emailed statement that its upcoming work with evaluators “builds on existing collaboration with independent safety organizations,” including METR and Redwood Research.
Anthropic didn’t respond to CNBC’s request for comment.
‘I’ve never seen an issue move so fast’
The AI evaluator ecosystem consists mostly of small organizations, including METR and Apollo Research, and larger accounting and auditing firms like Accenture.
AI labs have been working with evaluators in limited capacities, but Andrew Freedman, CEO of policy nonprofit Fathom, said the field is quickly maturing.
“I’ve worked in politics and policy for the last 20 years of my life, and I’ve never seen an issue move so fast on so many different political spectrums,” Freedman told CNBC in an interview. He said he expects an “influx of capital” to flow into the ecosystem.
Rayan Krishnan, CEO of independent evaluator Vals AI, said his for-profit startup, which builds benchmarks to measure how AI models perform on industry-specific tasks, has grown from eight employees to roughly 30 this year, and in August announced a $40 million funding round.
METR, a nonprofit, announced in August that it had raised commitments of around $71 million over the last six months. That’s up from total 2024 contributions of $13.6 million, according to the group’s most recent filing with the Internal Revenue Service.
By late that month, METR’s profile had risen further. OpenAI enlisted two of its employees and a contractor to put together a postmortem report detailing how the company’s models escaped containment, accessed the open internet and breached open-source developer platform Hugging Face. METR said it did not accept payment from OpenAI for the assessment.
Kevin Werbach, faculty director of the Wharton Accountable AI Lab at the University of Pennsylvania, said the ecosystem is “not robust enough right now.” METR, for example, employs fewer than 50 full-time staffers, according to its website.
The power imbalance between the small evaluators and the leading labs that have raised tens of billions of dollars and employ thousands of people raises questions surrounding potential conflicts.
“If you want true third-party evaluation, you need true independence financially and otherwise,” said Venkatasubramanian. “It’s not just a matter of not getting paid, it’s a matter of, will there be consequences if I am an auditor and I put out a report that looks unfavorable to this company? Is my business going to dry up?”
Anthropic acknowledged the complexity in a blog post last month, as it announced it will embed employees from Faculty, Accenture’s specialist AI business, to test safeguards and assess whether models will behave in line with human values. Anthropic said that “given the importance and urgency of this work,” it will fund Accenture’s contributions directly.
“There are, as yet, no standards for what information embedded evaluators should have access to, or how they should report what they find. There is also no settled system for funding independent evaluation,” Anthropic said. “Long-term, we think funding should come from pooled or government sources.”
Anthropic said it’s in discussions with METR and other nonprofit evaluators that are planning to use their own funding to pilot “elements” of embedded evaluation.
Will the government step in?
In June of last year, Fathom introduced a marketplace framework for Independent Verification Organizations, or IVOs. These groups would be licensed by the government and authorized to test whether AI companies are meeting various safety criteria.
Freedman, the group’s CEO, said government oversight is key because otherwise third-party evaluators can become beholden to the large AI labs for revenue, incentivizing them to “start rubber stamping stuff” to maintain favor.
Some lawmakers are on board.
IVOs are a key provision of the ″Frontier Risk Oversight, National Transparency, Independent Evaluation, and Reporting” (FRONTIER) Act, which Reps. Lori Trahan, D-Mass., and Jay Obernolte, R-Calif., introduced in July. Fathom helped draft language and provided technical expertise for the bill, Freedman said.
OpenAI global affairs chief Chris Lehane told reporters in September that he sat down with one of the bill’s sponsors on Capitol Hill to express support for the IVO provision.
“It was important for them to hear that and hear it from us, and we wanted to be really clear about that,” Lehane said, according to reports.
Meanwhile, lawmakers in California, Connecticut and Virginia have taken steps to implement IVOs, and states like Massachusetts are weighing independent safety evaluations more broadly.
California Governor Gavin Newsom recently signed two bills involving IVOs, one establishing a “first-in-the-nation framework,” and the other creating a state registry for AI auditors. Anthropic threw its support behind both bills in August, and OpenAI formally endorsed them last month, the same day Newsom signed them into law.
Lehane wrote in a blog post at the time that “we prefer independent technical assessments to be required at the federal level,” but in the absence of federal action, “California can help establish the rules of the road.”
Freedman said he thinks it will be “really difficult” for companies like OpenAI and Anthropic to work out how to engage with independent evaluators on their own. However, with the government’s role unclear, “it’s a muscle worth developing in the interim,” he said.
For now, the closest thing the industry has to a set of standards is what Trump called a “morally binding” agreement at a luncheon he hosted for tech leaders at the White House late last month.
The one-page accord says that “every company is responsible for developing its own technology safely and in a way that builds trust with customers and the public.” It also encourages signees to work with an “independent external auditor or evaluator to carry out independent assessments.”
The document was signed by top execs at Anthropic, Google, Meta, OpenAI, SpaceX and Nvidia, a rare show of solidarity between leaders who have shared conflicting views on addressing AI’s risks. The executives still have to chart their own paths forward.
“It was a performance of an attempt to show action when in fact no action actually happened,” Venkatasubramanian said. “The things that they promise to do are things they should have been doing already, and, in fact, have claimed that they were doing in the past.”
Amodei, in his September essay, said Anthropic will equip evaluators with desks, access badges, company laptops, and permissions that are “mostly comparable” with internal risk assessment teams. Additionally, evaluators will be supported with contracts that give them “the right to publish key findings,” with Anthropic reserving “the narrow ability” to redact certain security-sensitive or confidential information.
“This is an unusual step for a company, but we think it is important to prove out the concept of embedded external reviewers,” Amodei wrote.
OpenAI published its own proposal days later, and said evaluators should work on “scoped and mutually agreed upon claims for assessment,” clearly explain their methodology and standards, demonstrate relevant technical expertise and disclose conflicts of interest.
The AI Evaluator Forum, which includes METR, the AI Verification and Evaluation Research Institute (AVERI), and other groups, published a public letter last month titled, “Minimum Conditions for Embedding Evaluators.”
The letter said evaluators should be transparent, shielded from retaliation and granted access equivalent to AI companies’ “own highly privileged employees.”
“Embedded evaluations cannot address all oversight needs and should be treated as a complement to, rather than a replacement for, broader efforts by frontier AI companies to expand external oversight,” the letter said.
Freedman said he’s seen a shift in posturing out of OpenAI and Anthropic in recent months, largely because they’ve realized they won’t be able to roll out their advanced systems without the public’s trust.
“I don’t think you need to trust that they’ve suddenly turned altruistic or that there’s anything but corporations acting like corporations,” Freedman said.
That underscores perhaps the central problem, Werbach said. OpenAI and Anthropic are, first and foremost, competing with each other as they march toward the public markets and seek trillion-dollar-plus valuations.
“There is a tremendous amount of personal distrust between those two companies,” Werbach said. “Even though there’s also tremendous agreement about the need for this kind of evaluation to happen.”
WATCH: Bradley Tusk on Anthropic IPO: Why add public market pressure if safety is your top priority?
Technologies
Trump says he is ‘going to look at’ joining Saudi Arabia in the fight against Iran-backed Houthis after deadly airport strike
U.S. military involvement in the fight against the Houthis would stretch resources in the Middle East already committed to fighting Iran, analysts said.
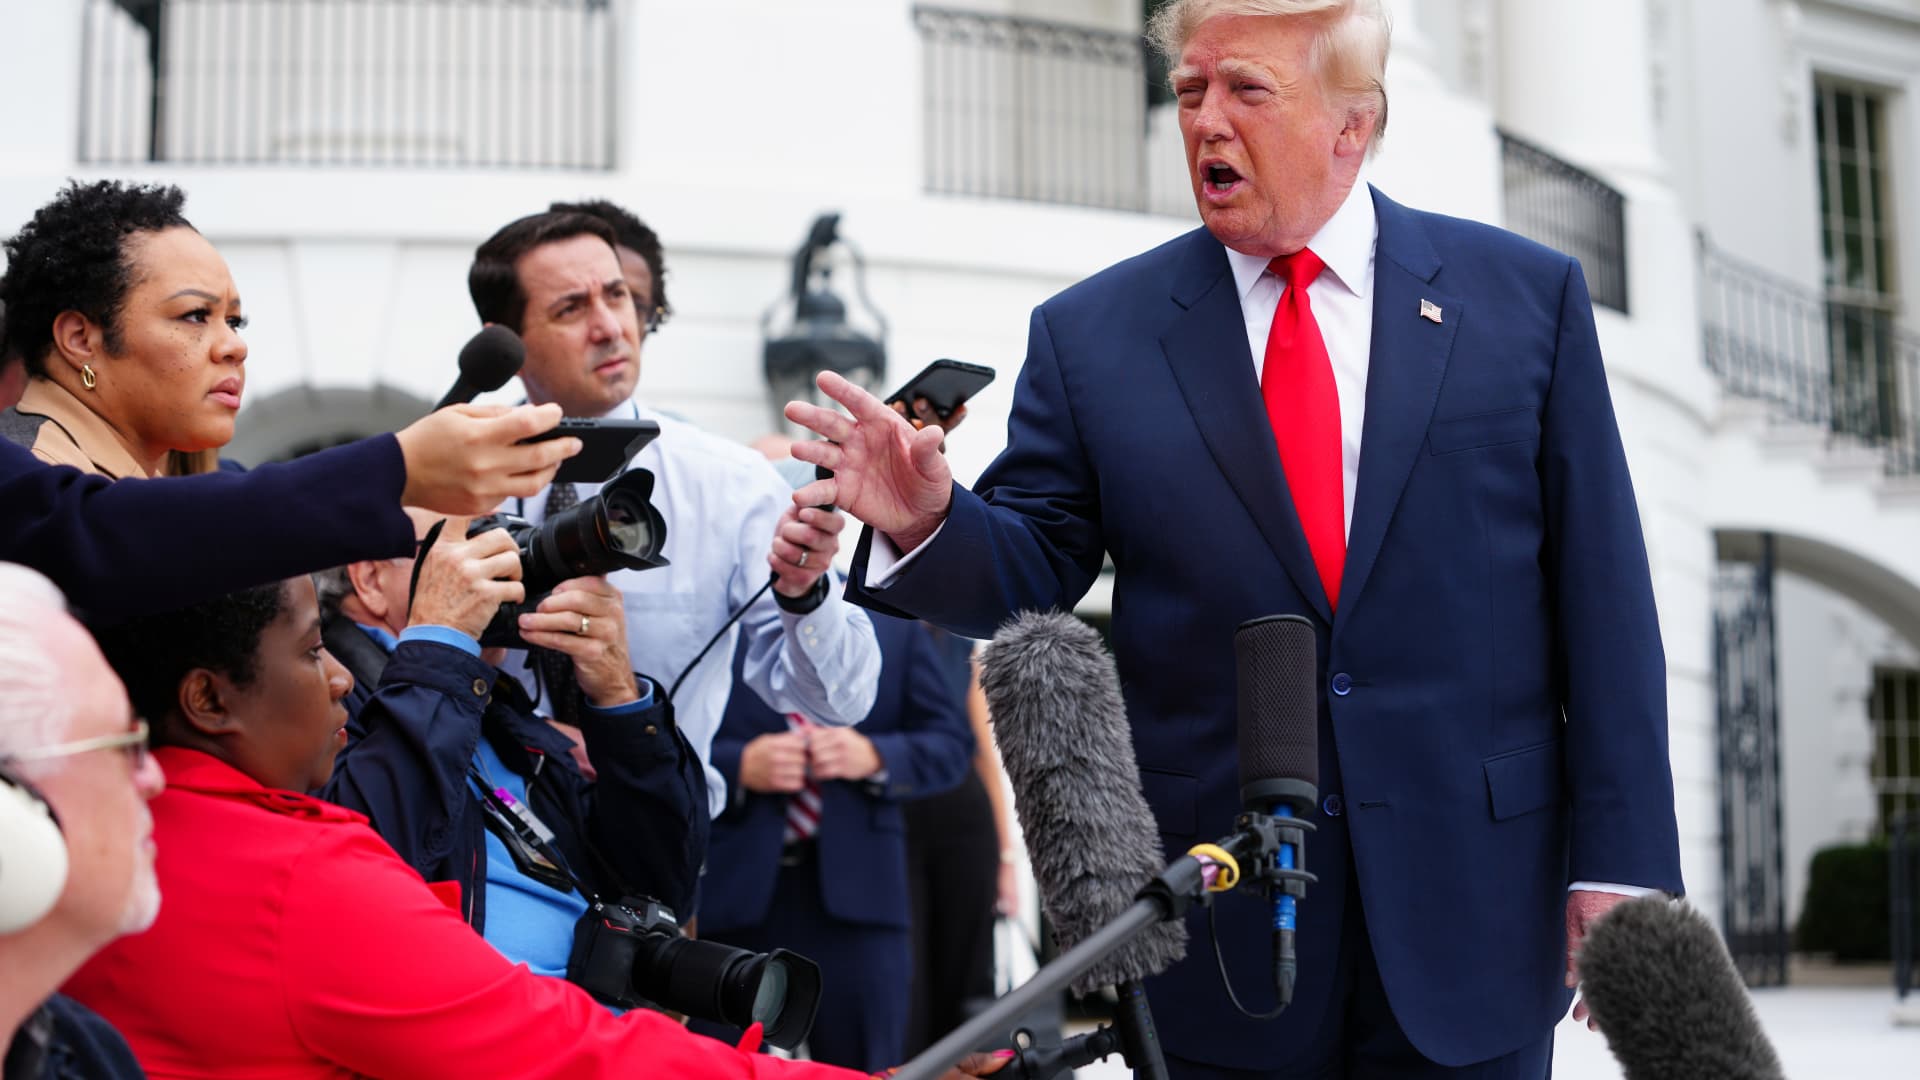
President Donald Trump said he is considering joining Saudi Arabia in its retaliation against Tehran-backed Houthis in Yemen after a deadly attack on Riyadh’s main airport, a move that could draw the U.S. further into a second front in the Iran war.
“We may. We’re going to look at it,” Trump told reporters outside the White House on Saturday when asked if the U.S. would back Saudi Arabian strikes. “We just found out about the recent attack. So, we’ll make a decision. We move very quickly.”
Two Saudi Arabian government officials told MS NOW that the kingdom is requesting “urgent defense support” from the U.S. following the attacks.
The officials, including a senior member of the Ministry of Foreign Affairs, did not want to be identified because of the matter’s sensitivity. They added that the U.S. needs to intervene “as soon as possible” to help the Saudi-led coalition in Yemen fight the Houthis.
The White House did not immediately respond to a CNBC request for comment.
The Saudi General Authority of Civil Aviation said the attack on King Khalid International Airport in Riyadh killed 12 people and injured 309 others, the country’s official Saudi Gazette media outlet reported.
Colonel Turki Al-Maliki, the spokesman for the Saudi-led Coalition to Support Legitimacy in Yemen, which has been leading the fight against the Houthis, described the attack as a “war crime.”
“Therefore, the Joint Forces Command of the Coalition will respond decisively to this terrorist attack in accordance with the Customary International Humanitarian Law,” Al-Maliki said in a post on X.
It was the second deadly assault on Riyadh’s airport in less than a week.
Three Saudi nationals, including a pilot, were killed in attacks on the facility by Iran-backed Houthi militants on Thursday.
Following Saturday’s attack, the Houthis renewed their warning against using Saudi airports.
“We renew our warning to all airlines, experts, employees, workers and travellers against using Saudi airports and airspace, as they are vulnerable to attack and have become a theatre of operations for our forces, with the exception of the airports in (the holy cities of) Mecca and Medina,” the Houthis said in a post on X.
Saudi Arabia, a key U.S. ally in the Middle East, intervened in Yemen’s civil war between the Houthis and its internationally recognized government after the group seized the Yemeni capital Sanaa in 2014.
Last month, the Trump administration approved the potential $24.3 billion sale of nearly 50 F-35 warplanes to Saudi Arabia in what was seen as a major boost for the kingdom as it faces intensifying attacks from the Houthis. The sale is under congressional review.
International energy conference still on
The Saudi energy ministry said a long-planned international energy conference will still take place in Riyadh on Sunday, Reuters reported.
The five-day WPC Energy Congress is taking place at a convention center near King Khalid airport. State television told Reuters that more than 70 ministers, 300 company executives and representatives of more than 25 international energy organizations have confirmed their attendance, though it was not clear whether the participants would attend in person or virtually.
Reuters said a ministerial meeting of the International Energy Forum is also set to take place, with its plenary session to be held behind closed doors.
Energy choke points
In addition to attacks on civil aviation, the Houthis have also been trying to choke off oil tanker traffic through the Bab el Mandeb strait, a key entry point to the Red Sea, as Iran has effectively done in the Strait of Hormuz to the north of the Arabian Peninsula.
Earlier this month, Yemeni government forces said they reclaimed the strategic port city of Mokha from the Houthis.
Energy prices have soared since the start of the Iran war, which began with U.S. and Israeli airstrikes on Iranian targets on Feb. 28, putting pressure on consumers globally.
The surge in domestic fuel prices has been a key issue for voters ahead of next month’s U.S. midterm elections.
But that support would be expensive militarily.
“Potential U.S. involvement in the Saudi-Yemeni government air campaign to degrade Houthi ballistic missile capabilities would mark the first direct U.S. military action against the group since the conclusion of Operation Rough Rider in May 2025,” according to the Critical Threats Project, part of the American Enterprise Institute think tank.
The offensive aimed to suppress the Houthis’ capabilities, but recent attacks show the group has regrouped.
“After seven months of war, there are questions about the U.S. capacity to wage a sustained campaign against the Houthis, return to combat against Iran if necessary, and prepare for contingencies in other parts of the world, notably East Asia,” Steven Cook, an expert on Arab and Turkish politics at the Council on Foreign Relations think tank, wrote last month.
Meanwhile, the United Kingdom’s defense secretary said his government is also examining how to support Saudi Arabia.
“I’ve spoken to my Saudi counterpart [Khalid bin Salman] on a number of occasions in recent weeks to look at what more we can do to support Saudi Arabia, and I’m afraid last night explains precisely why we are providing that support,” Wes Streeting said in an interview on BBC television on Sunday.
Streeting said the U.K. is not getting involved in offensive operations “at this stage.”
“We’ve always been clear that there isn’t a military solution to this conflict,” Streeting added.
-
 Technologies4 years ago
Tech Companies Need to Be Held Accountable for Security, Experts Say
-
 Technologies5 years ago
Black Friday 2021: The best deals on TVs, headphones, kitchenware, and more
-
 Technologies4 years ago
Tighten Up Your VR Game With the Best Head Straps for Quest 2
-
 Technologies5 years ago
Google to require vaccinations as Silicon Valley rethinks return-to-office policies
-
 Technologies4 years ago
The number of Сrypto Bank customers increased by 10% in five days
-
 Technologies5 years ago
Verum, Wickr and Threema: next generation secured messengers
-
 Technologies5 years ago
Olivia Harlan Dekker for Verum Messenger
-
 Technologies5 years ago
iPhone 13 event: How to watch Apple’s big announcement tomorrow