Technologies
FBC: Firebreak: 9 Beginner Tips to Survive Your First Shift
If you want to make it out of the Oldest House alive, you’ll have to work together with your teammates to utilize every tool at your disposal.
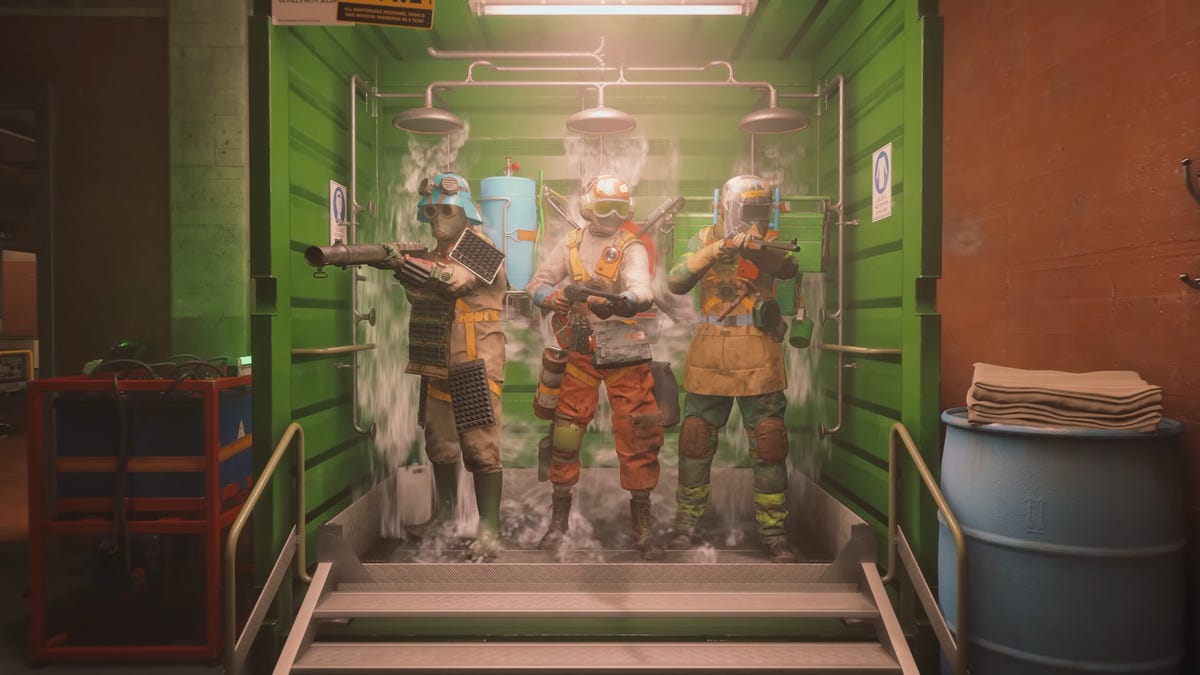
So you’ve volunteered to be a Firebreaker, and now you’re staring down a paranatural threat with only a glorified super soaker in your hands. It happens to the best of us.
FBC: Firebreak is developer Remedy Entertainment’s first crack at a live-service multiplayer game. It’s a Left 4 Dead-like horde shooter set in the Oldest House (from Control), an ever-shifting building that contains the world’s foremost paranatural threats.
Taking place six years after Remedy’s 2019 game Control, FBC: Firebreak has players participating in a new initiative that seeks to contain the Hiss invaders and other crises throughout the Oldest House’s sectors by drafting a ragtag team of volunteers from within the Bureau.
The game is heavy on action, and you’ll have to utilize teamwork, your first-person shooting skills and all of the pieces of your arsenal to survive. Here are some tips to survive your first shift.
FBC: Firebreak has crossplay — so bring any friend you can
Firebreak has full crossplay between PC, PlayStation 5 and Xbox Series X/S, which means you can venture into the heart of the Oldest House with any of your friends. This is a game where camaraderie and team play will win the day, so you’ll want to play with folks who you know will have your back. It’s also just nice to be able to communicate with your teammates over Discord.
Note that even though Firebreak has crossplay, it doesn’t have cross-progression. That means you can bring the whole gang together to play, but your level-ups, perks and kit unlocks will be locked to whatever platform you’re playing on.
Communication is important, even without voice chat
One of Firebreak’s more bizarre design decisions is the fact that a horde shooter has no in-game chat options. You can’t hook up a microphone to communicate with your teammates, and there’s no text chat option to send them a quick message.
That makes queuing with randoms extremely difficult — this is a game that requires teammates to stick closely together to receive shield and perk benefits from one another, and anyone who splits off can be quickly overwhelmed by paranatural threats. This is even mechanically enforced — if you stray far from your squad, soon your shields will deplete.
You should frequently mark waves of enemies your teammates haven’t noticed yet, ping where you’re moving to keep the team together and point out shelters before you open them and spawn a wave of Hiss enemies.
Even if you’re in a good place resource-wise, ping the healing showers and sinks and any ammunition you don’t need. Live and die by the ping system, because it’s the only way you’ll be able to share crucial information with the team.
The Splash Kit is the worst solo kit, but it’s the best multiplayer kit
The game’s three classes (or Kits) all bring a substantial amount of utility to Firebreak’s Jobs. The Jump Kit quickly restarts electronics, and the Fix Kit hammers away at the showers, ammo stations and the lights to get crucial interactables working again more quickly than a manual repair.
The Splash Kit starts off with a glorified Super Soaker that makes enemies wet and staggers them upon charged-up hits, but doesn’t really feature any other utility out of the box. In solo play, you’ll barely have time to pull out your gun before the horde you just knocked backwards gets up and starts to maul you again.
Multiplayer matches are where the Splash Kit really sings. When massive mobs of enemies descend on the team, the person carrying this kit keeps many of the Hiss fighters permanently knocked down by firing globs of water at them. This lets the rest of the team clean up the fight quickly, efficiently and without much risk. It can even wash off fire and other annoying hazards, too.
Bring along a six-shooter at the beginning of the game
Firebreak’s arsenal of weapons is extremely limited, and all of the guns hit like a wet noodle until you upgrade them. You start with a boomstick that doesn’t boom, a submachine gun that requires you to burn ammo to tick away an enemy’s health bar and a revolver that can knock out fodder in two shots (or one well-placed shot to the dome).
The revolver is the obvious choice for new players until you have enough lost assets to buff your weapons up by advancing in the requisition pass (which functions like a Helldivers 2 war bond). It hits the hardest, it has a modest reload time compared with the shotgun and its only downside is offset by the fact you have two teammates covering you as well.
When the horde bears down upon you, combine your kit powers
When the Hiss enemies threaten to overwhelm your Firebreaker squad, stow your guns and pull out your class abilities. A Fix Kit user might have a rough go of things in the early game — the wrench doesn’t connect with a satisfying kinetic impact and does very little damage or knockback until it gets upgrades.
But the Splash Kit and Jump Kit have fundamentally strong synergy that cuts a swath through waves of foes. Your Splash Kit user should be hosing down a horde, while the Jump Kit user follows up with devastating shocks. The strategy isn’t super consistent, but electricity should chain through most of the wet Hiss, and you can take out dozens of fodder enemies at once.
The best part is that this pairing can be repeated whenever you want. You can use the water gun or the electric jumper as often as you like, so employ this combo liberally when the going gets tough.
Resource management is the key to victory in harder Jobs
Once you unlock more parts of your Firebreaker kit, you’ll want to step into harder Jobs, either by upping the difficulty or the containment level for longer expeditions. That’s the right move, but you’ll have to learn a new skill: Resource management. It’s very easy to stay stocked up on ammunition on lower difficulty missions, but it starts to get harder to retain your resources as hordes of enemies constantly spawn in as you set the threat level higher.
Make sure you know where the closest ammo station is at all times, and don’t be afraid to pop open one of the bunker-like shelters to collect the ammunition (and more importantly, the grenades) from within. Certain enemies, like the armored grenadiers with miniguns, will also drop several ammo pickups when you defeat them.
Players are able to restock their most important equipment as well, like the Fix Kit’s swivel gun or the Splash Kit’s healing humidifier, but this takes longer and you can’t count on being able to pull another one of these valuable abilities out of the ammo station in a pinch (its replenishment seems erratic). Prepare your arsenal between encounters so you have these powerful pieces of equipment when you need them the most.
Stock up on lost assets wherever you can find them
If you see a dossier, grab a dossier. These folders — known as lost assets — are the primary currency in FBC: Firebreak, and you’ll need them to purchase items on the requisition pass and unlock perks.
Lost assets can be found sparsely scattered around levels, but you’re guaranteed to find a heap of them if you crack open a shelter and take a peek inside. Mini boss enemies (the ones that spawn with unique names and a health bar at the top of your screen) also drop a handful of lost assets for you to pick up.
Not every asset gives you the same amount of requisition points. The fatter closed folders will give you more points to spend after you extract them. There’s no limit to how many assets you can recover, though, so pick them all up at your leisure.
It’s important to know that if you go down and a teammate can’t revive you, all of the lost assets you were carrying will scatter around the spot where you were defeated. Once you respawn, work with your teammates to fight back to that location — or else you’ll lose all of the lost assets you were previously toting around.
The Black Rock Neutralizer is your new best friend
The ragtag Firebreak initiative team doesn’t exactly have a stellar arsenal. You’re carrying around a single (probably faulty) firearm, a jury-rigged gadget and a couple of other odds and ends. It’ll certainly be a challenge to hold your own against the paranatural threats of the Oldest House, but every once in a while, you may come across a great equalizer.
The Black Rock Neutralizer is a special weapon you can find at ammo stations or (rarely) within opened bunkers. This grinder propels chunks of black rock ore at enemies, ripping them apart with ease. It’s an incredibly effective weapon that thins out hordes or shreds through boss health bars.
Most importantly, if you’re playing with corruption modifiers on, the Black Rock Neutralizer is the only way to destroy the altered items that cause chaos throughout the match. No matter what you use this weapon for, it’s an incredibly versatile piece of equipment that can help your team stay in control of the battlefield.
When in doubt, huddle it out
This is a team game, and you and your teammates are forced to stick together if you want to fight at full power.
Players in close proximity to one another get resonance bonuses, sharing the benefit of any leveled-up perks that they have equipped. More importantly, players who are split up from one another don’t get the benefits of shield regeneration, which means they’re basically kneecapping their own survivability.
When a situation gets out of hand, sometimes the best thing a team can do is huddle up in an area with health and ammo until they can get things back under control. Whether you park yourself in the start of a zone with an ammo station and a shower, or you find a nice warm bunker to open up, identify the best places to make a combined stand.
Technologies
The Fourth Episode of the VERUM AI Mini-Series Is Out
The Fourth Episode of the VERUM AI Mini-Series Is Out

Verum Messenger has released the fourth episode of its AI mini-series SHADOWS, created using Verum AI. The new episode, titled “No Borders,” continues the story of a team trying to stay out of the OMEGA corporation’s sight.
Following the events of the previous episodes, the team moves between cities and countries while OMEGA continues its search. The new episode puts particular emphasis on Verum Messenger’s capabilities that allow users to conceal their location.
“No Borders” is another chapter in a story about privacy, freedom of communication, and technologies that erase borders between people.
The VERUM AI mini-series consists of seven episodes, released gradually across Verum Messenger’s social media channels.
Episode 4 is now available. Stay tuned for the next chapter.
Technologies
Verum Messenger Introduces Built-In Verum Chess
Verum Messenger Introduces Built-In Verum Chess
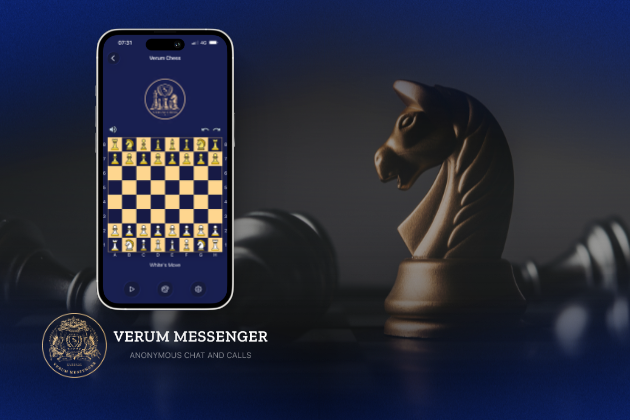
Verum Messenger has released a new update for iOS, iPadOS, and macOS, adding another feature to its growing ecosystem — Verum Chess. Users can now play chess directly inside the messenger without switching between different applications.
The new feature allows users to start a game in just a few taps while reinforcing Verum’s vision of a unified digital environment where communication and everyday services come together in a single platform.
Verum Messenger continues to evolve into a multifunctional ecosystem that combines secure chats and calls, AI tools, a built-in VPN, anonymous email, eSIM, financial services, cryptocurrency features, and offline communication. With the introduction of Verum Chess, the platform now also offers a new way for users to interact and spend time together without leaving the app.
The update is now available for iPhone, iPad, and Mac on the App Store.
Technologies
Episode 3 of the VERUM AI Mini-Series Is Now Available
Episode 3 of the VERUM AI Mini-Series Is Now Available

Verum Messenger has released the third episode of its AI mini-series, SHADOWS, created using Verum AI.
The new episode, titled «Ghost Money,» continues the story of the conflict between a team of heroes and the Omega corporation, which seeks to take control of digital communications. This time, the focus shifts to anonymous payments and financial freedom, revealing how privacy can extend beyond messaging.
Like the previous episodes, the new release not only advances the storyline but also showcases the capabilities of the Verum ecosystem, highlighting technologies designed for secure communication and digital privacy.
The mini-series consists of seven episodes, released gradually across Verum Messenger’s social media channels.
Episode 3 is now available. Stay tuned for the next chapter.
-
 Technologies4 года ago
Tech Companies Need to Be Held Accountable for Security, Experts Say
-
 Technologies3 года ago
Best Handheld Game Console in 2023
-
 Technologies5 лет ago
Black Friday 2021: The best deals on TVs, headphones, kitchenware, and more
-
 Technologies3 года ago
Tighten Up Your VR Game With the Best Head Straps for Quest 2
-
 Technologies5 лет ago
Google to require vaccinations as Silicon Valley rethinks return-to-office policies
-
 Technologies5 лет ago
Verum, Wickr and Threema: next generation secured messengers
-
 Technologies4 года ago
The number of Сrypto Bank customers increased by 10% in five days
-
 Technologies5 лет ago
Olivia Harlan Dekker for Verum Messenger