Technologies
My Favorite Motorola Phone in 2023 Is on Sale for $400
Commentary: The Lenovo ThinkPhone surprised me with its elegant design and top-notch hardware. It’s a steal at $300 off.
If you want a phone for less than $500 that isn’t used or refurbished, there are two main options.
The first is to consider a phone that was made to be affordable, of which there are plenty from the likes of Samsung, Motorola, OnePlus and Google. These phones typically have a lot to offer for their price, such as great battery life, 5G support and a processor that isn’t the fastest but is still powerful enough for mundane daily tasks (i.e. scrolling through social media, texting, video chats, etc.). But to keep the price down, these cheaper phones come with compromises including lower-resolution screens that aren’t very bright, cameras that take just OK photos and plastic designs.
Read more: Best Phones of 2024
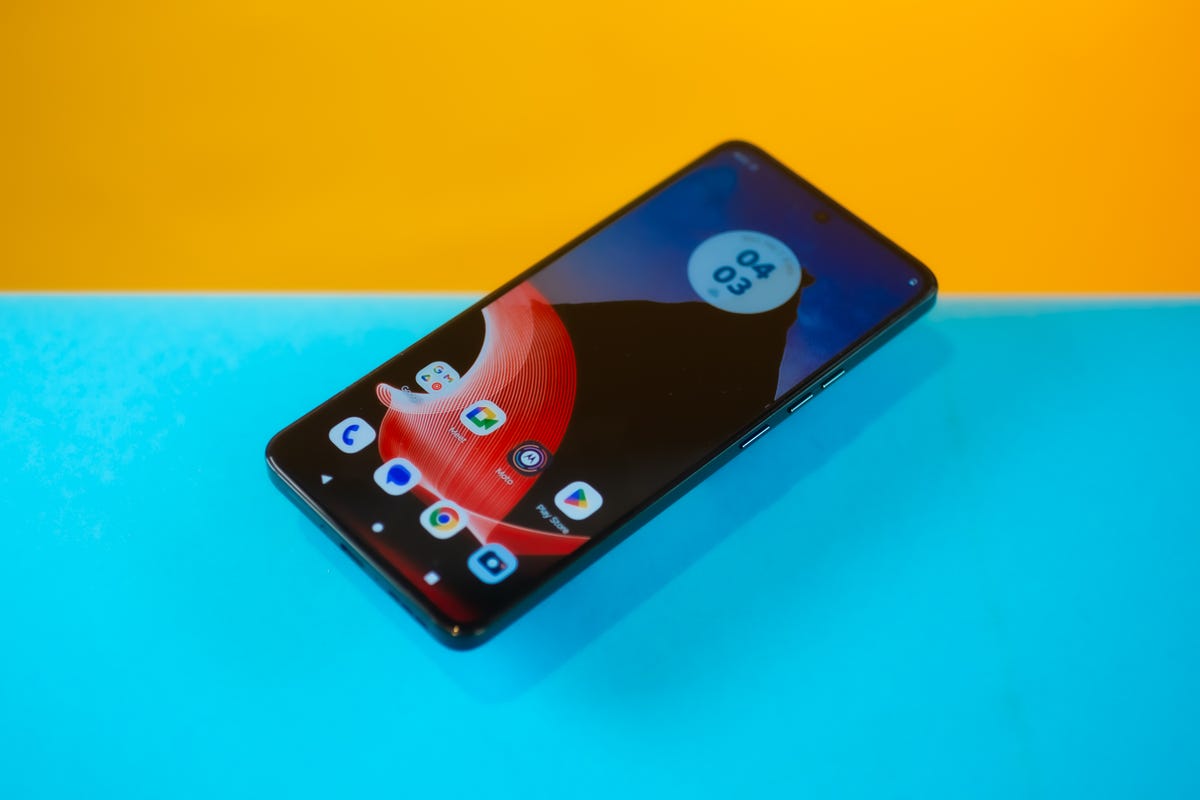
The other option is to find a more expensive phone that came out last year, or even two years ago, for a discount. The Lenovo ThinkPhone by Motorola, currently priced at $400, is a great example. I can almost hear you asking: «Wait, Lenovo makes phones?» They did this year, and it’s one of my favorite phones I tested in 2023.
The ThinkPhone was a good deal at its original price of $700, but it’s definitely worth buying with a $300 discount.
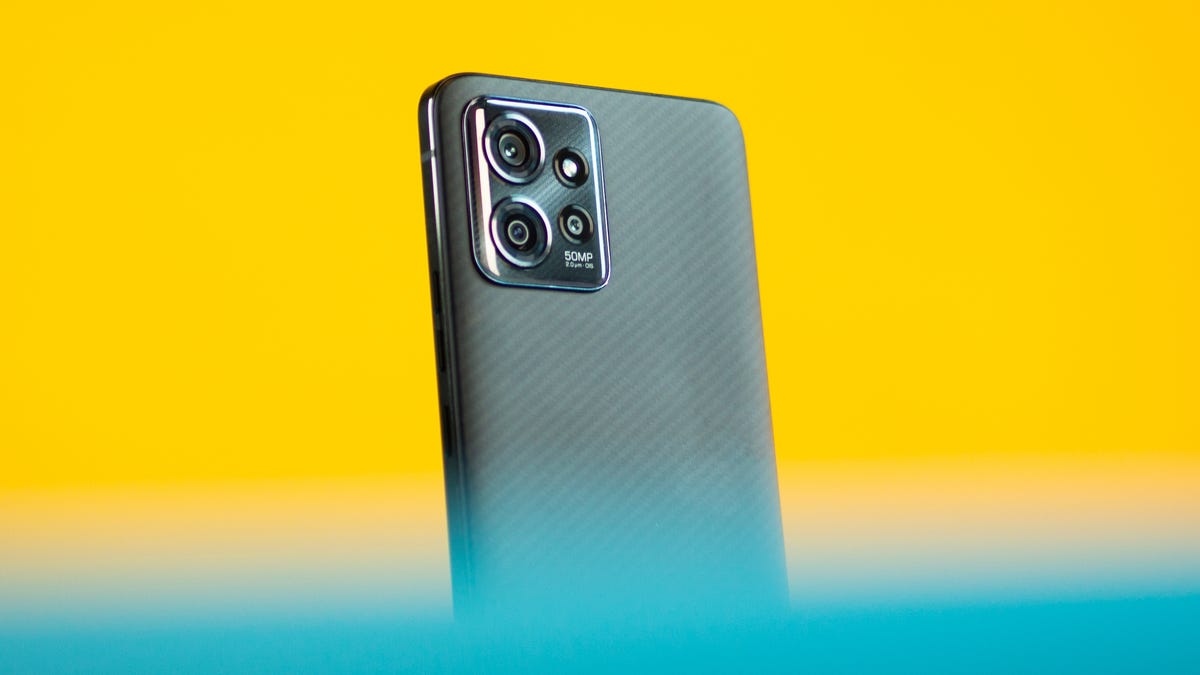
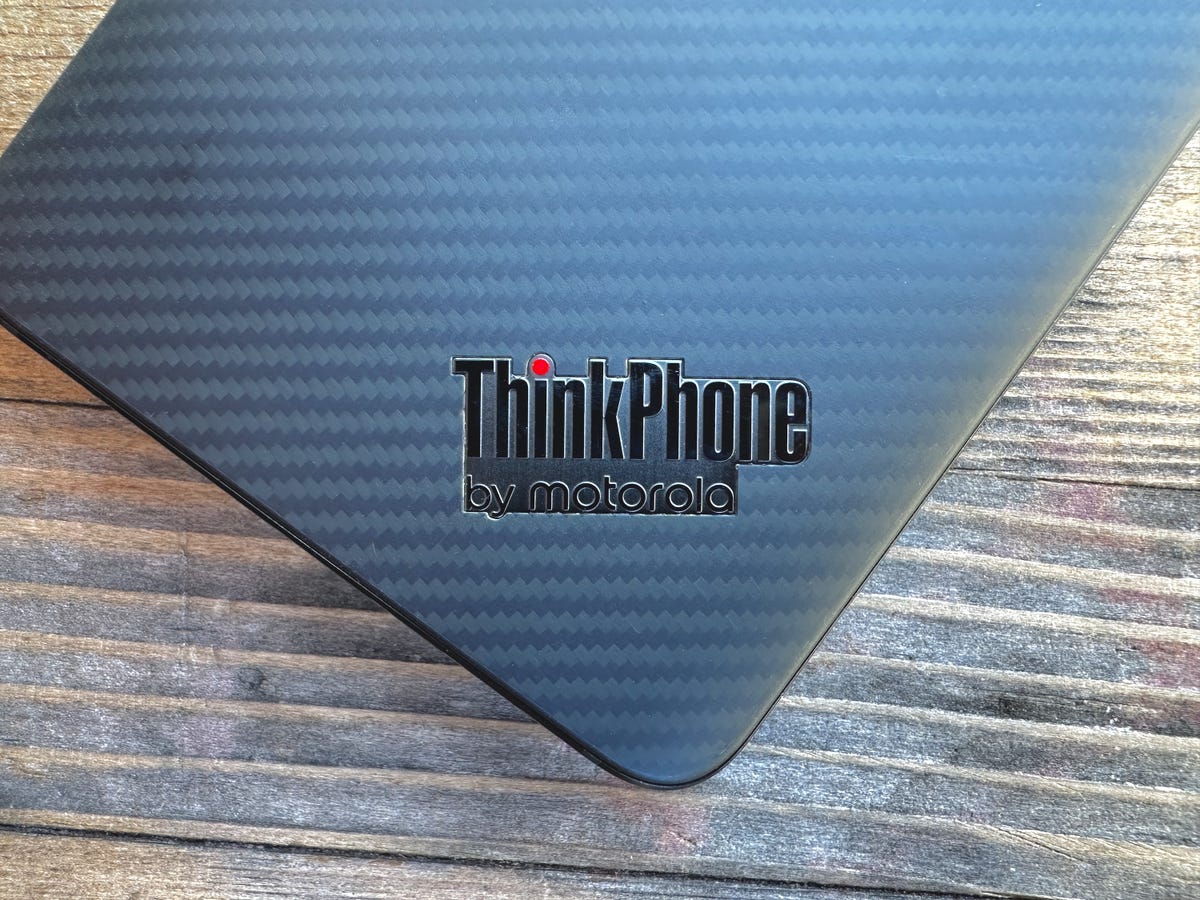
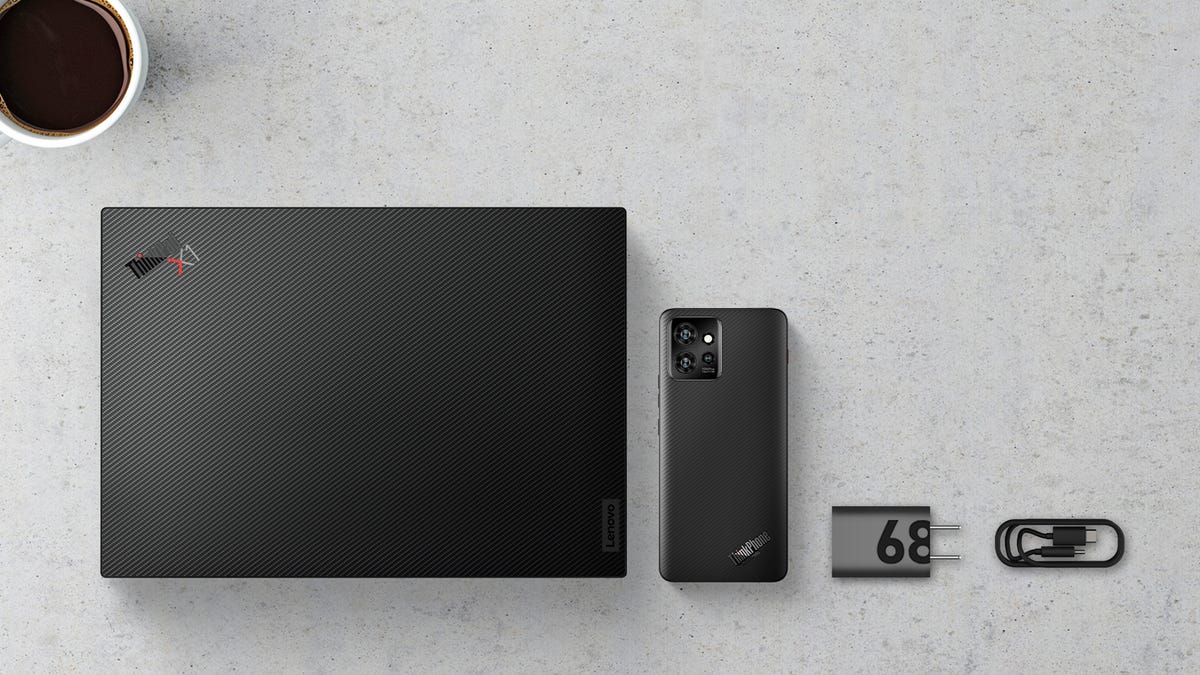
As the name suggests, the ThinkPhone is a collaboration between Motorola and its parent company, Lenovo. It has a similar design as Lenovo’s popular ThinkPad laptop lineup, right down to the signature red hardware button for triggering software shortcuts. It has impressive hardware for $400 that includes 256GB of storage (most sub-$500 phones only have half that capacity), a Snapdragon 8 Gen 1 Plus processor (two generations old but still powerful) and a lovely 6.6-inch 144Hz display (a higher refresh rate than most phones).
It also supports 68-watt fast charging and ships with the required wall plug. That alone makes the ThinkPhone stand out; phones from Samsung and Apple take longer to charge and don’t include the power adapter in the box. In my tests, the ThinkPhone went from an empty battery to 92% in 30 minutes, making it one of the fastest-charging phones sold in the US. For perspective, the $799 iPhone 15 only added 53% in the same amount of time.
But it’s the ThinkPhone’s harmonious design that made it stand out in 2023. Smartphone hardware, especially in the sub-$500 range, has moved away from being an expression of style and design and has instead become an aluminum or plastic housing for a rectangular glass screen. A phone’s color and camera bump shape are usually their most distinctive aspects.
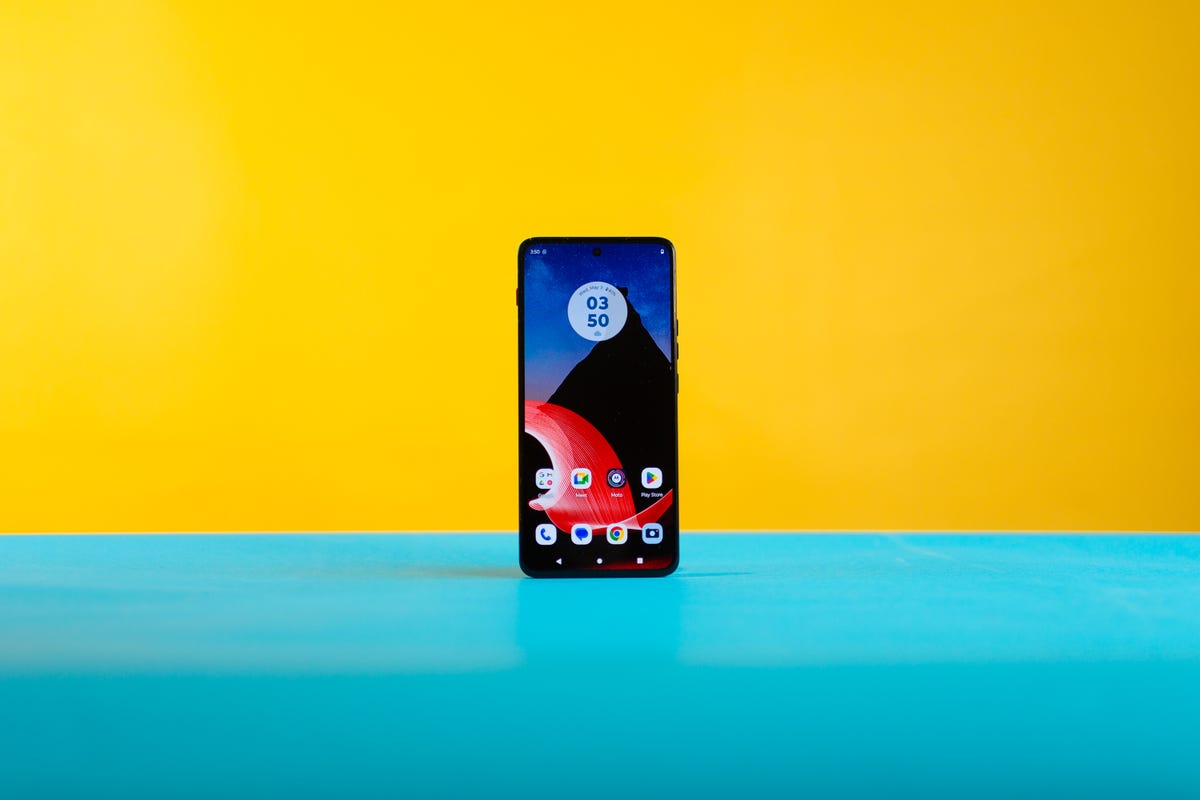
The ThinkPhone’s design is a bit more ambitious. It’s refined and mature, replicating the ThinkPad’s buttoned-down corporate look. The diagonal aramid fiber weave inlay on the back gives it a sophisticated finish and feels great to the touch. The hardware and lightly customized Android 13 software feel like a single cohesive design. It’s the kind of thing a lot of reviewers, including myself, usually credit Apple with. I should note that Motorola and Lenovo commit to three years of major OS updates and four years of security updates.
I spoke with Sudhir Chadaga, global lead of Motorola for business, about the ThinkPhone this past summer. He said the phone’s design took time to find.
«We wanted to make a statement that the ThinkPhone should be the best companion to your PC,» said Chadaga on a video call. «It’s not just that they need to look like each other; they need to work well together.»
Besides being a solid Android phone, the ThinkPhone has a number of nifty shortcuts and cross-platform utilities with Windows. The cross functionality isn’t limited to Lenovo ThinkPads; the ThinkPhone can work with most recent Windows computers.
You can connect it to PCs, monitors and TVs. For example, I copied and pasted text and photos from the phone to a PC laptop and used the ThinkPhone’s 50-megapixel main rear camera for a video call I took on the ThinkPad. The video quality looked much clearer than the laptop’s built-in webcam.
Those integrations between Android and Windows are the result of customers, and even Lenovo staff, wanting a better experience between their laptops and phones. Chadaga tells me many of his employees frequently file expenses on the road, which can be a clunky experience that often involves emailed photos of receipts. He wondered if there was an easier way.
«Android and Windows haven’t always played well together,» said Jerry Paradise, vice president of global commercial portfolio and product management at Lenovo. «Customers were always saying, ‘You guys really need to do a ThinkPhone.'»
Clearly, the ThinkPhone made a good impression on me. But I should mention some of the drawbacks, and the first are the cameras. For $700, these cameras take decent photos, but they struggle in low light. If you’re buying this for $400, the ThinkPhone’s cameras are good compared with most other cheap phones.
The interconnectivity between the phone and PCs worked well most of the time, but there were times (such as when I had the ThinkPhone’s screen on a ThinkPad display) when I experienced an occasional lag.
In terms of software support, Motorola and Lenovo still fall behind Samsung, which offers four years of major OS updates, and Google, which offers seven years for the new Pixel 8 and Pixel 8 Pro.
While Chadaga and Paradise praised the ThinkPhone for business-minded users, it’s also a splendid Android phone. You may not care about having a phone that syncs to your PC or lets you use Microsoft Teams at the press of a button. But the ThinkPhone’s speedy charging, iconic design and otherwise high-quality hardware still makes it a worthwhile phone.
With its $300 discount, the ThinkPhone is the best $400 phone you can buy right now. The question now: How long will it remain at this price?
Technologies
Australians Flock to VPNs in the Wake of Online Age-Restriction Laws
App downloads for VPN services increase sharply as websites in Australia go behind age-restriction walls.

A new set of laws in Australia requiring adult websites and app stores to age-restrict content for those under 18, and requiring AI companies to restrict chatbot offerings from displaying certain types of sensitive or adult content to minors, is apparently driving many to download Virtual Private Network apps there.
Major adult sites have closed their virtual doors to those who aren’t age-confirmed in Australia, and these changes follow a nationwide ban on social media use by teenagers and young children that went into effect in December.
According to reports from Reuters, The Guardian and others, in response to the bans, downloads of VPN-related apps, which people can use to circumvent location-based restrictions, are sharply on the rise. According to Reuters, three of the 15 most downloaded free iPhone apps in the country were VPN-related as the new laws went into effect on Monday.
Lawmakers in some regions, including the US, are well aware that people use VPNs in this way. In states such as Michigan and Wisconsin, laws are being proposed to limit or outright ban VPN use. Wisconsin’s proposed law would require adult sites to block VPN traffic, while Michigan’s proposal would ban VPN use entirely in the state.
There is also a proposal in England under consideration to ban VPN use by minors. That proposal is currently under review.
Technologies
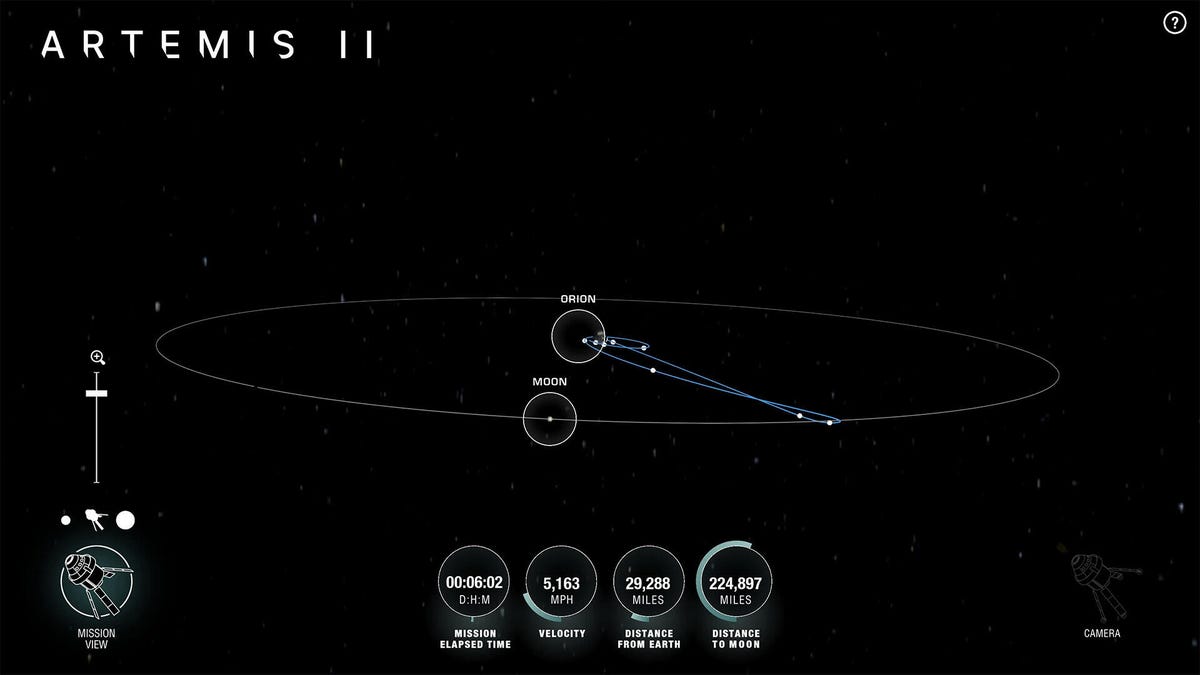
Here’s How to Track the Artemis II Mission in Real Time With NASA’s New Tool
The tool will let you track NASA’s modern lunar program during its 10-day flight around the moon and back again.
More than half a century after astronauts last left footprints on the lunar surface, humanity is preparing to return to the moon. The excitement surrounding NASA’s Apollo program once captivated the world, and now NASA hopes to rekindle that same sense of wonder with its modern lunar effort, the Artemis program.
NASA’s Artemis II launch is scheduled for the first week of April. It’ll be the first human mission to the moon since 1972, and it should be quite the achievement for the Artemis program. Now, NASA has released a new tool that lets the public track Artemis II in real time.
The Artemis program is NASA’s long-term effort to return humans to the moon and establish a sustained presence there for the first time since the Apollo program. The program aims to land astronauts near the lunar south pole, develop new technologies for long-term exploration and use the moon as a stepping stone for future missions to Mars.
The Artemis Real-time Orbit Website, dubbed AROW, is already available to the public, although there isn’t much to see since the launch is still a few weeks away. It’s also available directly from the NASA app if you’re using a mobile device. The site lets the public visualize data collected by sensors on Orion and sent to the Mission Control Center at NASA’s Johnson Space Center in Houston.
The website is simple to navigate. You’ll see a visual representation of Artemis II’s progress, including its speed, distance from Earth and distance to the moon. Mobile app users get all of the above, along with an extra augmented reality tracker that lets you point your phone at the sky and see where Artemis II is relative to your position on Earth. It works much like Google Star Map and other stargazing apps that use similar technology.
According to NASA, tracking will be available once the Orion capsule separates from the rocket’s upper stage, which is expected about 3 hours after the upcoming April launch. The site will then update its information in real time for the entire 10-day mission.
NASA is also making flight data available for download so that people interested in creating their own content, such as visualizations or tracking apps, can do so. The data will include all sorts of things, including state vectors, which are data that «describe precisely where Orion is located and how it moves.» That same data will be used by NASA to study Orion and make improvements for future Artemis missions.
An exact launch date for Artemis II hasn’t been set, but the agency plans on launching the mission no earlier than April 1. The launch was originally scheduled for February, but it was delayed multiple times due to a hydrogen leak and a helium flow issue. NASA says it has since fixed both issues.
Technologies
Today’s NYT Connections Hints, Answers and Help for March 10, #1003
Here are some hints and the answers for the NYT Connections puzzle for March 10, No. 1,003

Looking for the most recent Connections answers? Click here for today’s Connections hints, as well as our daily answers and hints for The New York Times Mini Crossword, Wordle, Connections: Sports Edition and Strands puzzles.
Today’s NYT Connections puzzle is a fun and diverse mix. If you know your US states, you’ll surely solve the blue category early. Read on for clues and today’s Connections answers.
The Times has a Connections Bot, like the one for Wordle. Go there after you play to receive a numeric score and to have the program analyze your answers. Players who are registered with the Times Games section can now nerd out by following their progress, including the number of puzzles completed, win rate, number of times they nabbed a perfect score and their win streak.
Read more: Hints, Tips and Strategies to Help You Win at NYT Connections Every Time
Hints for today’s Connections groups
Here are four hints for the groupings in today’s Connections puzzle, ranked from the easiest yellow group to the tough (and sometimes bizarre) purple group.
Yellow group hint: Think Julia Child.
Green group hint: Also, Bro and Sis.
Blue group hint: Minn. and Ore. are two others.
Purple group hint: Hit with your fist.
Answers for today’s Connections groups
Yellow group: Cook with dry heat.
Green group: Familial nicknames.
Blue group: US state abbreviations.
Purple group: Punch
Read more: Wordle Cheat Sheet: Here Are the Most Popular Letters Used in English Words
What are today’s Connections answers?
The yellow words in today’s Connections
The theme is cook with dry heat. The four answers are brown, roast, sear and toast.
The green words in today’s Connections
The theme is familial nicknames. The four answers are Cuz, Gram, Pop and Unc.
The blue words in today’s Connections
The theme is US state abbreviations. The four answers are Mass, Miss, Penn and Wash.
The purple words in today’s Connections
The theme is punch. The four answers are box, duke, slug and sock.
-
 Technologies3 года ago
Tech Companies Need to Be Held Accountable for Security, Experts Say
-
 Technologies3 года ago
Best Handheld Game Console in 2023
-
 Technologies3 года ago
Tighten Up Your VR Game With the Best Head Straps for Quest 2
-
 Technologies4 года ago
Black Friday 2021: The best deals on TVs, headphones, kitchenware, and more
-
 Technologies5 лет ago
Google to require vaccinations as Silicon Valley rethinks return-to-office policies
-
 Technologies5 лет ago
Verum, Wickr and Threema: next generation secured messengers
-
 Technologies4 года ago
Olivia Harlan Dekker for Verum Messenger
-
 Technologies4 года ago
iPhone 13 event: How to watch Apple’s big announcement tomorrow