Technologies
The Best MP3 Players for 2023
Take your music anywhere without having to use your phone. Here are our picks for the best MP3 player.
Standalone MP3 players dominated pop culture for a long time, but in 2023 almost no one needs one. Any iPhone or Android phone is an audio player that works with subscription music apps like Spotify, Apple Music, Tidal, Amazon Music and YouTube Music. You pay your $5 to $10 a month, and you get access to nearly every popular song ever recorded. And the tracks are downloadable, too, so you can listen to your music even when you leave a Wi-Fi or cellular coverage area. It’s quick, easy and convenient. What’s not to like?
«A lot,» I can hear some people saying. Maybe you’ve got one too many subscriptions already, so why pay for one more when you already have a music library of thousands of MP3 files sitting on your hard drive? Or maybe you’ve meticulously crafted iTunes playlists, like mixtapes of old, that you don’t want to re-create or transfer to another service. Maybe you have rare, one-off live tracks that don’t exist on mainstream services. (Phish fans, I’m looking at you.)
Now, truth be told, if any of that applies to you, you still don’t need an MP3 player — your iPhone can still sync music files from iTunes (on Windows) or the Apple Music app (on Mac), and it probably has more storage space than your old iPod ever did. Android phones, too, can play whatever music files you can load them up with. But if you want a dedicated device for your music — or, maybe, a parentally curated set of songs to give to a kid who’s not ready for a phone — there are still MP3 device options out there. They’re not all great, and they generally come with some caveats. But if you’ve gotten this far, here’s what I can recommend, more than two decades after the iPod was first released.
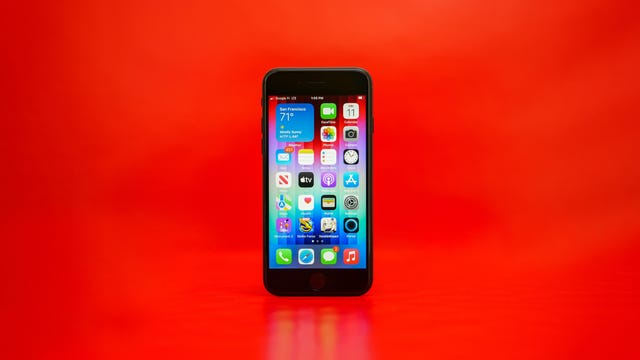
The iPod Touch was the last dedicated music player in Apple’s lineup, but it was officially discontinued in May 2022. You can still find used models out there, but don’t expect them to be supported for much longer.
What to do instead? Get a used iPhone, or a new iPhone SE — and just use it on Wi-Fi. The latter will cost you about $429 all-in (for 64GB of storage), but you’ll get a device that can run the latest version of iOS, and it can pull music from iTunes (on Windows) or Apple Music (on the Mac). It works seamlessly with Bluetooth headphones and speakers, but you’ll need a pesky Lightning adapter to use old-school headphones. And, because it’s got the App Store, you can also opt for alternate services like Spotify, Amazon Music, YouTube and the like (so long as you can access a Wi-Fi hotspot), in addition to or instead of the Apple Music app.
Yes, this is way too much to pay for a «music player,» in my book. But it’s the most capable and flexible option here, especially for those who are already in the Apple services universe — or refuse to leave their iTunes-based MP3 library. It’s also a nice fallback portable MP3 player option for kids if you don’t want to spend up for an iPad, which starts at around $300 and isn’t pocketable.
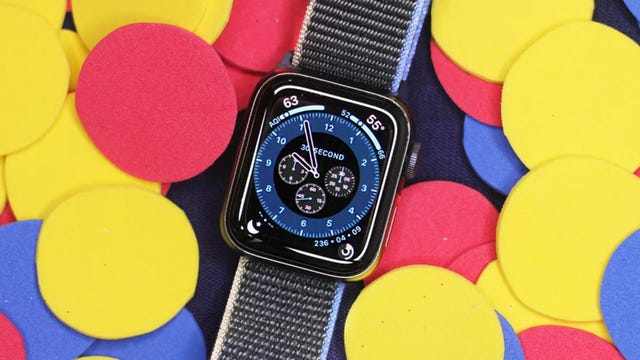
Once upon a time, people strapped iPod Nanos to their wrists and called it an Apple Watch of sorts.
Nowadays the real Apple Watch can act as a sorta-kinda iPod, at least for Apple Music subscribers. Just sync some playlists to the Watch, and you can enjoy digital music (not to mention podcasts) on a set of wireless headphones, even if the iPhone is nowhere nearby. Get an Apple Watch SE for less than $250 for basic music playback, or go for an Apple Watch Series 8 or Apple Watch Ultra if you want more non-music features. Note that recent Apple Watch SE sales have seen the prices of the 40mm version drop to as low as $200 and the larger 44mm model dip below $230.
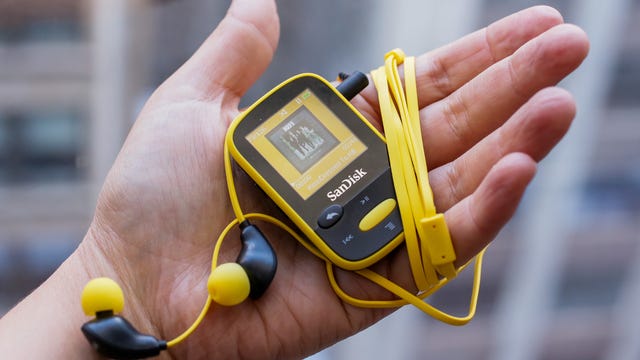
These days, you can still get very basic music players on Amazon, but they’re nearly all from no-name China brands. (We tried one like this, and it was fine, but nothing special.) In the (distant) past, the tiny SanDisk Clip family of players were a serviceable option for basic music playback (so long as you’re well versed in the old school drag-and-drop method of file transfer). But some Amazon reviewers have criticized the later iteration of that model — the Clip Sport Plus — saying that its Bluetooth connection wasn’t up to snuff. If you want to go this route, you might want to stick with wired headphones, which will also enable FM radio playback.
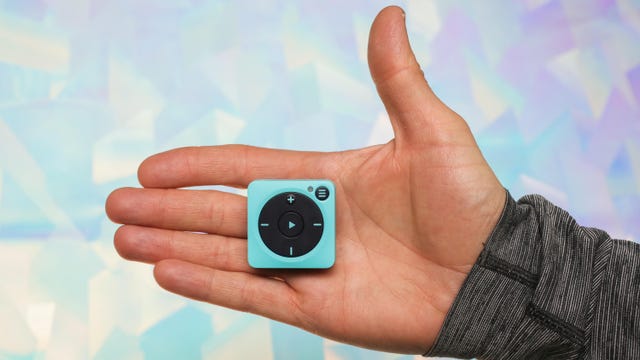
The Mighty Vibe is the closest modern equivalent to the iPod Shuffle, the screenless iPod that was beloved by runners for weighing next to nothing and just spooling off songs from their favorite playlist. (It’s also a great gadget loophole for sleepaway camps with «no screen» rules.) The catch is that this model only works with Spotify Premium and (thanks to a recent firmware update) Amazon Music, both of which can be synced wirelessly.
The Vibe can store upwards of 1,000 songs in its music library, and — unlike the old Shuffle — it supports wireless and wired headphones. But it charges through the headphone jack via a proprietary cable, rather than more ubiquitous micro-USB or USB-C connectors. The 5-hour battery life is so-so, as is the price tag over $100, which feels higher than what you want to pay for this MP3 device product in an era of $30 wireless headphones and $200 smart phones.
Other MP3 players
Yes, the products above are really the only ones I can recommend in this category with any degree of enthusiasm. But they aren’t the only options. If you’re looking for a bargain basement option (under $50), a serious high-end alternative (starting at $350 and going to four figures) or some interesting workarounds, read on.
Swim-friendly option: Aftershockz OpenSwim
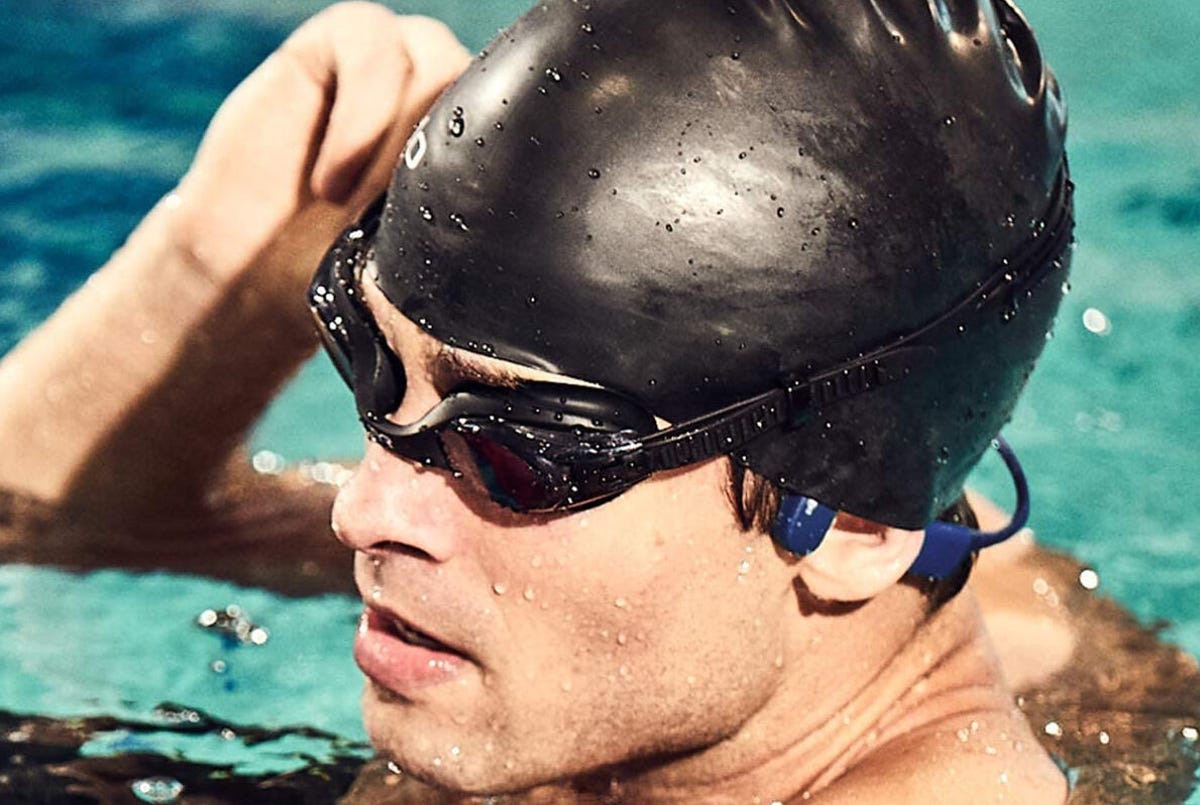
This 4GB «player in a headphone» model uses Aftershockz’s patented bone-conduction technology. It’s also fully waterproof, and retails for about $150. (Note that CNET hasn’t tested these hands-on.)
The budget hack: Any old smartphone
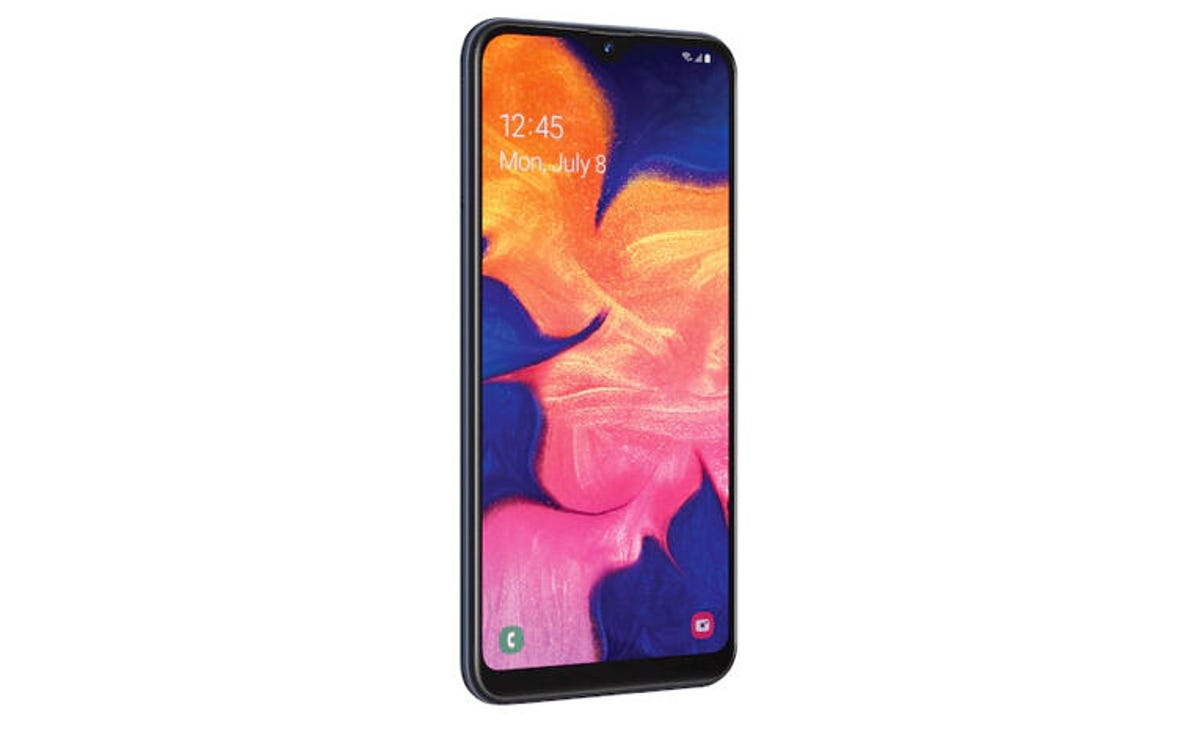
If you’ve got an old phone — or you buy a new one without service — you’ll have access to the full realm of app-based music services, and any music files you care to upload. Something like the $160-ish Samsung Galaxy A03S (shown above) fits the bill nicely, since you can drop in a MicroSD card that you’ve preloaded with tunes.
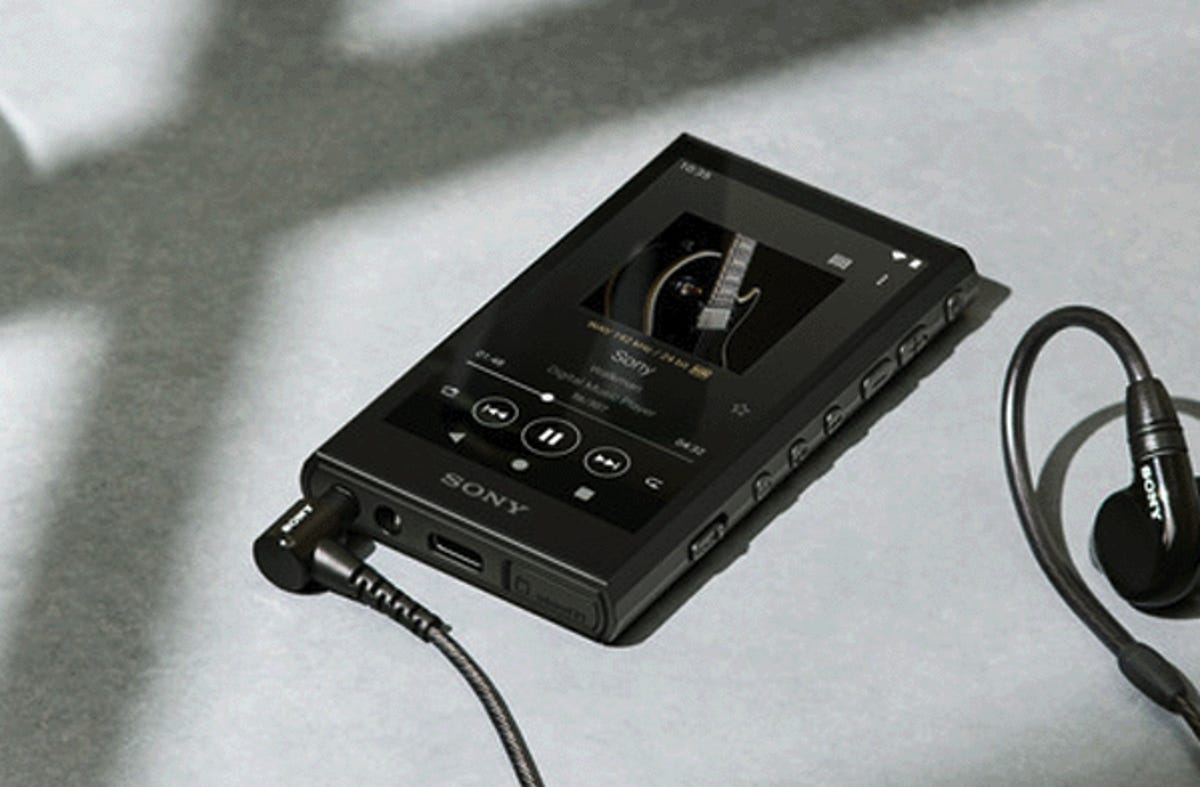
High-end options: Sony Walkman, Astell & Kern

Sony is still making new Walkman models.
Audiophiles have long looked down on digital music because the sound quality was notably inferior for golden-eared listeners with distinguishing tastes. But the development of lossless file formats (such as FLAC) and cheap ample multigigabyte storage have made portable high-fidelity music a reality.
At this point, there are really only two major players in the high-end portable music space: Astell & Kern and Sony (where the Walkman brand still lives on). We’ve used earlier versions of each brand, but not the current models.
- Sony Walkman music players line starts with the new-for-2023 (really!) NW-A306, arriving soon for $348.
- Astell & Kern players start at $1,299, and are strictly for true enthusiasts.
If you’re the sort of person who has hard drives full of uncompressed music audio files — and can hear the difference between that and comparatively low-resolution MP3 and AAC files — then, by all means, pair up one of those players with your wired headphone of choice.
That said, nearly all of the streaming music services now offer lossless or high bitrate options — that’s nearly all the big players, from Tidal and Qobuz to Amazon and Apple. (Spotify HiFi, weirdly, remains a no-show.)
If you like what you hear, consider upgrading to a decent headphone DAC (that’s «digital to analog converter») like the Audiofly Dragonfly and a serious wired headphone. Then you’ll have a solid audiophile option that’s good for the road, without the need for a standalone music player.
Music lockers: YouTube Music and iTunes Match
If you’ve got a digital music collection that includes one-offs and live tracks that aren’t available on the mainstream services, you can upload them to online services, where they can live alongside subscription tracks and be shared among multiple devices (including smart speakers).
YouTube Music, formerly known as Google Play Music, offers this service at no additional cost for up to 100,000 tracks.
Apple users can opt for iTunes Match, which lets you upload your own digital music to live in tandem with Apple Music tracks. Once available for $24 a year, the service now appears to be bundled in as part of an Apple Music or Apple One subscription.
If you opt for either of these options, make sure you keep a local backup of your files, just in case these services go away.
Note that Amazon shuttered its «MP3 locker» service in 2018.
More audio recommendations
Technologies
A Humanoid Robot Visits the White House to Push AI for Teaching Kids
First lady Melania Trump shares the spotlight with a Figure 03 robot to promote the use of artificial intelligence in education.
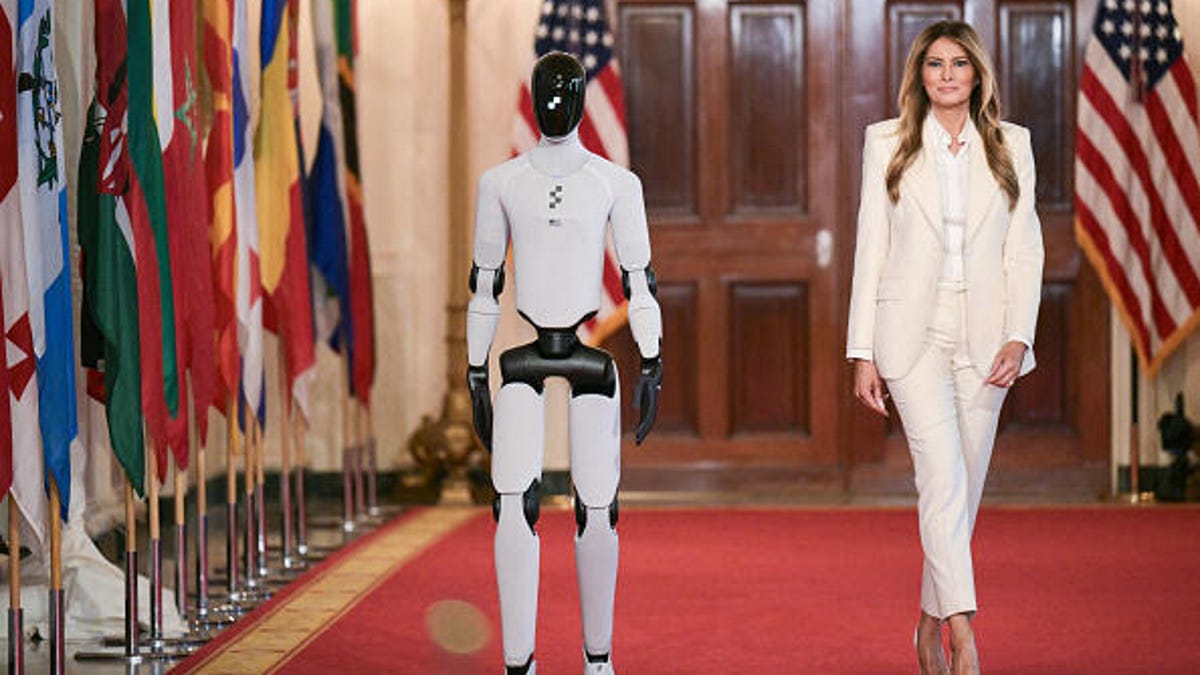
An unexpected guest escorted Melania Trump at the Fostering the Future Together Global Coalition Summit on Wednesday: a walking, talking Figure 03 humanoid robot.
During the event, the first lady pitched a future where AI-powered humanoid robots — presented as an idealized educator named «Plato» — provide students with personalized and instant access to human knowledge, including philosophy and art.
The Figure 03 robot is made by Silicon Valley-based robotics company Figure AI, which introduced its third-generation humanoid robot in October last year. The Figure 03 robot costs around $25,000, according to Forbes.
Figure 03 was designed for people to use in their homes, with demo videos showing it folding laundry, lifting eggs from a carton, using a washing machine and delivering drinks to its owners lounging by the pool. It was also shown in corporate use cases as a receptionist and a package deliverer. Using a proprietary AI engine called Helix, it can autonomously perform these tasks and respond to your voice commands.
At the White House, the humanoid robot walked slowly down the red carpet to deliver opening remarks for the tech summit.
«I’m grateful to be part of this historic movement to empower children with technology and education,» the Figure 03 robot said. It then said «welcome» in various languages.
The first lady later said that AI-powered humanoid robots could be placed in children’s homes as an aid to their education to «boost analytic skills and problem solving and adapt in real time to a student’s pace, prior knowledge and even emotional state.»
Promoting AI in education
The two-day summit is hosting leaders from 45 nations and 28 technology organizations, and is intended to «empower children through education and technology,» according to a White House statement. Guests included representatives from tech giants such as Google, OpenAI, and Microsoft and the AI data analytics company Palantir.
The summit is part of the first lady’s Be Best: Fostering the Future initiative, which aims to help children learn using advanced technology. It was introduced in 2018 as an awareness campaign aimed at combating cyberbullying and helping children affected by the opioid crisis.
US Education Secretary Linda McMahon spoke about AI being one of the Department of Education’s main priorities on the first day of the summit.
«If we’re able to scale these resources effectively by investing in AI infrastructure and training, we can offer expert instructions across countless fields, to hire volumes of people at a fraction of the cost,» McMahon said Tuesday at a roundtable meeting.
According to McMahon, the Department of Education has already dedicated millions of dollars in grants to support the use of AI in schools.
The event follows criticism of the Trump administration’s 2025 executive order to dismantle the Department of Education. While the Department of Education hasn’t been officially abolished, it has undergone significant policy changes, funding cuts and workforce reductions.
The introduction of a humanoid robot at the summit sparked significant backlash among many who are wary of the technology’s role in the classroom. Critics took to social media to voice concerns that these machines could eventually replace teachers, stripping the education system of essential human connection, and leading to increased layoffs and cost-cutting.
On one Huffington Post Instagram post featuring the robot, commenters expressed deep skepticism, with one user sarcastically noting, «Nice, getting rid of educators in favor of a robot,» while another flatly rejected the concept, stating, «No, I don’t want to imagine a world with emotionless robots educating our children.»
The White House did not immediately respond to a request for comment.
Technologies
Nintendo’s $20 Switch 2 Upgrade for Super Mario Wonder Is Worth It for the Extras
Commentary: Super Mario Bros. Wonder’s Bellabel Park DLC is here this week, but it’s more about lots of chaotic multiplayer minigames than new courses.
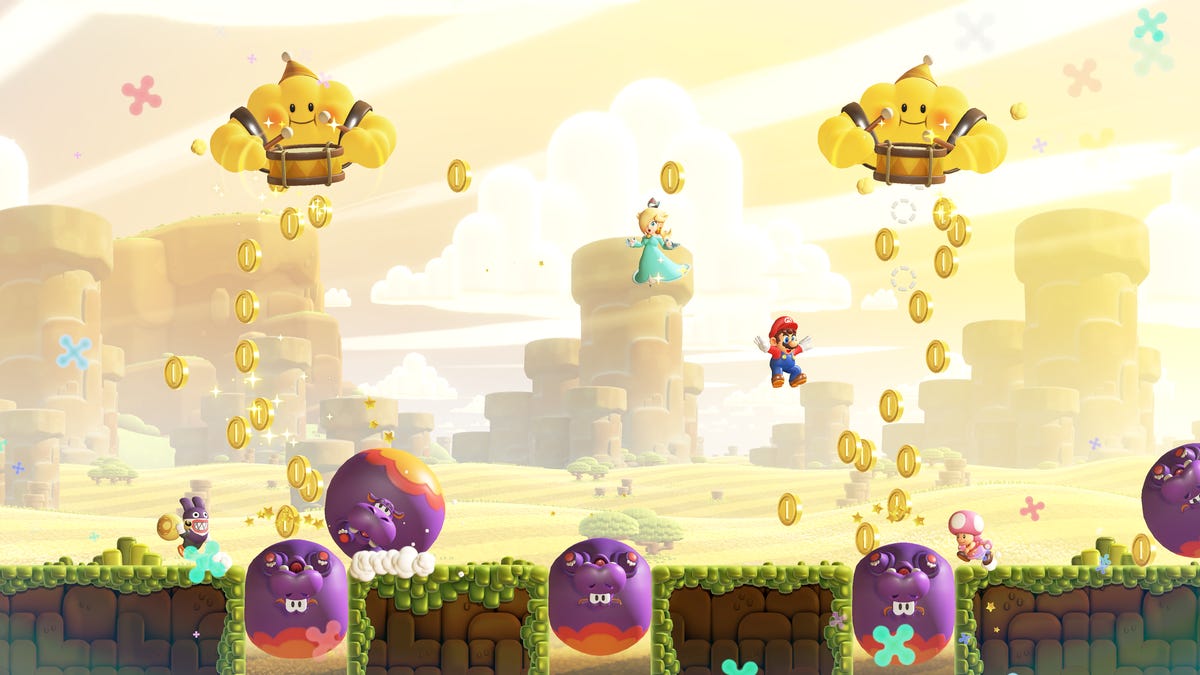
I want a new Super Mario Bros. Switch 2 game as much as anyone, but almost a year into the console’s first year, it hasn’t happened yet. Mario Kart? Mario Tennis? Mario Party? Yes. New Yoshi game? That’s happening soon, too. And now, we have the next closest thing: The wonderful 2023 Super Mario Bros. Wonder has a Switch 2 downloadable-content pack for $20 that’s, well, sort of a new Mario game, just a week before the Super Mario Galaxy movie arrives in theaters.
I’ve been playing it for the past week, and it’s worth the upgrade if you like multiplayer Mario. If not, well, you might consider it anyway.
The awkwardly named «Super Mario Bros. Wonder — Nintendo Switch 2 Edition + Meetup in Bellabel Park» is an add-on to Wonder, but it’s really just focused on building out a whole bunch of multiplayer party modes. The new course variants and minigame challenges, while welcome, require online multiplayer or local multiplayer play to work. For most of this new Switch 2 update, you can’t play offline on your own.
The multiplayer games cover dozens of challenges and themes — some turning everyone into bouncy balls, others making everyone rush to collect the most coins. You can throw up to four players locally on the Switch 2 at home or up to 12 players online at once, and it gets busy fast. I can see screaming breaking out with kids.
I played an hour or so of multiplayer sessions, and it was fun. But I haven’t gotten to play with lots of others online yet other than that. Still, it does feel sort of like Mario Party Super Mario Style, as opposed to Super Mario Bros. game extensions.
The DLC does have some extras you can still enjoy on your own. Seven new miniboss stages have been added into the game, featuring all of the Koopalings to take on. They’re the extended universe of Mario enemies, and each of the levels has the miniboss use a strange new power to melt the world in clever ways.
A new Toad Brigade Training Camp mode also offers up dozens of little challenge stages to beat, all remixes of existing Wonder levels. Some involve surviving without touching enemies or coins; some you have to defeat all enemies or collect all coins before time runs out. They’re addictive and hard, and I’m glad for them existing.
Nintendo also tried to add some fun extras: Bellabel park has lots of flowers you can collect by watering plants with «Bellabel water» you collect by completing tasks. And you can decorate parts of the park. It’s sort of neither here nor there for me, though, because I come to Mario platformer games to play fun levels, not decorate gardens. Pokemon Pokopia is the place for that.
Rosalina and a Luma Star are extra characters you can play with, but Rosalina doesn’t do anything truly new and the Luma Star is a co-op option. There’s also a weird Flower power-up now that turns you into a walking flowerpot, throwing flowers upward to attack enemies or hit blocks. It was OK. It’s not my favorite new extra.
Maybe that’s what feels missing here: Wonder threw all sorts of wildcards out into the game, from new enemies to strange Wonder Seeds that transformed levels. Bellabel Park feels more like a multiplayer-focused remix than a bunch of new single-player whimsy.
I like the multiplayer games on tap more than I liked the Switch 2 add-on for Mario Party Jamboree. They’re probably worth it if you’re a Switch 2 owner with a big family or lots of friends who want to play.
And even though I appreciate the resolution boost to the graphics, the Switch 2 graphics upgrade is hard to spot since the game’s «older» graphics have a retro look that still looked great before the upgrade (to me, at least).
What I really want, of course, is a truly new Mario game. Who doesn’t? That’s not on the table yet. But maybe, just maybe, Wonder’s Switch 2 pack is a little appetizer before that news eventually comes. But as revamped Switch 2 game editions go, Wonder’s extras are the best yet and turn this game into a truly multiplayer-rich bunch of fun.
Technologies
Verum Finance — the future of digital payments
Verum Finance — the future of digital payments
Virtual Verum Finance cards can be linked to Apple Pay and Google Pay, giving users seamless access to in-store payments, online shopping, hotel bookings, flight purchases, and more worldwide.
The cards work globally, enabling payments without geographic limitations while providing a high level of security and full control directly within the app.
Issuing a card takes just a few minutes and does not require switching to third-party services — the entire process is handled within Verum Messenger.
Users get a unified solution for communication and finance: from messaging to managing payments and digital assets in one application.
Download Verum Messenger, get your Verum Finance card, and start using it today.
-
 Technologies3 года ago
Tech Companies Need to Be Held Accountable for Security, Experts Say
-
 Technologies3 года ago
Best Handheld Game Console in 2023
-
 Technologies3 года ago
Tighten Up Your VR Game With the Best Head Straps for Quest 2
-
 Technologies4 года ago
Black Friday 2021: The best deals on TVs, headphones, kitchenware, and more
-
 Technologies5 лет ago
Google to require vaccinations as Silicon Valley rethinks return-to-office policies
-
 Technologies5 лет ago
Verum, Wickr and Threema: next generation secured messengers
-
 Technologies4 года ago
Olivia Harlan Dekker for Verum Messenger
-
 Technologies4 года ago
The number of Сrypto Bank customers increased by 10% in five days