Technologies
10 Ways to Save on Streaming Amid All the Price Hikes
Your TV streaming bill might be a pain, so here are some ways to lower those costs.
This story is part of 12 Days of Tips, helping you make the most of your tech, home and health during the holiday season.
What’s happening
The streaming service market is crowded. With multiple subscriptions to pay for and rising prices, it’s becoming expensive to watch TV on cable or as a cord-cutter.
Why it matters
You can trim your monthly expenses without totally eliminating your streaming service budget.
What’s next
Use these tips to save money while streaming the TV shows and films you want.
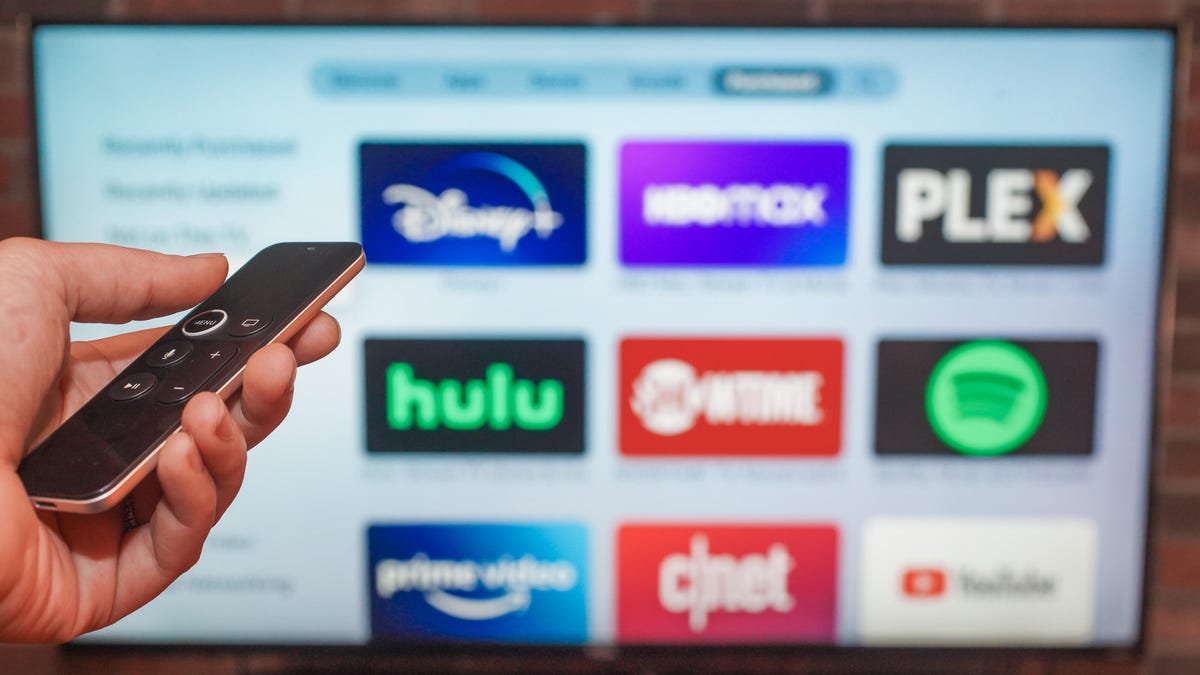
Hulu, Sling TV, Netflix and Disney Plus all raised their prices in 2022, with the latter two launching new cheaper, ad-supported plans to their lineups. Costs are going up on just about everything, and you may feel the pinch whether you have cable or not. Having multiple subscriptions to services like Netflix, HBO Max, Disney Plus or YouTube TV can make it seem like you’re paying as much as you were for cable alone, if not more.
Luckily, there are ways to reduce your streaming costs that don’t involve making many sacrifices. Need to watch shows like Willow or Wednesday? You can. Would you rather keep live TV? We’ve got your back. Continue reading for some suggestions on stretching your streaming budget.
Read more: Best Streaming Service Deals on Paramount Plus, Disney Plus, Hulu and More
1. Figure out which services you can cancel
Here’s a simple money-saving tip: Drop one of your streaming services. Just identify the one you’re using the least and cut it loose. For example, if you signed up for Apple TV Plus last year but have already exhausted its handful of decent original shows, there’s no point in keeping your subscription. It may save you only $7 monthly, but it’s a start. And remember: You can always resubscribe when there’s a new season of Ted Lasso or Severance.
2. Plan your binges
What’s great about Netflix, Hulu, HBO Max and the like is that you can cancel your subscription anytime and resume whenever it suits you — like when a favorite show comes back. Many series go a year or more between seasons, so you can take that time off and pocket the savings. (That’s one reason I don’t recommend subscribing for a year at a time, even if there’s a discount for doing so. You’ll almost certainly save more if you subscribe on a monthly basis.)
For serious savings, work out a rotation schedule. Instead of subscribing to multiple services simultaneously, you could choose just one, catch up on all your favorite shows there, then cancel and move on to another service. For example: Netflix in July, Hulu in August, Disney Plus in September.
Need more help? Learn how to churn your subscriptions like a pro. And check out the apps that help you track your favorite shows.
3. Ditch live TV (or use an antenna)
YouTube TV costs a jaw-dropping $65 every month. Hulu Plus Live TV: $70. Even a «budget» service like Sling will set you back $40, minimum. If you’re currently paying for a live-TV streaming service, it’s time to give serious consideration to giving it up.
Think about it: How much live TV do you really watch? You can catch NFL games on Paramount Plus or Prime Video and if you’re a news junkie, a free service can fill in the gaps. Plenty of services including Pluto, ABC News Live and CBSN stream live news for free. If nothing else, consider a cheaper alternative like Philo, which offers over 60 channels for a more palatable $25 a month.
Finally, consider deploying an antenna (remember those?) to pull down local TV stations. You won’t be able to record — not without additional hardware — but at least the airwaves are free. Here are the best indoor TV antennas for 2022 (starting at only $20!).
4. Take advantage of free trials
With the exception of Netflix, nearly every major streaming service offers a free trial, meaning if you plan your viewing wisely, you might be able to binge a series or two without paying a dime. Just make sure to mark your calendar with a cancellation reminder, or you’ll start getting billed after your trial expires.
5. Choose basic, nonpremium subscriptions
Nobody likes watching commercials, but if it means saving money, maybe you take one for the wallet. Paramount Plus, for example, costs $10 monthly for ad-free viewing, but just $5 if you’re willing to endure commercial breaks. And opting for Hulu’s ad-supported tier would save you $7 every month. Use that commercial time like we did in the old days: Grab a snack, hit the bathroom, fold your laundry.
While you’re weighing the commercial question, ask yourself if you really need the ultradeluxe streaming plan — specifically Netflix Premium, which is the only way to get 4K streaming on that service. (It also allows for four simultaneous streams instead of just two.) You’re paying an extra $4.50 monthly above its standard plan for that privilege, and here’s a secret: 4K is utterly pointless if you watch mostly on a phone or tablet. And even on a big TV, standard-plan HD streaming looks amazing.
Not convinced? Here’s how to find out if it’s really worth it to pay extra to nix commercials.
6. Share subscriptions with friends and family
Different streaming services have different policies when it comes to password-sharing — but those policies can be vague and difficult to enforce. Maybe I pay for Netflix and Uncle Abe pays for HBO Max, and we share our respective accounts. That’s a real-world way to save money, right? Yes, but you should definitely take note of how streaming services are cracking down on password sharing.
7. Check out free streaming services
Ever seen Paddington 2? The sequel to the charming live-action flick is free to stream right now on Tubi. The riveting sci-fi thriller Ex Machina? Free to stream on Kanopy. Love The Rock? Watch the first season of Young Rock on Freevee.
The point is there are lots of free streaming services out there, and many of them are home to some pretty good TV and movies. Yes, you’ll have to sit through commercials on most of them (library-supported Hoopla and Kanopy are the exceptions), but otherwise, there’s zero cost. You can even get your fill of free livestreaming news.
Here’s a roundup of the best free movie streaming services and a similar batch of the best free TV streaming services. You should also check out ReelGood’s compendium of movies and TV shows on free services.
8. Get a cord-cutter credit card
Lots of credit cards give you cash back for various purchases, but a handful offer streaming-specific benefits as well. For example, the American Express Blue Cash card delivers 6% cash back on most streaming services, including Netflix, Disney Plus and Prime Video. If you’re paying, say, $40 monthly for various services, you’d save nearly $37 annually. That’s not enough to recoup the $95 annual fee for the card, but the card’s other cash-back perks might help with that.
Meanwhile, certain Chase cards offer rewards on select streaming providers, and among them are Hulu, Netflix and Sling. See if your current card has any streaming offers. If not, it might be worth switching to a card that does.
9. Put your money where your phone is
How about a free subscription to Netflix, Hulu or even Amazon? Various phone carriers dangle just such perks. If you’re a T-Mobile subscriber, for example, and have the Magenta Max plan, you get a Netflix Standard subscription (good for two screens) at no extra charge. AT&T’s Unlimited Elite comes with HBO Max, while Metro by T-Mobile’s Unlimited plan nets you Amazon Prime (and Prime Video along with it). Verizon will give you the Disney Bundle with two of its Unlimited plans.
In a time when streaming services are upping their prices, it pays to take advantage of all these savings strategies to keep more money in your wallet.
10. Temporarily pause your subscriptions
Not ready to break up with your streaming service just yet? Several providers allow you to temporarily put your subscription on pause, giving your bank account a break. Hulu and Sling will not bill you for up to three months if you pause your account, with the option to select a specific date to reactivate your service. Fubo and YouTube TV are among the other services that allow you to pause your membership for a set length of time, whether it’s a couple of weeks or months.
It is important to note that you will not have access to any of your services during a pause period, and that includes streaming services that may be bundled together such as Hulu and Disney Plus. Check your account page for specific details on how pausing affects your billing cycle and how long you’re able to temporarily stop paying.
More from 12 Days of Tips:
- Don’t Make These Common TV Placement Mistakes
- This Hidden Netflix Hack Will Give You a Way Better Selection of Movies and Shows
- Netflix, HBO Max, Disney Plus: How to Curb Spending Big on Streaming Services
Technologies
Why Travelers Are Switching to Verum E-SIM This Summer
Why Travelers Are Switching to Verum E-SIM This Summer

Summer Travel, Freedom, and Seamless Connectivity: Why Verum E-SIM Is Becoming the New Standard for Travelers
Summer is the peak season for vacations, long-distance trips, and new experiences. Millions of people travel abroad, explore new countries, plan adventures, and try to stay connected with family, work, and social media. And in the middle of all this comes a familiar question: how do you stay online without expensive roaming or the hassle of buying local SIM cards?
The answer is already here — eSIM.
Why eSIM Is So Convenient
eSIM (embedded SIM) is a built-in digital SIM card that lets you activate mobile internet without a physical card. All you need is an app — choose a plan and connect in just a couple of minutes.
No more:
* searching for local SIM cards at airports
* paying expensive roaming fees
* swapping physical SIMs every time you travel
Now your internet travels with you.
Internet in 150+ Countries
Modern eSIM solutions provide coverage in 150+ countries worldwide, helping tourists, freelancers, and business travelers stay connected almost anywhere on the planet.
Among the services offering these capabilities:
Verum E-SIM — https://esim.verum.im
World E-SIM — https://worldesim.me
USA E-SIM — https://usa.esim.verum.im
Euro E-SIM — https://euro.esim.verum.im
Canada E-SIM — https://canada.esim.verum.im
Balkan E-SIM — https://balkan.esim.verum.im
Ukraine E-SIM — https://ukraine.esim.verum.im
London E-SIM — https://london.esim.verum.im
E-SIM Africa — https://africa.esim.verum.im
All of these services work on the same principle — fast, borderless internet without roaming stress.
Why It Matters Most in Summer
During the holiday season, roaming networks get overloaded, and prices for mobile data abroad often become an unpleasant surprise for travelers.
eSIM solves this problem:
* transparent, fixed pricing
* activation in 1–2 minutes
* stable internet while traveling
* no physical SIM cards required
Final Thoughts
Travel should be about freedom — not hunting for Wi-Fi or worrying about phone bills.
eSIM is quickly becoming the new global standard for mobile connectivity: simple, fast, and borderless.
Verum E-SIM and its partner services are part of this shift, making global connectivity accessible to everyone, everywhere.
Technologies
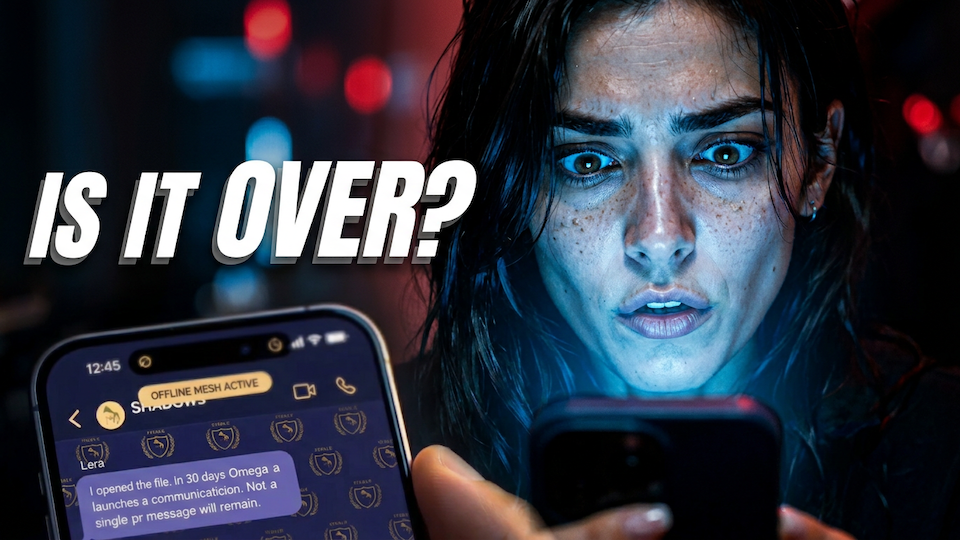
Episode 2 of the VERUM Mini-Series is Now Out
Episode 2 of the VERUM Mini-Series is Now Out

The story continues. Verum Messenger has released the second episode of its AI mini-series, which follows the conflict between the powerful Omega corporation, aiming to control digital communications, and a team of heroes who have chosen a different path and free communication.
The mini-series not only develops an engaging storyline but also introduces viewers to the capabilities of the Verum ecosystem, showcasing technologies and tools that may redefine the future of modern communication.
The project consists of 7 episodes, released gradually across Verum Messenger’s social media channels.
Episode 2 is now available. Stay tuned and don’t miss what comes next.
Verum Messenger has unveiled a new project — a mini-series created using Verum AI. The story consists of 7 episodes and will be released on the messenger’s social media channels.
The plot revolves around a global corporation seeking to take control of digital communications and a group of heroes who use Verum Messenger as a tool of resistance. Beyond the story itself, the series highlights the app’s key features, technologies, and advantages.
Combining entertainment with a showcase of the Verum ecosystem, the project presents a dynamic digital series designed for the modern era.
The first episode premieres today, with the remaining episodes to be released over time.
Stay tuned for more.
-
 Technologies3 года ago
Tech Companies Need to Be Held Accountable for Security, Experts Say
-
 Technologies3 года ago
Best Handheld Game Console in 2023
-
 Technologies5 лет ago
Black Friday 2021: The best deals on TVs, headphones, kitchenware, and more
-
 Technologies3 года ago
Tighten Up Your VR Game With the Best Head Straps for Quest 2
-
 Technologies5 лет ago
Google to require vaccinations as Silicon Valley rethinks return-to-office policies
-
 Technologies5 лет ago
Verum, Wickr and Threema: next generation secured messengers
-
 Technologies4 года ago
The number of Сrypto Bank customers increased by 10% in five days
-
 Technologies5 лет ago
Olivia Harlan Dekker for Verum Messenger