Technologies
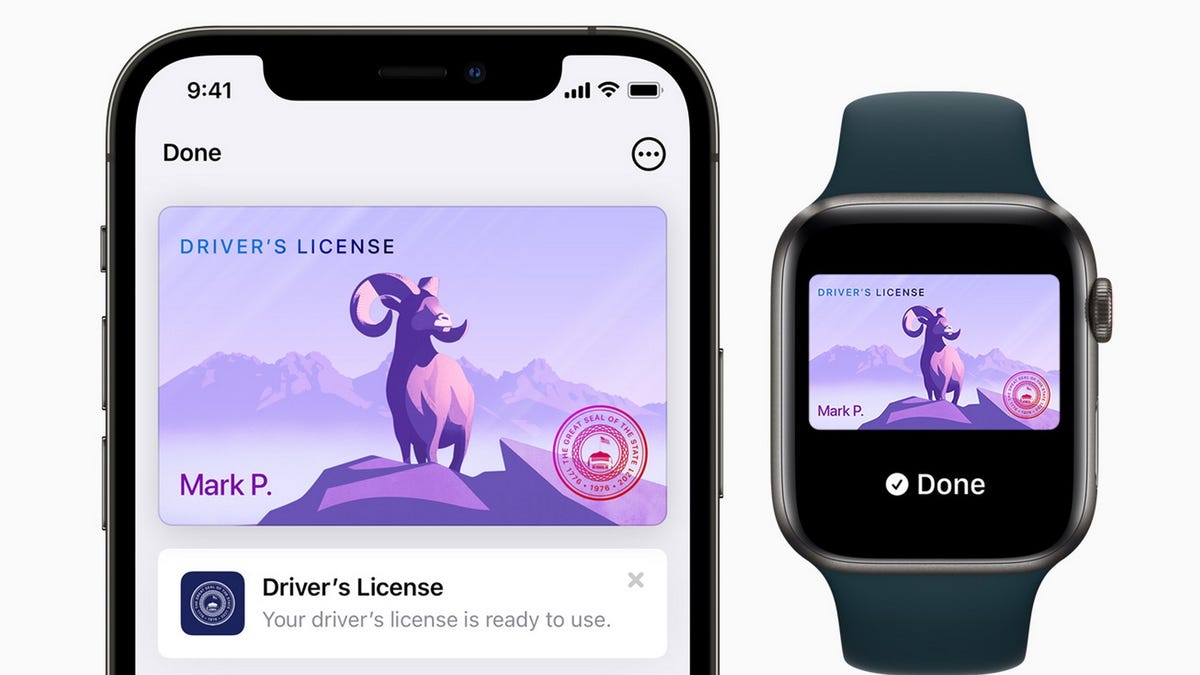
How to Upload Your Driver’s License to Your iPhone
Residents of select states can show TSA a digital version of their license stored in their Apple Wallet.
If you’re traveling over the holidays, there’s a lot to keep track of as you race through the airport: Your tickets, your boarding pass, your luggage, your loved ones — and, of course, your ID.
Almost all airlines let you use a digital version of your boarding pass to board, but now some states are allowing residents to keep their driver’s license or other recognized identification in their Apple Wallet, letting them just flash their iPhones — or Apple Watch — rather than root through their pocketbooks for their ID.
Apple announced the initiative in 2021, building the technology into iOS 15 for iPhone.
«The addition of driver’s licenses and state IDs to Apple Wallet is an important step in our vision of replacing the physical wallet with a secure and easy-to-use mobile wallet,» Jennifer Bailey, vice president of Apple Pay and Apple Wallet, said in a statement at the time.
It’s not quite a universal game-changer yet: While 12 states have committed to allowing digital IDs, only three have officially started accepting them.
And while the airport you depart from might accept a driver’s license on your Apple Watch, you might not be extended the same courtesy on the return trip.
But the Transportation Security Administration (TSA) is already supporting the technology at select airport security checkpoints at participating airports.
«Digital identity has the ability to strengthen airport security and enhance the passenger experience by reducing touchpoints, providing greater privacy, and verifying IDs more accurately,» the agency said in a statement. So it’s really a question of when, not if the option will become standard nationwide.
Here’s what you need to know about putting your driver’s license in your Apple Wallet, including how to do it and which states recognize digital IDs.
Read On: Homeland Security Postpones Deadline for Real ID at Airports
How do I add my driver’s license to my Apple Wallet?
Adding a driver’s license or other state ID is similar to how you add new credit cards to your Apple Wallet.
First, tap the «+» button at the top of the screen in Wallet. (If you have an Apple Watch paired to your iPhone, it will ask you about adding your license there, as well.)
You’ll then scan your physical driver’s license with your iPhone’s camera and take a selfie, «which will be securely provided to the issuing state for verification,» according to Apple.
You’ll also be asked to complete a series of facial and head movements «as an additional security step.»
Once your ID has been verified by the state that issued it, it will be added to your Wallet.
To add your license or ID to Apple Wallet, it will need to be issued from a participating state. In addition, you’ll need:
- An iPhone 8 or later, or an Apple Watch Series 4 or later, with the latest version of iOS or WatchOS
- Face ID or Touch ID turned on
- An Apple ID with two-factor authentication turned on
- Your device region set to the US
Also, only passengers with TSA PreCheck on their boarding pass are eligible to flash digital licenses, according to the TSA website, though the agency said it plans to add the option for other passengers in the future.
Only one license or ID can be added to an iPhone and paired Apple Watch at a time.
Which states accept a digital driver’s license on an iPhone?
Apple initially announced in 2021 that eight states were participating in the program, then bumped the number to 12 this year. But those are states committed to accepting Apple Wallet IDs, not that currently do.
Only Arizona, Colorado and Maryland currently support the digital identification feature — and only at select security checkpoints at these airports:
- Phoenix Sky Harbor Airport
- Baltimore/Washington International Thurgood Marshall Airport
- Ronald Reagan Washington National Airport
Connecticut, Georgia, Hawaii, Iowa, Kentucky, Mississippi, Ohio, Oklahoma and Utah have all committed to supporting the initiative, as has Puerto Rico, though specific timetables have not been announced.
Other states are expected to join this roster soon: Last year Bailey said Apple was «already in discussions with many more states.»
In November, the South Carolina Department of Motor Vehicles said it was «exploring» the digital ID option.
«There is a proviso that created a study committee on the idea and they are still undergoing research,» spokeswoman Maranda Williams told The State, a Columbia, South Carolina, news outlet.
Separate from Apple’s efforts, some states allow residents to upload their driver’s licenses to their phones through state-operated apps, like Louisiana’s LA Wallet. But these are for driving and age verification purposes and are not accepted by TSA yet.
How do I use a license stored in my Apple Wallet at TSA?
To present your digital ID, tap your iPhone or Apple Watch on the identity reader at the security checkpoint.
You’ll then be prompted to authenticate your identification with Face ID or Touch ID.
If it’s successful, a checkmark should appear on the screen.
According to Apple, «you don’t need to unlock, show or hand over your device [to a TSA agent].»
Is this technology secure?
According to Apple, it is. A statement on the Apple Support website says the program uses the same privacy and security features already in the iPhone and Apple Watch to prevent tampering and theft.
«Your driver’s license or state ID data is encrypted,» it said. «Neither the state issuing authority nor Apple can see when and where you use your license or ID, and biometric authentication using Face ID and Touch ID helps make sure that only you can view and use your license or ID.»
If my state accepts digital IDs, do I still need my physical license at the airport?
Yes. The program is still in its infancy, and there’s no guarantee the TSA agent you encounter will be able to accept a driver’s license on your Apple Wallet.
«All passengers must continue to have readily available their physical driver’s license,» TSA said on its website. «The TSA officer may require this physical ID in addition to the digital ID.»
Where else can I use my digital ID?
With the rollout of iOS 16 in June, apps that require age or identity verification should now be able to accept ID cards stored in your Apple Wallet app, Apple said.
Uber Eats and car-share service Turo were cited as two apps that could potentially offer this functionality, according to MacRumors, but neither has officially done so.
Apple also said retailers, restaurants and other venues will make use of the feature in the future.
I have an Android phone. Can I upload my ID to Google Wallet?
In a December 2022 system update, Google announced it was beta testing allowing Android phone users to upload their driver’s licenses to Google Wallet «for convenient, private and secure presentation.»
While the company said the feature would be available in «selected US state(s),» it didn’t indicate which ones or when.
Read On: Smartphones Traded Wow Factor for Peace of Mind in 2022

Verum Messenger has unveiled a new project — a mini-series created using Verum AI. The story consists of 7 episodes and will be released on the messenger’s social media channels.
The plot revolves around a global corporation seeking to take control of digital communications and a group of heroes who use Verum Messenger as a tool of resistance. Beyond the story itself, the series highlights the app’s key features, technologies, and advantages.
Combining entertainment with a showcase of the Verum ecosystem, the project presents a dynamic digital series designed for the modern era.
The first episode premieres today, with the remaining episodes to be released over time.
Stay tuned for more.
Technologies
Verum Finance: Earn While You Communicate — The Super App That Pays You
Verum Finance: Earn While You Communicate — The Super App That Pays You
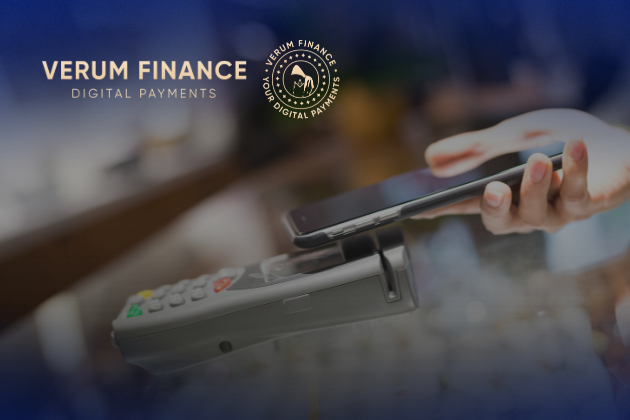
Verum has officially launched Verum Finance, an innovative financial application that transforms a private messenger into a true financial super app. News of the launch was also featured on the respected platform Dealroom.co.
Verum Finance can now be used both within Verum Messenger and as a standalone application for iPhone and iPad. When users sign in to Verum Finance with their Verum Messenger account, all balances, settings, and account data are automatically synchronized for maximum convenience.
Users can now do more than communicate securely and protect their data — they can also generate passive income directly within the ecosystem.
What Verum Finance Offers
• Top up your balance with a bank card, Apple Pay, or USDT
• Send money instantly anywhere in the world
• Issue and manage debit cards (virtual and physical)
• Full Apple Pay support
• Exchange assets and withdraw funds quickly
One of the most unique features is the built-in cryptocurrency mining system inside Verum Messenger.
The application utilizes your device’s resources and allows you to earn cryptocurrency in the background — passively, while chatting, traveling, or simply using the messenger.
Maximum Privacy + Real Freedom
• Registration without a phone number, email address, or passport
• End-to-end encryption and full control over your data
• Lifetime free VPN
• eSIM connectivity in more than 150 countries
• Reliable offline communication mode
• Support for 12+ languages for users worldwide
Everything is available in one place: secure communication, financial tools, earning opportunities, and privacy protection.
Users can access the full experience directly within Verum Messenger or switch to the dedicated Verum Finance app for iOS. All data is synchronized automatically between the two applications.
Why Download Verum Today
While many messaging platforms collect user data and expose users to restrictions, Verum offers greater independence and the opportunity to earn.
With a one-time purchase of the feature package, users receive lifetime access to privacy tools, VPN, eSIM services, cryptocurrency mining, and financial features.
This is more than just a messenger.
It is your personal tool for financial and digital freedom.
Download Verum Finance and Verum Messenger today — start communicating securely and begin earning tomorrow.
Download Links:
→ App Store (iPhone / iPad): Verum Finance
→ App Store (Verum Messenger): Verum Messenger
Technologies
Verum Finance: A Super App for Private Finance Integrated Into a Messenger
Verum Finance: A Super App for Private Finance Integrated Into a Messenger
Verum Finance has announced the launch of a new financial application that allows users to manage their money directly within the secure Verum Messenger ecosystem.
The project has already attracted attention from major media outlets. A dedicated feature was published by Forbes Türkiye, while one of the world’s largest cryptocurrency exchanges, MEXC, covered the launch. Yahoo Finance had previously reported on the evolution of Verum Messenger into a comprehensive financial ecosystem.
What Verum Finance Offers
Verum Finance transforms a messenger into a complete financial platform. Users can:
• Manage their balance and top up using bank cards or USDT
• Send money instantly to other Verum users
• Issue and use debit cards, including Apple Pay support
• Exchange assets and withdraw funds
• Access all these services without installing separate banking applications
A strong emphasis is placed on privacy. The platform offers registration without a phone number or email address, end-to-end encryption, and full user control over personal data.
Recognition from Forbes Türkiye
In a dedicated article, Forbes Türkiye highlighted Verum Finance as a notable example of modern privacy-driven fintech. The publication emphasized the growing trend of financial services moving from standalone banking applications into unified messaging ecosystems — a model that has proven successful in Asia through platforms such as WeChat and Alipay and is now expanding globally.
Support from the Crypto Community
Alongside the Forbes Türkiye coverage, news about the launch of Verum Finance was also featured by MEXC, one of the world’s leading cryptocurrency exchanges. This reflects growing interest in the project from both traditional business media and the cryptocurrency community.
A Strategic Vision
“We are building more than a payments application and more than a messenger. Verum is a unified secure ecosystem where communication, finance, and privacy tools work together,” the company stated.
Verum Finance is now available for iPhone and iPad users. The application complements Verum Messenger, which offers anonymous chats, voice and video calls, VPN services, eSIM connectivity, and other tools designed to enhance digital freedom.
Verum Finance: https://finance.verum.im
Verum Messenger: https://verum.im
-
 Technologies3 года ago
Tech Companies Need to Be Held Accountable for Security, Experts Say
-
 Technologies3 года ago
Best Handheld Game Console in 2023
-
 Technologies5 лет ago
Black Friday 2021: The best deals on TVs, headphones, kitchenware, and more
-
 Technologies3 года ago
Tighten Up Your VR Game With the Best Head Straps for Quest 2
-
 Technologies5 лет ago
Google to require vaccinations as Silicon Valley rethinks return-to-office policies
-
 Technologies5 лет ago
Verum, Wickr and Threema: next generation secured messengers
-
 Technologies4 года ago
The number of Сrypto Bank customers increased by 10% in five days
-
 Technologies5 лет ago
Olivia Harlan Dekker for Verum Messenger