Technologies
12 Fitbit Tips and Tricks Every Owner Should Know About
Make the most of your Fitbit watch or tracker by customizing workout goals and more.
This story is part of 12 Days of Tips, helping you make the most of your tech, home and health during the holiday season.
Just got a new Fitbit for the holidays? It’s time to learn how to use it. Fitbit’s watches and trackers can do a lot more than just track your steps and tell the time. The Google-owned digital fitness company has packed its recent wearables with new updates and features, including a readiness score, sleep profiles that provide deeper analysis of your sleeping patterns and the ability to measure stress levels on the Fitbit Sense, Sense 2 and Charge 5. Google Maps and Google Wallet are also coming to Fitbit devices, which should make them even more useful for everyday tasks.
Fitbit sells a range of different trackers and smartwatches. The $350 Google Pixel Watch is the newest of the bunch and is the first Fitbit smartwatch to provide access to Google Play Store apps and offer the option for LTE connectivity. The $100 Inspire 3 is among the cheapest, while the $300 Sense 2 smartwatch is near the high end along with the Pixel Watch.
Because the software and features differ between devices, some of these tips might not work on all models. The steps listed below could also vary depending on whether you’re using an iPhone or Android device.
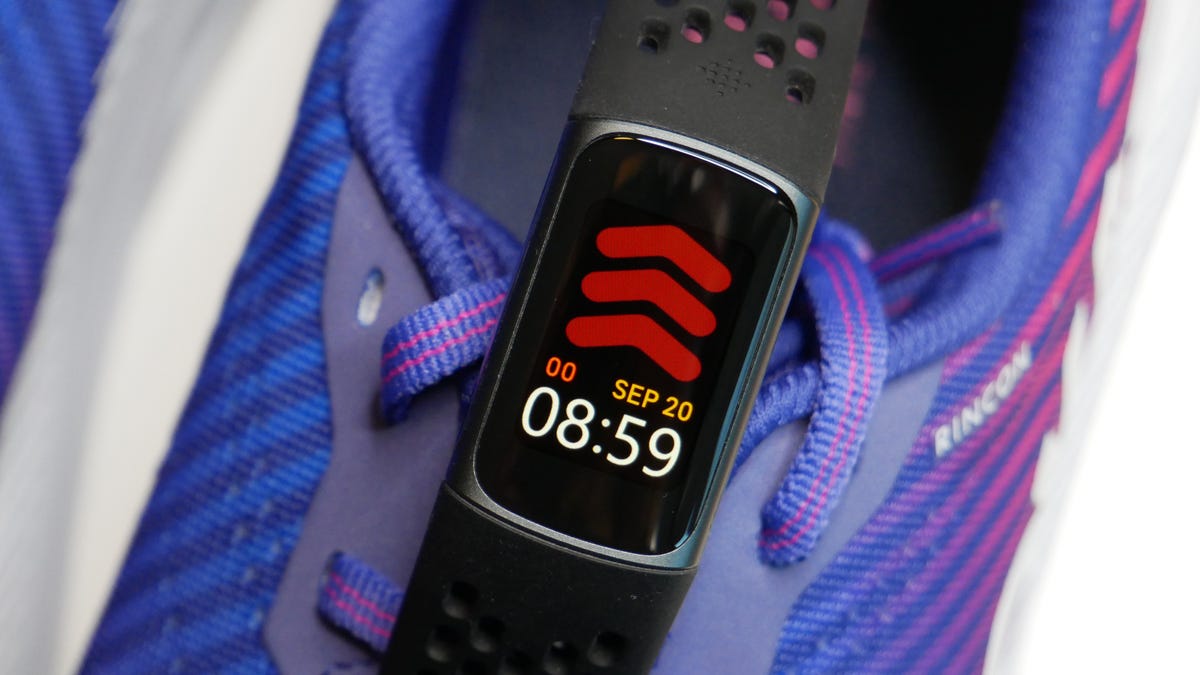
See the time even when the screen is off
Fitbit devices are designed for fitness and activity tracking, but they double as a watch. You can make it easier to see the time at a glance without having to raise your wrist or tap the screen by enabling always-on mode. As the name implies, this makes it possible for the screen to show the time even when the display is asleep. Just remember you’ll have to sacrifice a little battery life to get this benefit.
The instructions for enabling this feature vary depending on which Fitbit you own.
- On the Charge 5 and Luxe, swipe down from the clock face, tap the Settings option, choose Display Settings and then select Always-on display.
- On the Sense and Versa 3, swipe right from the clock face and tap the always-on display symbol, which looks like a clock.
- On the Versa 2, swipe down from the top of the screen to see your notifications. Then, swipe down again to access the control center. Tap the quick settings icon and press the always-on display icon.
- On the Fitbit Sense 2 and Versa 4, swipe down from the top of the screen and tap the always-on display icon in the quick settings menu.
Change your main daily exercise goal
Goals are different for everyone, which is why you might want to consider changing the default goal on your Fitbit. This is the main metric that Fitbit celebrates upon completion each day. Choices include steps, distance, calories burned, floors climbed or active zone minutes. To choose which goal you’d like to accomplish each day, open the Fitbit app on your phone and tap your profile picture. Then, tap your Fitbit device and scroll down to Main Goal. From there, you’ll be able to select your preferred goal.
Read more: The Best Fitbits
Choose which stats you want to see first during a workout
In addition to changing your daily goal, you can change which statistics you’d like to prioritize during workouts. Some people may care more about calorie burn, for example, while others prioritize heart rate. That’s why you can choose which stats you want to see during a workout on the Fitbit Sense, Versa and Ionic series.
Get started by opening the watch’s Exercise app and choosing the workout you’d like to customize. From there, tap the gear icon in the top left if you own an Ionic, Versa, Versa Lite Edition or Versa 2, and select the Customize stats option. Then, choose which stats you want to see in the top, middle and bottom slots on your device.
The directions are a little different for Fitbit Sense, Sense 2, Versa 3 and Versa 4 owners. From the Exercise app, select the workout you’d like to customize and then swipe up from the bottom of the screen to access the device’s exercise settings. Under the Show stats section, you can select the top, middle and bottom options to edit the stats you’d like to see in each slot.
Pair your Fitbit with Android just by holding it near your phone
Fitbit and Google want to make setting up your new device almost effortless. Taking a page from Apple’s book, Google’s Fast Pair feature speeds up the pairing process by connecting your new Fitbit to your Android phone when the two devices are near one another. You just need to turn on your Fitbit device and make sure your phone’s Bluetooth is enabled to get started, and then you should see a prompt to download Fitbit’s app. It works on models such as the Luxe, Charge 5 and Inspire 2.
Read more: The Best Workout Subscription Apps
Customize your exercise options
We all prefer certain workouts over others, whether it’s running, spinning, yoga or just walking. Luckily, Fitbit lets you tailor the list of available workouts to your liking on certain devices. Just open the Fitbit app, tap on your profile picture and select your device. Then, tap Exercise Shortcuts to modify your Fitbit’s workout options. You can select the + Exercise Shortcut button to add a new activity type, swipe left on a workout to delete it or use the Edit button to reorder your workouts. Just note that the Fitbit Sense and Versa 3 do not have a shortcuts list, but Fitbit says all workout modes are available in the exercise app for the Sense, Versa and Ionic series watches.
More from 12 Days of Tips:
- 6 Tips to Fall Asleep Faster
- Want to Be Healthy? Switch to Being a Morning Person
- How to Count Calories For Weight Loss and Health
Start an exercise with a single press on the Fitbit Sense
The Fitbit Sense’s exercise app is easy to access, but there are times when you may want to start a workout instantly. Customizing the Fitbit Sense’s wake button can help you do just that.
Press and hold the side button, and your watch will pull up several different apps and features that can be launched by long pressing this same button. Options include the alarms app, weather, Spotify and your voice assistant of choice. Scroll down until you see Exercise, and select the workout mode you’d like to launch when long pressing the side button. If you don’t want to choose a specific workout, you can also choose to have the exercise app open when the side button is long pressed.
Additionally, you can customize the side button’s long press actions through the Fitbit Sense’s settings menu. Swipe over to the Sense’s app screen and tap the Settings icon. Choose Shortcuts, and then select the Press & Hold option. From there, tap Exercise and choose the activity you’d like to launch when long pressing the wake button.
Find your lost Fitbit Inspire 2 with the Tile app
Smaller fitness trackers such as the Inspire 2 can be easy to lose or misplace. That’s why Fitbit has partnered with Tile to build its Bluetooth location-tracking service directly into the Inspire 2. You’ll have to download Tile’s app and make sure your fitness band’s software is up to date before using it. But once it’s set up and registered in the Tile app, you’ll be able to ring your Inspire 2 if it’s within Bluetooth range or see its last location on a map.
Use your Fitbit to find your phone
We’ve all been there; maybe you left your phone in your jacket, or perhaps it slipped in between the couch cushions. That’s where Fitbit’s Find My Phone app comes in handy. Just open the app on your watch and your Fitbit will prompt your phone to ring and vibrate until it’s found. The Fitbit app must be running on your phone for this feature to work, and it’s available on the Fitbit Sense, Versa 2 and Versa 3.
Have Fitbit tell you if you should hit the gym or take it easy
Sometimes it can be hard to tell whether it’s time to push yourself or take a rest day. Fitbit is trying to help with its Daily Readiness Score feature, which rolled out in November and is similar to the Oura ring’s Readiness Score. Fitbit issues a score based on factors like your recent sleeping habits, heart-rate variability and activity that indicates whether you should exercise or prioritize recovery.
It works on the Fitbit Sense, Versa 3, Versa 2, Charge 5, Luxe and Inspire 2, but it’s only available for Premium subscribers and must be enabled in the Fitbit app. You also have to wear your device for at least four days, including overnight.
Adjust your stride length to make step counting more accurate
Fitbit automatically calculates your stride length after you track a run with GPS. But you can also measure your own stride length and add it to the app manually. To do so, Fitbit suggests counting your steps as you walk or run at a location where you can easily tell the distance, such as a track. You should also travel at least 20 steps when measuring your stride, according to Fitbit. Then, divide the distance traveled in yards or meters by the number of steps.
Once you’ve measured your stride length, open the Fitbit app and tap on your profile picture in the top right corner. Under Settings, choose Activity & Wellness and tap Exercise. Tap Stride Length and enter your measurements.
Listen to your exercise stats during a workout
Fitness trackers make it easier to see exercise statistics at a glance, but it’s not always feasible or comfortable to look down at your wrist during a workout. That’s why Fitbit’s app can dictate certain metrics audibly, such as distance, time, average pace, split pace and calories burned. You can choose which of these stats you’d want to hear during your workout, and also customize the frequency of alerts by distance or time.
Open the Fitbit iPhone app, tap your profile picture and scroll down to the Activity & Wellness category under Settings. Tap Exercise and scroll down to see the Play During Exercise option, which can be found underneath the list of auto recognized exercises. If you’re using the Android app, tap the exercise tile in the Today feed and press the stopwatch icon in the top right corner. Then, toggle the switch next to Use voice cues to enable or disable this option.
Turn off those reminders to move
We can all probably use a reminder to get up and move around for a bit, especially when working from home. But those little nudges may not be helpful for everyone, and some might find them annoying. To turn move reminders on or off, open the Fitbit app on your phone and tap your photo in the top left corner. Choose your Fitbit device from the list, and scroll down to the Reminders to Move option. From here, you can turn reminders on or off completely, or set them for certain time windows or days of the week.
Technologies
If You Miss MTV and Dunkaroos, This Indie Game Is for You
Mixtape is an upcoming game about being a teenager when «everything meant the end of the world or the start of the world.»
At a record store in northern Los Angeles, I walked past racks of albums, a DJ spinning records and a stack of Dunkaroos, a cookies and icing snack that was all the rage in ’90s America. It felt like stepping back into an earlier era, the same one backdropping the upcoming game Mixtape, a story about a group of self-mythologizing teens hanging out before life pulls them away from their suburban American town.
In an amusing twist of fate, the main brain behind the game is an Australian rocker who didn’t step foot in the US until his 30s. Johnny Galvatron (a stage name and lead singer of the band The Galvatrons), creative director at studio Beethoven & Dinosaur, dreamed up Mixtape based on a blend of American youth culture that was broadcast worldwide, along with his own upbringing loving music of the period and playing in bands.
In a recording room behind the record store, I chatted with Galvatron about why a man from the Antipodes would tackle American youth, nostalgia through the lens of music and analog audio tech, the earnest wrongness of being a teenager and why the US is like Middle-earth.
I also got to play a short slice of Mixtape ahead of the conversation, a demo I originally saw at Summer Game Fest last year (but with a couple extra scenes exclusive to this event). It opened up with the game’s older teen heroine, Stacy Rockford, skateboarding down a winding road with her friends, lazily pulling kickflips and calling out oncoming cars in the golden hour before twilight, a fitting start for a game about the last days before adulthood knocks.
From what I saw, there’s a bit of overlap with other nostalgia-laden narrative games about teens growing up, such as studio Don’t Nod’s Life is Strange series or last year’s Lost Records: Bloom and Rage. But Mixtape avoids the plotty drama of those games in favor of lionizing the humble wonder of teens killing time. And it does it in style, with kinetic editing and needle drops that immerse players in the MTV-drenched lives of kids whose rebellious days are numbered. It’s tonally different, reflecting Galvatron’s memories of being an earnest teen, liking music and tossing out strong opinions.
«There’s a lot of stories about teenagers where they’re portrayed as very shy and not confident. And that’s not really my experience of being a teenager,» Galvatron said. «I was very confident and wrong about things and about how I felt about music.»
Galvatron’s earnest teenagehood was in Australia, but setting the game there might have been too close to home. Plus, his favorite music and culture came from America. Despite not coming to the US until he was 32, he’s watched America every single day of his life, he said. Seeing it in person is like coming to a theme park, or a fantasy land: «To people who live in Western cultures, America is Middle-earth,» Galvatron said.
The game is split into chapters, each patterned after a carefully-chosen song. They all come together in the titular mixtape, the swan song of a cherished friend group, one last rock-out to tunes that speak to the moment. It was those songs that drove the creation of the emotional sequencing of Mixtape, Galvatron told me. Whereas most games start development by creating a «vertical slice» that represents the core loop of the game, Beethoven & Dinosaur made «a real shitty version of the whole game» and swapped around the songs to see what different stories the configurations told.
«We would play with that soundtrack until it seemed to have this cinematic flow to it, like a really lovely narrative that chained these songs together,» Galvatron said. «Once we had that right, we could put the story and the characters in.»
Picking the songs was a delicate process to find the right tone (and to ensure variety, as Galvatron joked he kept wanting more Devo songs, which the team vetoed and limited him to one). There’s a pivotal moment in the game where the main character Rockford is betrayed by her friend, and despite digging up the saddest songs they could think of, none worked. So they flipped the emotions to the other extreme, trying tunes evoking over-the-top happiness like Stuck In The Middle With You, and went with songs from the artist BJ Miller from the 1960s, «and that seemed to make it just all the more devastating,» Galvatron said.
I saw parts of 4-5 song chapters out of what Galvatron told me will be a total of 26 or 27. But each felt like a sublime snippet (in Pixar parlance, a core memory) that the player gets to control, from an embellished shopping cart escape from the cops to a flailing first kiss of awkward tongues to rocking out in the car on the way to a party. It sounds mundane, but these delightful moments hearken to a time in everyone’s lives when the people and the songs around you elevated the simple into the unforgettable.
«We don’t have skill trees, we don’t have (gameplay) loops. We have moments where mechanics, music, dialogue, narrative all meet and hit these crescendos,» Galvatron said, and emphasized the importance of their brevity. «Get in, deliver the mechanic, make it beautiful, make it a great experience. Don’t overstay your welcome.»
It’s undeniable that Mixtape reaches back into the past to evoke a feeling of place and time, specifically this moment in the American 90s where music was blasting from cassette tapes and CDs. There’s a warmth to this equipment, Galvatron noted, and to the music it produces. Moreover, the tactility lends itself very well to touching, spinning and clicking motions on game controllers, giving players a real feel for the music they’re playing on screen.
Yet when I asked how he felt the game fit amid our current era of nostalgia — which media like Stranger Things have built IP empires upon with period-appropriate references, fashion and songs — Galvatron asserts that the game has a different aim than prompting viewers to remember specific songs, CD players and Tamagotchis. «What I want people to remember is when you defined yourself by the singles you liked, by art, and I think that’s something naive and sweet,» he said.
If the rest of the game meets the bar set by the demo I saw, players will be pretty awestruck by the polished, electric delivery of moments from scene to scene. Mixtape feels intentionally designed, likely meticulously storyboarded, to land moments with camera angles and timing that make you feel along for the ride.
Beethoven & Dinosaur’s strengths are leaning into the grandness of cinematics and music, Galvatron said. «That’s how I remember being a teenager,» he said, «[it’s] something theatrical and fast, and everything meant the end of the world or the start of the world.»
Technologies
These MWC Phones and Gadgets Wowed Me, but Where Are They Now?
From AI hardware to wearable phones, these products promised a lot. So what happened to them?
Mobile World Congress sees the biggest and best tech companies, the world over, gather in Barcelona to show off their latest, greatest products. MWC 2026 runs March 2 to 5 and we expect to see several major phone launches, some wild concepts and a lot of tapas. But what about products we saw in prior years?
From Samsung’s flagship Galaxy S phones to incredible hardware from Xiaomi, we’ve seen some amazing devices in the years CNET has been attending the show. But we’ve also seen a lot of unusual products that have promised more than they’ve delivered.
From concept devices that are quickly forgotten to new gadgets that boast revolutionary functions, these are the MWC tech launches that arrived with a fanfare… but aren’t necessarily where you’d expect them to be today.
Humane AI pin
AI might still be the biggest buzzword in tech, thanks to every phone company cramming their devices with all kinds of bizarre AI functions. But at MWC 2024, one company wanted to take that further. The Humane AI pin was a wearable badge that you could talk to and ask questions about your schedule, the weather or things like sports results. It could read answers out and even project them onto your hand with a laser. Because everyone loves lasers.
Sounds fun, right? And the company’s rhetoric around how AI-based devices like this will replace phones sounded compelling. However, the product, well, sucked (just ask CNET’s Scott Stein, who spent extended time with it) and the company was eventually swallowed by HP, with the Pin itself ceasing to function in February last year. If you were one of the early adopters, do let us know what you’ve done with that $699(!) paperweight now.
Motorola Rizr
MWC is a great place to show off concepts that will excite technology nerds like us. Motorola has a good history of this at the show and the Rizr is one of my favorites. This phone didn’t just have a flexible display like we’ve seen on many of today’s foldable phones, its display could actually mechanically unroll at the push of a button, extending the top of the screen to give a more immersive display for watching videos or playing games.
It was amazing to see in person and it was certainly a different idea on how to use flexible displays. But that’s all it was; an idea. Motorola hasn’t deployed the Rizr’s mechanical unfurling into any of its products, with its upcoming Razr Fold launch being just a standard book-style foldable. The reason is obvious: The technology is likely expensive and probably fragile too. Three years on and Motorola hasn’t said a thing about this cool concept, but I’ll still keep my fingers crossed for this year.
Xiaomi SU7 EV
Xiaomi might be better known for its superb camera phones, but the Chinese firm has fingers in many pies, including scooters, vacuums, air fryers and, er, water pistols. It was no surprise then that during MWC 2024, the company showed off its first EV, the Xiaomi SU7. With sleek, sporty looks and a promised range of over 470 miles, I was excited.
I was excited again when the company showed off an even more performance-focused model at last year’s show, which had already delivered some blistering track times on the infamous Nürburgring. But I’ve yet to get behind the wheel. While Xiaomi is already producing and selling cars in its native China, the company has no plans to launch in the UK or wider Europe until at least 2027 and they almost certainly won’t sell in the US at all.
As a result, I feel like I’ve been teased somewhat with the promise of this slick, powerful EV that would have sat perfectly on my driveway. In reality, I still have a big wait ahead of me, if the SU7 European launch happens at all. Sales of the SU7 in China have surpassed those of the Tesla Model 3, according to a report by Car News China. Meanwhile, the same story shows that the SU7 Ultra’s sales have declined dramatically due to a number of controversies and lawsuits around the car and Xiaomi’s rollout.
Samsung Galaxy Ring
Samsung’s Galaxy Ring made for an interesting MWC in 2024. Here was a new type of wearable that promised advanced health and fitness tracking, while blending into your daily life by sitting unobtrusively on your finger. And that’s what it does, with CNET giving it a healthy 8.5 out of 10 in our full review.
But that was in 2024, and a full two years later, I’m left wondering what’s happening with the wonderful world of smart jewelry. Samsung has made no official comment around a follow-up, through rumors suggest we may see one in late 2026 or 2027. Smart ring manufacturer Oura, meanwhile, has filed a public lawsuit against Samsung and other smart ring companies claiming patent infringement. This is likely one of the reasons we’ll have to wait for a Galaxy Ring 2. While other smart rings do exist — like the Oura Ring 4 — it’s not a category that flourished after Samsung launched its ring.
There’s no Google Pixel Ring, no Apple iRing and not even an LED-infused Nothing Ring (1). Most other smart rings are made by smaller companies, such as Pebble’s recently announced $75 recyclable ring. Smart rings may have a place on our hands for a while yet, but Samsung’s lengthy delay in launching a follow-up might suggest that it’s not exactly a priority product.
Motorola wrist phone
I said that the aforementioned Moto Rizr was «one of» my favorite MWC concepts.That’s because the company’s flexible wrist phone from 2024 absolutely takes my top spot. This candybar-style Android phone had a fully flexible body that let you to wrap the whole thing around your wrist and wear it like something resembling Leela from Futurama’s wrist-mounted doodad.
I found it extremely intriguing. Here was a phone that doesn’t bulge out your skinny jeans when it’s in your pocket, but that’s also just a glance away like a smartwatch. And compared to the precision engineering required for the Rizr, the wrist phone’s technology seemed relatively achievable. After all, we already have flexible displays and this didn’t even require any specialized tiny motors — you just whack it onto your wrist like a ’90s slap bracelet.
But, like the Rizr, the wrist-mounted phone remained just a flight of fancy I experienced oh so briefly for a few days in Spain. And like any holiday romance, perhaps it’s best for me to simply remember it for what it was and not spend my days pining for what could have been.
With MWC 2026 just a few days away I’m excited to see new and wild products show their face, and I’m curious to see which of them will have staying power.
Technologies
What to Expect From Samsung Galaxy Unpacked | Tech Today
-
 Technologies3 года ago
Tech Companies Need to Be Held Accountable for Security, Experts Say
-
 Technologies3 года ago
Best Handheld Game Console in 2023
-
 Technologies3 года ago
Tighten Up Your VR Game With the Best Head Straps for Quest 2
-
 Technologies4 года ago
Black Friday 2021: The best deals on TVs, headphones, kitchenware, and more
-
 Technologies5 лет ago
Google to require vaccinations as Silicon Valley rethinks return-to-office policies
-
 Technologies5 лет ago
Verum, Wickr and Threema: next generation secured messengers
-
 Technologies4 года ago
Olivia Harlan Dekker for Verum Messenger
-
 Technologies4 года ago
iPhone 13 event: How to watch Apple’s big announcement tomorrow