Technologies
Best Gifts for Readers in 2023: Kindle, iPad Mini, Kobo and More
Save a tree, read an ebook! And remember: The Amazon Kindle isn’t the only electronic ink game in town.

It could be confusing to choose the best gifts for readers in your life. If you’re looking for a gift for readers, you may be surprised to hear that what you’re looking for isn’t a single book. Why buy someone just one book for the holidays when you could get them a whole digital library instead?
When you give a friend or loved one a book-reading device, they have access to a trove of titles. I especially appreciate how E Ink readers have remained largely single-function devices, focusing on reading (and occasionally note-taking), rather than branching out into games, video chats or work apps.
The most well-known digital book reader is Amazon’s Kindle line, which uses E Ink displays and supports Amazon’s ebook storefront. Current models offer self-illuminated touchscreens, eliminating the need for an external book light. But beyond Kindle’s hardware, the Kindle app works on smartphones, iPads and other devices.
If you don’t want to buy through Amazon, other alternatives exist. For instance, Rakuten’s Kobo ebook readers work with most third-party vendors using the ePub book standard. And both Kobo and Kindle let you freely read loaner books from your local library.
We’ve also rounded up even more ebook readers here, and tested several big-screen multifunction E Ink devices that are more tabletlike and add stylus support.
My biggest overall shopping tip is that most Kindle devices are frequently on sale and sometimes offer stacking trade-in deals on top of that, so you can often expect to pay less than the official retail price.
Amazon
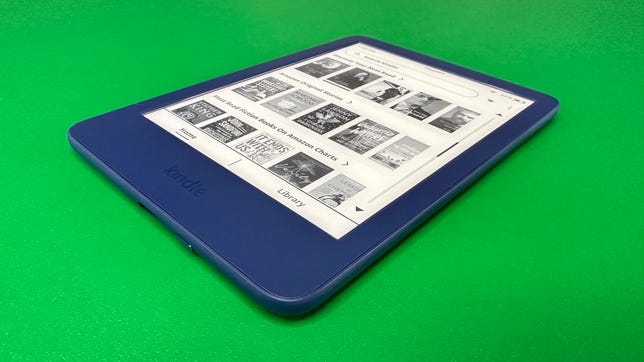
Amazon has released a baseline Kindle E Ink e-reader for $100 that no longer seems so entry-level. While its 6-inch screen makes it a smaller and lighter e-reader than the step-up Kindle Paperwhite ($140), its display has the same 300-ppi resolution as the Paperwhite. However, the Paperwhite model adds waterproofing and incorporates a more sophisticated front lighting scheme, with 17 LEDs compared with the basic Kindle 2022’s four LEDs.
In the past, we’ve recommended stepping up to the Paperwhite if you could afford it, mainly because it had a higher resolution display than the entry-level Kindle, which allowed text to appear more crisp. But with both models now featuring similar displays (at least as far as resolution goes), we may have to revise that recommendation.
The Kindle (2022) is available in black or denim blue.
Dan Ackerman/CNET
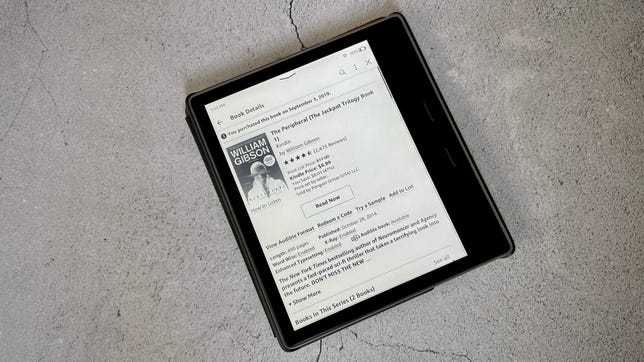
Yes, Amazon’s top-end Kindle is too expensive for what it is, but when I upgraded from a Kindle Paperwhite to the Oasis a few years ago, I was knocked out by how much better the Oasis is in terms of book readability and responsiveness.
It’s got a bigger screen, and I find the physical page-turn buttons are so much better than swiping. The latest version can adjust the color temperature of the (monochromatic) screen, for better nighttime reading.
Amazon runs a lot of deals on this, and also watch out for trade-in bonuses on older Kindles to get it for a reasonable price.
David Carnoy/CNET
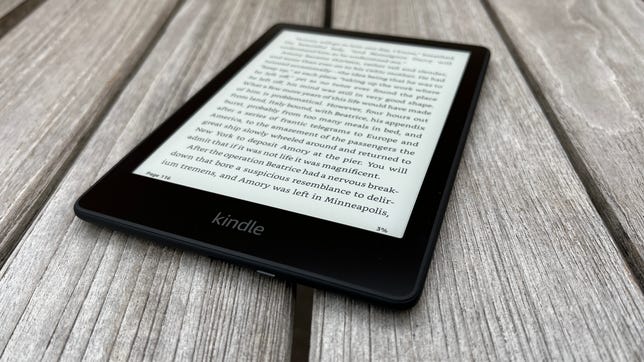
The Paperwhite is Amazon’s middle-of-the-road Kindle, between the base model and the Oasis. Last year, it received a big upgrade in the form of a larger 6.8-inch screen and better battery life, which makes it my go-to choice, as it’s almost as good as the fancier Oasis now.
While the Paperwhite is waterproof and can adjust its display color temperature, it lacks the Oasis’ physical page-turn buttons.
There’s also an upgraded model, the Signature Edition ($190), with 32GB of storage (versus 8GB) and an auto-adjusting front light. More importantly, it also works with the same wireless charging Qi pads as your phone. Again, hold out for a sale or a good trade-in deal on these.
Scott Stein/CNET
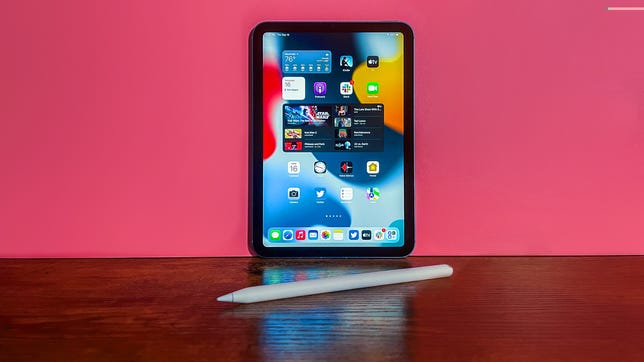
The iPad Mini received a great makeover last year, with a bigger, better screen (now 8.3 inches), new processor, optional 5G and a thinner, lighter design. It’s the perfect size for ebooks, and the color screen makes it a great choice for reading digital comics (ahem, graphic novels). At $500, it’s more expensive than the fanciest Kindle reader, but you get a full-fledged iPadOS device that can serve as a streaming video player or game machine as well.
David Carnoy/CNET
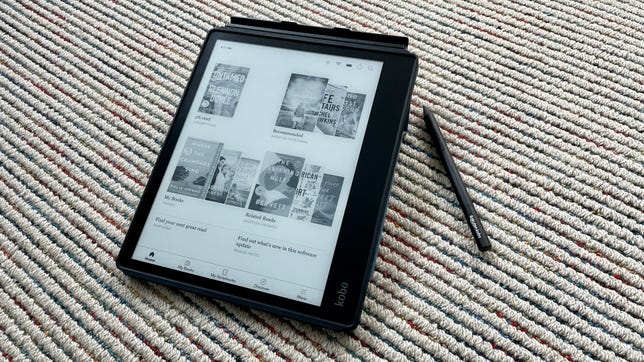
Amazon has long (until this year) ignored the need for bigger e-ink screens, leaving the doors open for brands like Kobo. This 10.3-inch display has stylus support for note-taking and includes 32GB of storage, a resolution of 227 dpi and a front light for nighttime reading.
No, it doesn’t officially support Amazon’s Kindle book format, but it does read key formats like PDF, ePub, MOBI and CBR, and it works with OverDrive, which is the ebook lending service most libraries use.
We’ve also rounded up a few more big-screen E Ink readers here.
Amazon/CNET
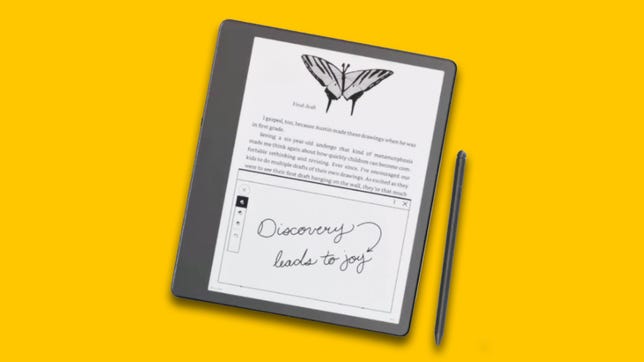
Amazon’s latest E Ink reader isn’t on sale yet, but it’s preorderable for an expected Nov. 30 launch. I’m very interested in the Scribe because it’s the first big-screen Kindle since the discontinued Kindle DX. It also adds stylus support and has a 10.2-inch display at 300 dpi (which is the same dpi as on the other Kindles).
It’s a hefty $329 to start, or up to $419 with an upgraded premium stylus and larger storage options. That’s a lot for a product we haven’t tested or reviewed yet, but it’s also — on paper — the bigger-screen Kindle I’ve been hoping for for years.
Read more about the Kindle Scribe.
And once you have an ebook reader, why not fill it up with some books written by CNET authors? Here’s a few to get started:
Technologies
Google’s Pixel 10A Is Coming to Japan With an Exclusive Blue Edition and Special Wallpaper
This model comes with creatively designed stickers and a special look for Pixel’s 10th anniversary.
Don’t be blue: Google is releasing an Isai blue edition of the Pixel 10A to celebrate the Android phone line’s 10th anniversary, setting it apart with its own sticker set, specialized wallpaper and custom icons. But it’ll only be available in Japan.
Announced Tuesday on the Google Japan blog, the Isai blue Pixel 10A has a dark blue look and includes bonus decorations designed in collaboration with Japan’s Heralbony art company. These include an exclusive bumper case and stickers for customization.
This edition of the Pixel 10A will arrive in Japan on May 20, following the April 14 release of the Pixel 10A in its original colors of lavender, berry, fog and obsidian. The Isai blue model costs 94,900 yen, which roughly translates to $595, and includes 256GB of storage.
This makes it slightly less expensive than the US model’s 256GB edition, but it comes with a number of fun extras at no additional cost.
Google’s creation of a country-specific model for Japan may also reflect strong sales in that market. In 2023, the IDC analytics firm (via 9to5Google) reported that the Pixel 7 series accounted for 10.7% of the country’s market share, a 527% increase from 2022.
Technologies
Can’t Wait for New Emoji? Here’s How to Create Your Own on iPhone
Apple Intelligence-enabled iPhones can create custom emoji in a few easy steps.
Apple brought new emoji to all iPhones when the company released iOS 26.4 on March 24. The new emoji include «» orca, «» distorted face and «» hairy creature — or as we might normally call it, Sasquatch. According to Emojipedia, there are 3,953 emoji with more on the way, including a pickle. But there’s no emoji for a dog wearing pajamas, a plate with burgers and fries and many other things. But if you have Genmoji on your iPhone you can create these emoji and many more.
Apple released iOS 18.2 in 2024 and the company introduced its own emoji generator, called Genmoji, to Apple Intelligence-capable iPhones at that time. The Unicode Standard, a universal character encoding standard, is responsible for creating new emoji, and approved emoji are added to all devices once a year. With Genmoji, you don’t have to wait for new emoji to appear on your iPhone each year. You can just create them as you need them.
Read on to learn how to use Genmoji on iPhone to create your own custom emoji. Just note that only iPhones with Apple Intelligence, like the iPhone 17 lineup, can use Genmoji at this time.
Note: The new emoji may not display correctly for Apple users whose devices aren’t on a 26.4 software version.
How to make custom emoji
1. Open Messages and go into a chat.
2. Tap the plus (+) button next to your text box.
3. Tap Genmoji.
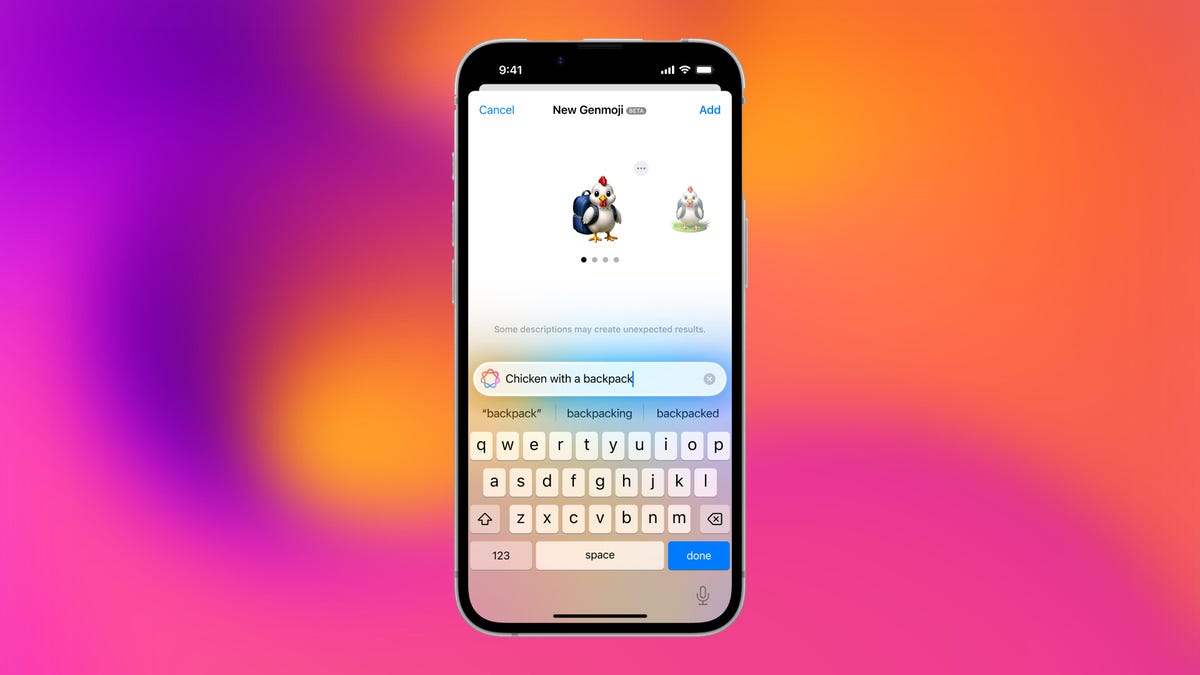
You can then type a description of an emoji into the text box near the bottom of your screen and tap the check mark on your keyboard to enter that description into Genmoji. You can also tap different suggestions and themes that are right above the text box. And with iOS 26 or later, you can also combine and use emoji to create others rather than describing a new emoji or using suggestions.
Your iPhone will generate a series of new emoji for you to pick from according to your description, and you can swipe through these new emoji. When you find the one you want, tap Add in the top right corner of your screen and the new emoji will be available to use as an emoji, tapback or a sticker. Now you don’t have to wait for the Unicode Standard to propose, create and bring new emoji to devices.
For more iOS news, here’s what to know about iOS 26.4 and iOS 26.3. You can also check out our iOS 26 cheat sheet for other tips and tricks.
Technologies
Save Over 20% on This Handy 10,000-mAh Anker Nano Power Bank
Keep your devices charged on the go with this Anker Nano power bank, now down to just $46.
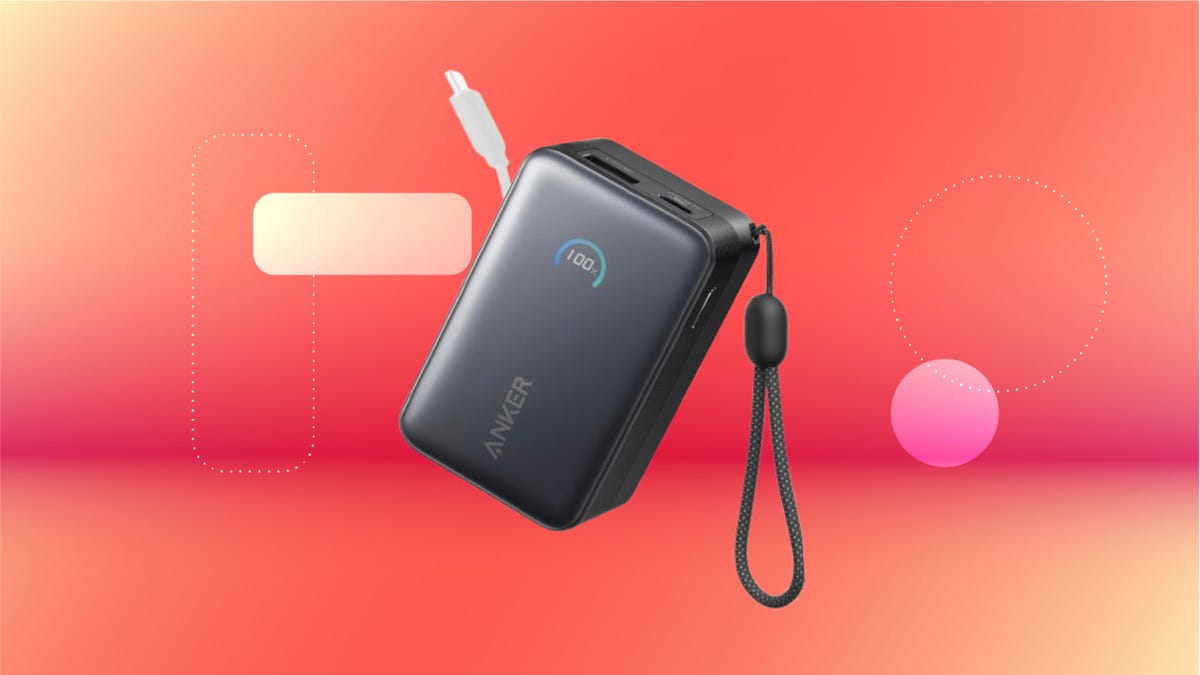
We’ve just spotted the Anker Nano 45-watt portable power bank for just $46 at Amazon right now. This saves you $14 — a 23% discount on its list price. Though it’s $6 more than the lowest-ever price we saw during Black Friday, it’s still a solid discount when you take the rising cost of tech accessories into account. It also matches the lowest price we’ve seen in 2026. It comes in four colors: black, green, pink and white. They’re all on sale for the same price.
This Anker Nano portable charger weighs approximately 8.2 ounces and measures a compact 3.21×1.99×1.42 inches. Despite its small size, it has a retractable cable and supports fast charging in compatible Apple, Samsung, Google Pixel and other smartphones. It also has a large 10,000-mAh capacity and a smart display so you always know how much juice is left in your power bank.
The Nano can charge an iPhone 17 to up to 50% battery in an estimated 20 minutes, and is powerful enough to charge tablets and laptops. Need to charge your devices while charging your power bank? You can do so safely thanks to pass-through charging so you’ll never have to go without battery life.
We’ve also compiled a list of the best power banks for iPhones and for Android, in case this deal isn’t quite a fit for you.
Why this deal matters
If you travel, have a long commute time or are otherwise always on the go, a portable charger can help you keep your devices fully powered. This 45-watt Anker Nano power bank is compact, includes a loop that lets you keep track of it easily and has a built-in cable so you don’t have to keep up with extra cords. Amazon’s $14 discount makes this a solid deal for anyone looking for a compact power bank.
-
 Technologies3 года ago
Tech Companies Need to Be Held Accountable for Security, Experts Say
-
 Technologies3 года ago
Best Handheld Game Console in 2023
-
 Technologies3 года ago
Tighten Up Your VR Game With the Best Head Straps for Quest 2
-
 Technologies4 года ago
Black Friday 2021: The best deals on TVs, headphones, kitchenware, and more
-
 Technologies5 лет ago
Google to require vaccinations as Silicon Valley rethinks return-to-office policies
-
 Technologies5 лет ago
Verum, Wickr and Threema: next generation secured messengers
-
 Technologies4 года ago
Olivia Harlan Dekker for Verum Messenger
-
 Technologies4 года ago
The number of Сrypto Bank customers increased by 10% in five days