Technologies
Forget Black Friday. This Amazon tip gets you sales and hidden discounts any time
One of our go-to Amazon shopping hacks can help you save you up to 70% or more no matter when you shop.

Black Friday sales are coming in hot, from luxury bedding to Apple AirPods Pro, laptops and so much more. While great Black Friday sales on items of every price keep coming down the chute — and holiday shipping deadlines approaching fast — we just wanted to make sure you know about our favorite hidden Amazon shopping trick that has routinely gotten us up to 70% off almost any kind of product.
You just need to be an Amazon Prime member and know where to look. We’ll tell you everything you need to know, including the fine print. But the big thing is that these products are listed as Amazon Warehouse deals, major discounts on returned, damaged, lightly used or refurbished items. And yes, free two-day shipping (one of the Amazon Prime membership perks) applies in case you need a rush holiday gift. (P.S. Here’s what to know about detangling Amazon’s sometimes confusing return options.)
Read more: Don’t shop early Black Friday deals without using these Amazon Prime benefits
Look for the Amazon Warehouse Deals page
We often begin Amazon searches on the Amazon Warehouse Deals landing page, because it cuts out full-price listings almost entirely so you mostly just see the discounted items (we’ll get to one exception shortly). To get there, open Amazon using either a desktop browser or the Amazon mobile app and search for «Amazon warehouse» or «warehouse deals.»
Rather than getting a list of search results like normal, you should see a screen that looks a lot like the main Amazon search page, with a search bar, categories and so on. From there you can browse categories like Computers & Tablets, Kitchen or Home Improvement (click these and other links in this story to see actual, current Warehouse Deals listings) or you can search for more specific items just like you would on the regular Amazon homepage, except the results will be discounted, sometimes heavily.
This quick and easy approach works best if you’re not in the market for something in particular — say you’re just looking for gift ideas or killing time during your lunch break. It can be a lot of fun to scroll through the various categories looking for stuff that pops out at you. If you’re shopping for something more specific, however, keep reading for pro tips on how to find it discounted using Amazon Warehouse Deals.
Why Amazon Warehouse stuff is so cheap
Just like other major retailers such as Walmart or Target, Amazon takes in a lot of customer returns, which it can no longer sell as new-in-box, regardless of why the buyer sent the item back or whether it’s even been opened. That’s why everything Amazon Warehouse sells is listed as used, even if the product itself has never been touched. Regardless of its condition, used stuff is just worth less — sometimes a lot less. And that’s good for you.
Amazon Warehouse Deals work for almost anything
Everything we’ve shown you so far works great so long as you’re a little flexible about what you’re looking for. If, on the other hand, you’re shopping for something really specific — like, say, an Otterbox case for your iPhone 13 — it can be frustrating to limit your search to just Warehouse Deals listings. You might turn up nothing at all relevant.
Whenever you head to Amazon to buy an exact product, go ahead and search for it just like you would otherwise. There’s a way to check and see if a discounted Warehouse Deals version is available from any Amazon listing.
First, pull up the item you want to buy just as you normally would on Amazon, but don’t add it to your cart just yet. Scroll down the page and keep your eyes peeled for words like «New & Used,» «Buy Used,» «New & Used Offers» or just plain «Used,» which you should see on the right side of the website.
Usually there’ll be a price listed, too, representing the cheapest option available (but not including tax or shipping costs). If you’re not having any luck finding the link and you’re on a computer, try using your browser’s «find» function (usually Control-F on Windows PCs and Command-F on Macs) to look for these keywords.
Once you locate the link, look for items with «Amazon Warehouse» listed as the seller and an Amazon Prime logo displayed near the price. If Amazon Warehouse has more than one of the same item in stock, there will sometimes be a separate listing for each, especially if the items are in different conditions.
Be careful of Amazon’s redirecting trick
Another thing to keep an eye on — make sure you always go back to the Amazon Warehouse Deals splash page before starting a different search. Otherwise, if you just search for another item from the search bar at the top of the page, Amazon might bounce you out of Warehouse Deals and into the full site.
Same goes for «recent searches.» If you searched for, say, «bunny slippers» across all of Amazon, then went to Warehouse Deals and searched for «banana slippers,» then decided you definitely want bunnies over bananas, don’t select «bunny slippers» from the drop-down menu that appears when you select the search bar. Those recent searches will search not just the same terms but the same Amazon sections as the original search. In other words, it’ll yank you out of Warehouse Deals and back to the land of full-price slippers. Instead, type the search in again on the Amazon Warehouse Deals main page.
You’ll find the best deals if you’re not loyal to one brand
Say you’ve been thinking about getting a new cordless drill for a while. You don’t care who makes it, you just don’t want to spend a lot of money. Or a new dog leash, robot vacuum, whatever. You’re not brand-loyal, just cost-conscious. That’s the perfect time to search from inside Amazon Warehouse Deals.
Do it just like you would on the full Amazon site — type your search terms in the dialog box, then select «Search.» Searching from the Warehouse Deals main page, your results won’t be cluttered with a bunch of full-price listings.
Except for one caveat: Amazon’s «sponsored» listings. Unless you have an ad blocker that specifically removes Amazon’s paid listing results (you cna use the Amazon Ad Blocker Chrome extension), you’ll still see full-priced items peppered among the discounts. These non-discounted listings look almost identical to Warehouse Deals, except they’re labeled «Sponsored.» Sneaky, but that’s why I’m warning you.
How Amazon Warehouse returns work
Of the dozens (if not hundreds) of Amazon Warehouse listings we’ve bought over the years, we only ever ran into problems with a handful of them — a Bluetooth adapter for a car that would randomly shut off, a wireless router that didn’t broadcast any signal, a very well-worn puppy harness with dog hair stuck to it; stuff like that.
Whenever that happens, just return the item like you would any defective product, then order another one. Sure, it’s a bit more hassle, but considering the hundreds, if not thousands of dollars we’ve saved over the years this way, it’s worth the extra effort.
Truth is, most Amazon Warehouse items are in perfect working order — many haven’t even been so much as pulled out of their packages. Even for stuff that has been taken out of the box, Amazon puts everything through what the company calls a «rigorous 20-point inspection process,» after which each item is given a quality grade and priced accordingly.
Some items may have cosmetic damage or be missing parts, accessories, instructions or assembly tools, but Amazon will detail any damage to the product or packaging, as well as any missing element along with the condition, so you won’t be surprised.
What the different Amazon grades mean
Amazon has five different grades it assigns to items it resells. Here they are with brief explanations of what Amazon means.
Renewed: This is the highest grade an Amazon Warehouse item can receive and is on par with what other companies might call «refurbished.» Renewed items have been closely inspected and tested and determined to look and function like new and come with a 90-day replacement or refund guarantee. The «refreshed» Roku Express Plus we once ordered had never even been opened.
Used, Like New: No noticeable blemishes or marks on the item itself, although the packaging may be damaged, incomplete or missing altogether. All accessories are included, and any damage to the package will be described in the listing. The box for the Like New Evenflo locking gate we bought saved $6 on was a little banged up, but we’ve seen way worse on Walmart’s shelves. The gate itself was flawless.
Used, Very Good: The item has been lightly used, with minor visible indications of wear and tear, but is otherwise in good working order. Packaging might be damaged, incomplete or the item repackaged. Any missing accessories will be mentioned in the listing.
Used, Good: Item shows moderate signs of use, packaging may be damaged or the item repackaged and it could be missing accessories, instructions or assembly tools. Another Bosch Icon wiper blade we got was only in Good shape, but we saved $15 on that one, and honestly can’t tell one from the other now that they’re on the car.
Used, Acceptable: Very well-worn, but still fully functional. Major cosmetic defects, packaging issues and/or missing parts, accessories, instructions or tools. I got an Echo Dot for $23 that was considered Acceptable. It has a scratch near the power port, but on a nightstand it’s hard to tell and cost half price.
How to choose the right quality grade
If there are multiple listings with different grades available, think about what it will be used for. If it’s something purely functional and we couldn’t care less about its cosmetic condition, like hair clippers or a cordless drill, we’d go with the cheapest option.
If it’s something for display, like a kitchen mixer, end table or wall clock, read the descriptions a little more closely and look for items that are rated Very Good or Like New.
But honestly, a low enough price on just about anything could woo you into putting up with some scratches or scuffs. In our experience, Amazon tends to err on the side of caution, marking items as Good or Acceptable that the average person would consider Very Good or Like New.
Beware, you may not have a warranty with your Warehouse Deal
One of the benefits of purchases made through Amazon Warehouse is that Amazon’s standard 30-day replacement or refund return policy applies, which comes in handy if you wind up with a lemon. Amazon does caution that because these products are considered used they don’t come with the manufacturer’s original warranty.
That said, if the product hasn’t already been registered in someone else’s name, there’s a decent chance any issues you run into past Amazon’s 30-day window can be resolved with a call to the manufacturer.
Amazon Prime members still get free shipping
Subscribing to Amazon Prime won’t get you a bigger discount on Amazon Warehouse Deals, but you’ll get free shipping just as you would for any other Prime-eligible item, which is why we pay for Prime even though many of our purchases come from Amazon Warehouse.
Most of the stuff we bought through Amazon Warehouse ships and arrives within the same one- to two-day window we get with new items, although some orders do take longer to fulfill. If that’s the case, the extra handling time is usually indicated on the listing, so you’ll know what to expect.
Quick tips about buying from third-party sellers
While wading around in the listings looking for Amazon Warehouse Deals you may have discovered even more discounted listings not sold by Amazon. What you’ve stumbled upon are items sold by third-party retailers whose only relationship with Amazon is that their items are for sale on Amazon’s marketplace, much like eBay.
Amazon’s buyer protections lag considerably behind eBay’s, however. eBay guarantees customers their money back in the event of a dispute, and although Amazon will ultimately do the same, its process is a bit more convoluted, so proceed with caution. Generally, if you can’t find a good enough deal on Amazon Warehouse, tab over to eBay and look for the item there instead. eBay is a little more transparent about both its vendors and the merchandise they sell. If you’re going to buy garage-sale used as opposed to Amazon’s never-opened used, eBay may well be the better way to go.
The editorial content on this page is based solely on objective, independent assessments by our writers and is not influenced by advertising or partnerships. It has not been provided or commissioned by any third party. However, we may receive compensation when you click on links to products or services offered by our partners.

Verum Messenger has unveiled a new project — a mini-series created using Verum AI. The story consists of 7 episodes and will be released on the messenger’s social media channels.
The plot revolves around a global corporation seeking to take control of digital communications and a group of heroes who use Verum Messenger as a tool of resistance. Beyond the story itself, the series highlights the app’s key features, technologies, and advantages.
Combining entertainment with a showcase of the Verum ecosystem, the project presents a dynamic digital series designed for the modern era.
The first episode premieres today, with the remaining episodes to be released over time.
Stay tuned for more.
Technologies
Verum Finance: Earn While You Communicate — The Super App That Pays You
Verum Finance: Earn While You Communicate — The Super App That Pays You
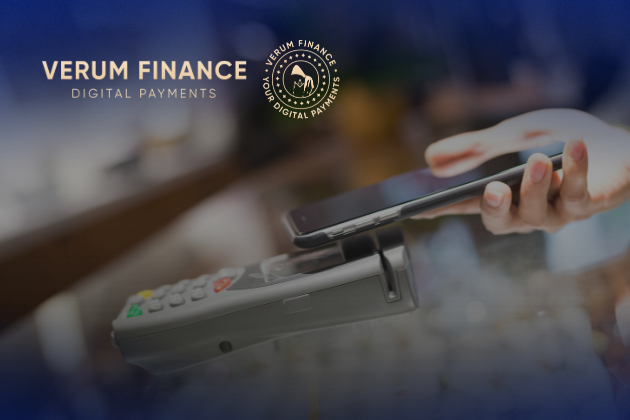
Verum has officially launched Verum Finance, an innovative financial application that transforms a private messenger into a true financial super app. News of the launch was also featured on the respected platform Dealroom.co.
Verum Finance can now be used both within Verum Messenger and as a standalone application for iPhone and iPad. When users sign in to Verum Finance with their Verum Messenger account, all balances, settings, and account data are automatically synchronized for maximum convenience.
Users can now do more than communicate securely and protect their data — they can also generate passive income directly within the ecosystem.
What Verum Finance Offers
• Top up your balance with a bank card, Apple Pay, or USDT
• Send money instantly anywhere in the world
• Issue and manage debit cards (virtual and physical)
• Full Apple Pay support
• Exchange assets and withdraw funds quickly
One of the most unique features is the built-in cryptocurrency mining system inside Verum Messenger.
The application utilizes your device’s resources and allows you to earn cryptocurrency in the background — passively, while chatting, traveling, or simply using the messenger.
Maximum Privacy + Real Freedom
• Registration without a phone number, email address, or passport
• End-to-end encryption and full control over your data
• Lifetime free VPN
• eSIM connectivity in more than 150 countries
• Reliable offline communication mode
• Support for 12+ languages for users worldwide
Everything is available in one place: secure communication, financial tools, earning opportunities, and privacy protection.
Users can access the full experience directly within Verum Messenger or switch to the dedicated Verum Finance app for iOS. All data is synchronized automatically between the two applications.
Why Download Verum Today
While many messaging platforms collect user data and expose users to restrictions, Verum offers greater independence and the opportunity to earn.
With a one-time purchase of the feature package, users receive lifetime access to privacy tools, VPN, eSIM services, cryptocurrency mining, and financial features.
This is more than just a messenger.
It is your personal tool for financial and digital freedom.
Download Verum Finance and Verum Messenger today — start communicating securely and begin earning tomorrow.
Download Links:
→ App Store (iPhone / iPad): Verum Finance
→ App Store (Verum Messenger): Verum Messenger
Technologies
Verum Finance: A Super App for Private Finance Integrated Into a Messenger
Verum Finance: A Super App for Private Finance Integrated Into a Messenger

Verum Finance has announced the launch of a new financial application that allows users to manage their money directly within the secure Verum Messenger ecosystem.
The project has already attracted attention from major media outlets. A dedicated feature was published by Forbes Türkiye, while one of the world’s largest cryptocurrency exchanges, MEXC, covered the launch. Yahoo Finance had previously reported on the evolution of Verum Messenger into a comprehensive financial ecosystem.
What Verum Finance Offers
Verum Finance transforms a messenger into a complete financial platform. Users can:
• Manage their balance and top up using bank cards or USDT
• Send money instantly to other Verum users
• Issue and use debit cards, including Apple Pay support
• Exchange assets and withdraw funds
• Access all these services without installing separate banking applications
A strong emphasis is placed on privacy. The platform offers registration without a phone number or email address, end-to-end encryption, and full user control over personal data.
Recognition from Forbes Türkiye
In a dedicated article, Forbes Türkiye highlighted Verum Finance as a notable example of modern privacy-driven fintech. The publication emphasized the growing trend of financial services moving from standalone banking applications into unified messaging ecosystems — a model that has proven successful in Asia through platforms such as WeChat and Alipay and is now expanding globally.
Support from the Crypto Community
Alongside the Forbes Türkiye coverage, news about the launch of Verum Finance was also featured by MEXC, one of the world’s leading cryptocurrency exchanges. This reflects growing interest in the project from both traditional business media and the cryptocurrency community.
A Strategic Vision
“We are building more than a payments application and more than a messenger. Verum is a unified secure ecosystem where communication, finance, and privacy tools work together,” the company stated.
Verum Finance is now available for iPhone and iPad users. The application complements Verum Messenger, which offers anonymous chats, voice and video calls, VPN services, eSIM connectivity, and other tools designed to enhance digital freedom.
Verum Finance: https://finance.verum.im
Verum Messenger: https://verum.im
-
 Technologies3 года ago
Tech Companies Need to Be Held Accountable for Security, Experts Say
-
 Technologies3 года ago
Best Handheld Game Console in 2023
-
 Technologies5 лет ago
Black Friday 2021: The best deals on TVs, headphones, kitchenware, and more
-
 Technologies3 года ago
Tighten Up Your VR Game With the Best Head Straps for Quest 2
-
 Technologies5 лет ago
Google to require vaccinations as Silicon Valley rethinks return-to-office policies
-
 Technologies5 лет ago
Verum, Wickr and Threema: next generation secured messengers
-
 Technologies4 года ago
The number of Сrypto Bank customers increased by 10% in five days
-
 Technologies5 лет ago
Olivia Harlan Dekker for Verum Messenger