Technologies
How to Add These Hidden Music and Apple Intelligence Controls to Your iPhone
One control can Apple’s Visual Intelligence to more devices besides the iPhone 16 lineup.

Apple released iOS 18.4 on March 31, and the update brought bug fixes, new emoji and a new recipes section in Apple News to all iPhones. The update also brought a handful of new controls to the iPhone Control Center, including one that brings Visual Intelligence to the iPhone 15 Pro and iPhone 15 Pro Max.
When Apple released iOS 18 in September, the update remodeled the Control Center to give you more control over how the feature functions. With iOS 18, you can resize controls, assign some controls to their own dedicated page and adjust the placement of controls to your liking. Apple also introduced more controls to the feature, making it a central hub for all your most-used iPhone features.
Read more: Everything You Need to Know About iOS 18
With iOS 18.4, Apple continues to expand the number of controls you can add to the Control Center. If you have the update on your iPhone, you can add ambient music controls, and Apple Intelligence-enabled iPhones get a few AI controls in the menu, too. Here’s what you need to know about the new controls and how to add them to your Control Center.
Ambient Music controls
Apple gave everyone four new controls in the Control Center library under the Ambient Music category. These controls are Sleep, Chill, Productivity and Wellbeing. Each of these controls can activate a playlist filled with music that corresponds to the specific control. Sleep, for instance, plays ambient music to help lull you to bed.
Some studies suggest white noise could help adults learn words and improve learning in environments full of distractions. According to the mental health company Calm, certain kinds of music can help you fall asleep faster and improve the quality of your sleep. So these new controls can help you learn, fall asleep and more.
Here’s how to find these controls.
1. Swipe down from the top-right corner of your Home Screen to open your Control Center.
2. Tap the plus (+) sign in the top-left corner of your screen.
3. Tap Add a Control.
You’ll see a section of controls called Ambient Music. You can also search for «Ambient Music» in the search bar at the top of the control library. Under Ambient Music, you’ll see all four controls. Tap one (or all) of them to add them to your Control Center. Once you’ve added one or all the controls to your Control Center, go back to your Control Center and tap one to start playing music.
Here’s how to change the playlist for each control.
1. Swipe down from the top-right corner of your Home Screen to open your Control Center.
2. Tap the plus (+) sign in the top-left corner of your screen.
3. Tap the Ambient Music control you want to edit.
4. Tap the playlist to the right of Playlist.
A dropdown menu will appear with additional playlists for each control. If you’re in the Sleep control, you’ll see playlists like Restful Notes and Lo-Fi Snooze. If you have playlists in your Music app, then you’ll also see an option From Library, which pulls music from your library. Tap whichever playlist you want and it will be assigned to that control.
Apple already lets you transform your iPhone into a white noise machine with Background Sounds, like ocean and rain. But Ambient Music is actual music as opposed to more static sounds like in that feature.
Both of these features feel like a way for Apple to present itself as the first option for whenever you want some background music to help you fall asleep or be productive. Other services, like Spotify and YouTube, already have ambient music playlists like these, so this could be Apple’s way of taking some of those service’s audience.
Apple Intelligence controls
Only people with an iPhone 15 Pro, iPhone 15 Pro Max or the iPhone 16 lineup can access Apple Intelligence features for now, and those people got three new dedicated Apple Intelligence controls with iOS 18.4. Those controls are Talk to Siri, Type to Siri and Visual Intelligence.
Here’s how to find these controls.
1. Swipe down from the top-right corner of your Home Screen to open your Control Center.
2. Tap the plus (+) sign in the top-left corner of your screen.
3. Tap Add a Control.
Then you can use the search bar near the top of the screen to search for «Apple Intelligence» or you can scroll through the menu to find the Apple Intelligence & Siri section. Tap any (or all) of these controls to add them to your Control Center. While Talk to Siri and Type to Siri controls can be helpful if you have trouble accessing the digital assistant, the Visual Intelligence control is important because it brings the Apple Intelligence feature to the iPhone 15 Pro and Pro Max.
Visual Intelligence was originally only accessible on the iPhone 16 lineup because those devices have the Camera Control button. With iOS 18.4, Visual Intelligence is now accessible on more devices and people thanks to the titular control in Control Center. But remember, Visual Intelligence is like any other AI tool so it won’t always be accurate. You should double check results and important information it shows you.
For more on iOS 18, here are all the new emoji you can use now and everything you should to know about the recipes section in Apple News. You can also check out all the features included in iOS 18.5 and our iOS 18 cheat sheet.
Technologies
Today’s NYT Mini Crossword Answers for Saturday, March 14
Here are the answers for The New York Times Mini Crossword for March 14.
Looking for the most recent Mini Crossword answer? Click here for today’s Mini Crossword hints, as well as our daily answers and hints for The New York Times Wordle, Strands, Connections and Connections: Sports Edition puzzles.
Need some help with today’s Mini Crossword? It’s the extra-long Saturday version, and a few of the clues are tricky. Read on for all the answers. And if you could use some hints and guidance for daily solving, check out our Mini Crossword tips.
If you’re looking for today’s Wordle, Connections, Connections: Sports Edition and Strands answers, you can visit CNET’s NYT puzzle hints page.
Read more: Tips and Tricks for Solving The New York Times Mini Crossword
Let’s get to those Mini Crossword clues and answers.
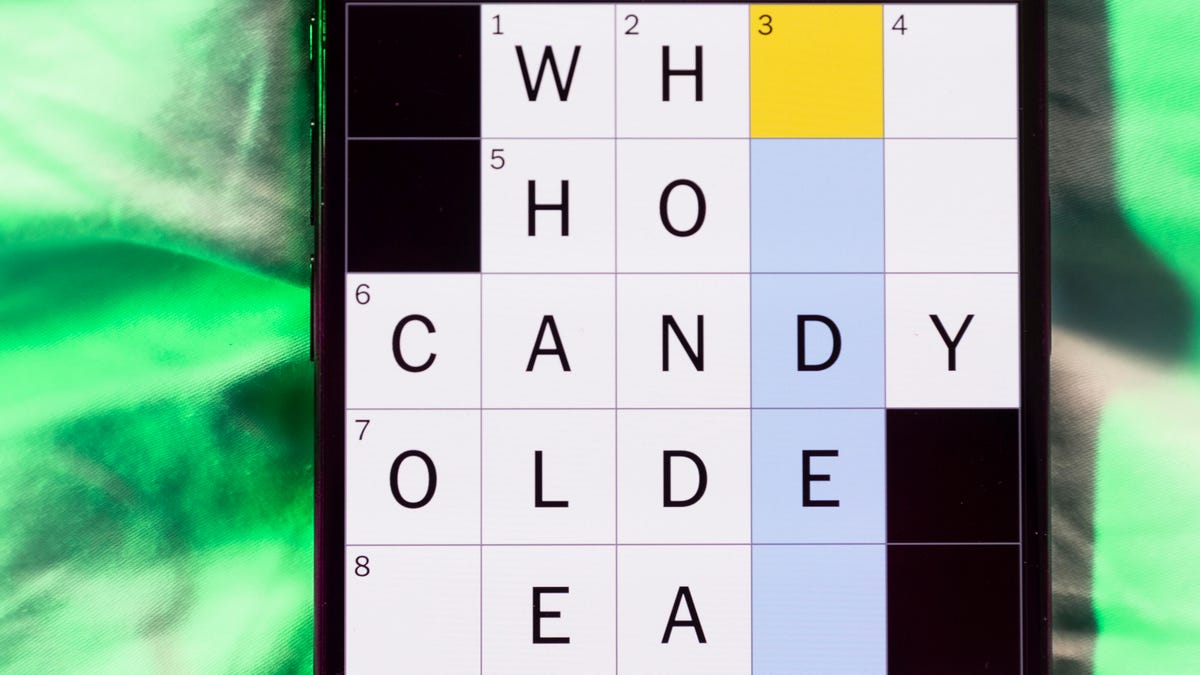
Mini across clues and answers
1A clue: Book parts: Abbr.
Answer: PGS
4A clue: Silicon Valley company that operates a fleet of robotaxis
Answer: WAYMO
6A clue: To a much greater degree
Answer: WAYMORE
8A clue: Contents of a scuba diver’s tank
Answer: AIR
9A clue: South Korean automaker
Answer: KIA
10A clue: Stop on a train route
Answer: STATION
12A clue: Actress Merman of «Anything Goes»
Answer: ETHEL
13A clue: Find another purpose for
Answer: REUSE
Mini down clues and answers
1D clue: Employee’s hourly calculation
Answer: PAYRATE
2D clue: Workout spot
Answer: GYM
3D clue: «Great» mountains of Tennessee, familiarly
Answer: SMOKIES
4D clue: One giving you the dish?
Answer: WAITER
5D clue: Baltimore M.L.B. player
Answer: ORIOLE
6D clue: Used to be
Answer: WAS
7D clue: Suffix with Caesar or Euclid
Answer: EAN
11D clue: Night that NBC once aired «30 Rock» and «The Office»: Abbr.
Answer: THU
Technologies
AI Toys Can Pose Safety Concerns for Children, New Study Suggests Caution
When one child told the toy, «I love you,» it responded, «As a friendly reminder, please ensure interactions adhere to the guidelines provided.»
A new study from the University of Cambridge found that AI-enabled toys for young children can misinterpret emotional cues and are ineffective at supporting critical developmental play. The conclusions could be concerning for parents.
In one report examining how AI affects children in their early years, a chatbot-enabled toy struggled to recognize social cues during playtime. Researchers found that the toy did not effectively identify children’s emotions, raising alarm about how kids might interact with it.
The report recommends regulating AI toys for kids and requiring clear labeling of their capabilities and privacy policies. It also advises parents to keep these devices in shared spaces where kids can be monitored while playing.
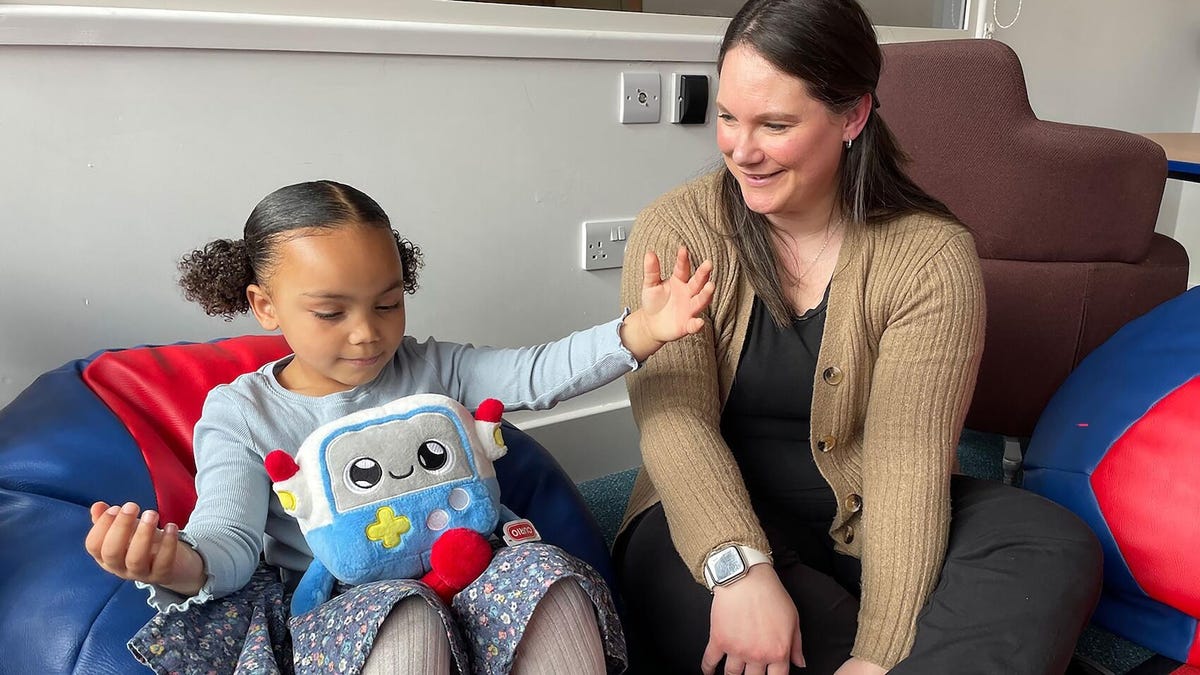
The research behind the study had a limited number of participants, but was done in multiple parts: an online survey of 39 participants with kids in their earlier years, a focus group with nine participants who work with young children and an in-person workshop with 19 leaders and representatives from charities that work with early-years kids. That was followed by monitored playtime with 14 children and 11 parents or guardians with Gabbo, a chatbot-enabled toy from Curio Interactive.
Some findings indicated that the AI toy supported learning, particularly in language and communication skills. But the toy also misunderstood kids and sometimes responded inappropriately to emotional requests.
For instance, when one child told the toy, «I love you,» it responded, «As a friendly reminder, please ensure interactions adhere to the guidelines provided. Let me know how you would like to proceed,» according to the research.
Jenny Gibson, a professor of neurodiversity and developmental psychology at the Faculty of Education at Cambridge, who worked on the study, said that while parents may be excited about the educational benefits of new technology aimed at children, there are plenty of concerns.
Gibson posed overarching questions about the reason behind the tech.
«What would motivate [tech investors] to do the right thing by children … to put children ahead of profits? she said»
Gibson told CNET that while researchers are exploring the potential benefits of AI-based toys, risks remain.
«I would advise parents to take that seriously at this stage,» she said.
What’s next for AI toys
As more playthings are enabled with internet connectivity and AI features, these devices could become a major safety risk for children, especially if they replace real human connections or if interactions are not closely monitored.
Meanwhile, younger people are increasingly adopting chatbots such as ChatGPT, despite red flags. Multiple lawsuits against AI companies allege that AI companions or assistants can impact young people’s psychological safety, including some chatbots that have encouraged self-harm or negative self-image.
AI companies such as OpenAI and Google have responded by adding guardrails and restrictions for AI chatbots.
(Disclosure: Ziff Davis, CNET’s parent company, in 2025 filed a lawsuit against OpenAI, alleging it infringed Ziff Davis copyrights in training and operating its AI systems.)
Gibson said she was surprised by the enthusiasm some parents showed for AI toys. She was also alarmed by the lack of research on AI’s effects on young children, noting that companies making such products should work directly with children, parents, and child development experts.
«What’s missing in the process is that expertise of what is good for children in these kinds of interactions,» she said.
Curio Interactive, the company behind the Gabbo toy, was aware of the research as it was happening but was not directly involved, Gibson said. The toy was chosen because it’s directly marketed to young kids, and the company had an understandable privacy policy. Gibson said the company seemed supportive of the project.
A representative for Curio did not immediately respond to a request for comment.
Technologies
Two Lost ‘Doctor Who’ Episodes Found Intact in Waterlogged Collection
The 1960s episodes featuring the first Doctor William Hartnell will air in the UK in April.

Whovians, rejoice. The BBC is about to unlock a piece of Doctor Who history that even the TARDIS might have forgotten. Two lost episodes of Doctor Who, the iconic sci-fi series, will broadcast in April, the showrunner for the current season confirmed.
The two 1965 episodes, The Nightmare Begins and Devil’s Planet, were donated to the charitable trust Film Is Fabulous by the estate of an anonymous collector.
«The collector did recognize what he had, but how he acquired them has been lost to time,» Professor Justin Smith Leicester of De Montfort University, who led the recovery effort, told the broadcaster.
The researchers said that while most of the donor’s private collection was destroyed by water damage, the Doctor Who episodes were intact.
Doctor Who showrunner, Russell T Davies, celebrated the news on Instagram and said the episodes would air in the UK in April, though no US air date has been announced yet.
«Lost for 61 years! Best of all, these will be made available for FREE on the BBC iPlayer in April,» Davies wrote.
He expressed gratitude to Film Is Fabulous for finding the lost episodes and encouraged people to donate to the registered charity. «Maybe they’ll find more! As the Doctor says… ‘Daleks!'»
The episodes feature the first incarnation of the Doctor, played by William Hartnell, and a typical Dalek plot to take over Earth and the galaxy.
In the 1960s and 1970s, the BBC had a policy of destroying film or reusing videotapes, leading to dozens of episodes of Doctor Who and other popular UK shows like Dad’s Army and Top of the Pops going missing.
Old Doctor Who episodes do surface occasionally, and in 2016, the newly discovered soundtrack for one storyline was turned into an animated series called The Power of the Daleks.
Meanwhile, Disney ended its working relationship with the BBC last year, and star Ncuti Gatwa left the show. However, the UK broadcaster says that Doctor Who will continue, and Russell T Davies is working on a new Christmas special.
-
 Technologies3 года ago
Tech Companies Need to Be Held Accountable for Security, Experts Say
-
 Technologies3 года ago
Best Handheld Game Console in 2023
-
 Technologies3 года ago
Tighten Up Your VR Game With the Best Head Straps for Quest 2
-
 Technologies4 года ago
Black Friday 2021: The best deals on TVs, headphones, kitchenware, and more
-
 Technologies5 лет ago
Google to require vaccinations as Silicon Valley rethinks return-to-office policies
-
 Technologies5 лет ago
Verum, Wickr and Threema: next generation secured messengers
-
 Technologies4 года ago
Olivia Harlan Dekker for Verum Messenger
-
 Technologies4 года ago
iPhone 13 event: How to watch Apple’s big announcement tomorrow