Technologies
Your iPhone Has 23 Settings That Could Make Your Life Way Easier
Small changes in your iPhone’s settings can make a big difference in how it works.
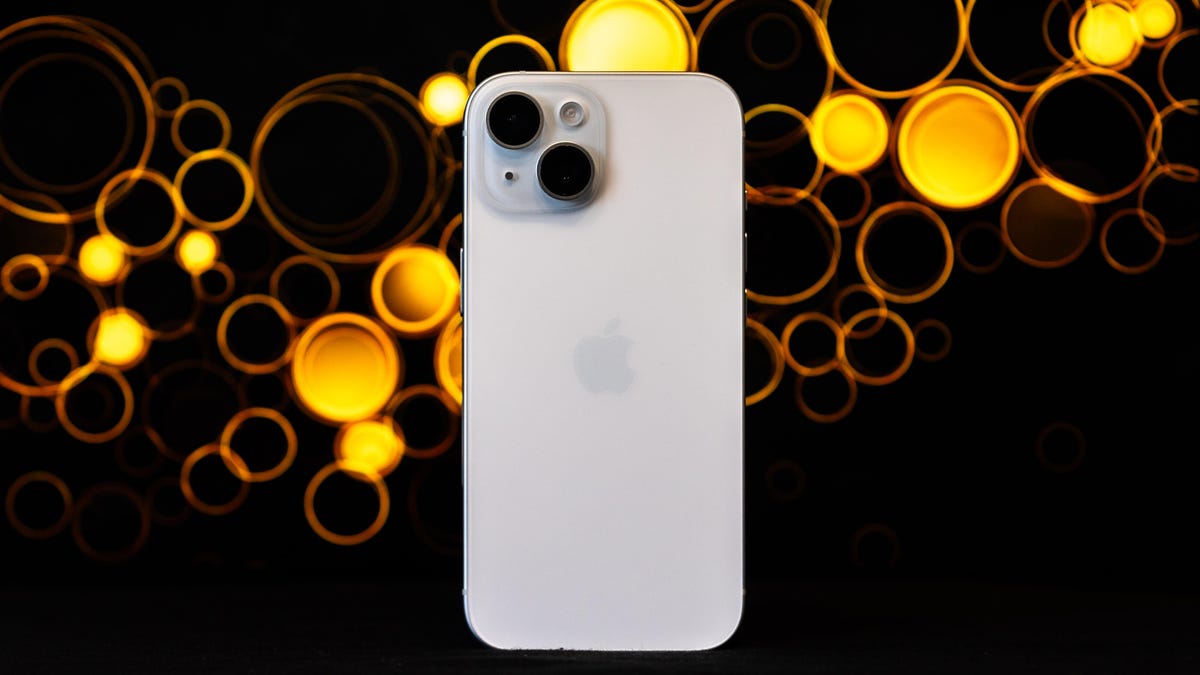
If you haven’t taken a closer look at your iPhone settings lately, you’re probably missing out on features that could save time, reduce distractions, and personalize your experience in a big way. Every iOS update quietly adds tools and upgrades that make your phone smarter and easier to use — but only if you know where to find them.
Apple continues to expand what your iPhone can do, from smarter notification controls to an upgraded Siri that feels more like an assistant and less like a voice search. There are also simple ways to clean up your camera roll, automate your daily routines, and cut down on the digital noise that slows you down.
From decluttering your home screen to maximizing battery life, we’ve rounded up 23 iOS settings that let you take full control of your device. Some you may already know, and others that might surprise you.
1. Stop apps from tracking your exact location
Apps like Doordash and Postmates require your exact location to deliver food to the right location or directly to you. That doesn’t mean every application on your iPhone needs to know precisely where you are at every moment. That’s why you can prevent an app from tracking your exact location.
In the Settings app, choose an application (like Instagram, for example), tap Location and then toggle off Precise Location. Any app with Precise Location off will only know your approximate location, within a few miles.
2. Turn the back of your iPhone into a button
The back of your iPhone can be used as a secret button to activate certain actions such as taking a screenshot, enabling low power mode or running a shortcut that can automatically play music when you arrive at the gym. The Action Button on the iPhone 14 Pro and Pro Max, iPhone 15 and 15 Plus, and iPhone 15 Pro and Pro Max models do the same, but if you have an older model, the back of your iPhone works.
The option is hidden deep in your settings; here’s how to find it.
In the Settings app, go to Accessibility > Touch > Back Tap and choose one of two options: double tap or triple tap. You should see a list of actions you can run by tapping the back of your iPhone, like opening your camera, turning on the flashlight and scrolling up and down. Tap an action or shortcut to enable it with Back Tap.
3. Enable Live Voicemail to get real-time voicemail transcriptions
You get a call and don’t want to necessarily pick up unless it’s important. Unfortunately, the only way you’ll know is if you listen to a voicemail left after the call. With iOS 17, you can read a real-time transcription of any voicemail being left. That’s right: If someone is leaving you a voicemail, you can read it on your phone and choose to pick up the call, connecting you with the person leaving the voicemail.
The Live Voicemail feature isn’t on by default, so go to Settings > Phone > Live Voicemail and turn it on. That’s it.
4. Bring back full-screen incoming call alerts
If your iPhone is unlocked and you receive a phone call, a banner-style notification appears at the top of your screen, with a small photo and name or number of the person calling, and the options to pick up or deny the call.
This wasn’t always the default option. In the past, incoming calls would take over your entire display when your iPhone was unlocked. It was disruptive, sure, but it also got the job done. The banner may be a welcome change for many because it’s more discreet and allows you to use your phone while receiving a call.
If for any reason you’re not a big fan of the banner and want to revert to the more attention-grabbing full-screen alert, go to Settings > Phone > Incoming Calls and tap Full Screen.
5. Turn off 5G coverage you don’t want or have
Apple touts a Smart Data feature that’s specific to its 5G phones that will automatically switch between 4G LTE and 5G networks based on how you’re using your device. You may find that your iPhone’s battery drains faster than it did before. If you don’t want to sacrifice battery life for faster 5G speeds, shut it down. You can always turn 5G back on when you want it, or when service in your area improves.
To turn off 5G on your iPhone, forcing it to always use 4G LTE (even if you have 5G coverage), open the Settings app, then go to Cellular > Primary > Voice & Data and tap LTE. Alternatively, if you want your iPhone to exclusively use a 5G connection when available, you can select 5G On.
6. Fine-tune how much data is used by a 5G connection
If you’re happy with your 5G performance, here’s a network-related setting you should check out. Go to Settings > Cellular > Primary > Data Mode, where you’ll find three options: Allow More Data on 5G, Standard and Low Data Mode.
Even though you can read brief descriptions below the three settings, they don’t paint a complete picture of the first option. According to an Apple support document, allowing more data on 5G will give you high-quality video and FaceTime calls. It also lets your phone download software updates and stream high-definition Apple TV and Apple Music content, and it allows third-party developers to improve their respective apps.
The default setting on this page will depend on your carrier and data plan, so it’s a good idea to check your iPhone and make sure it’s correctly set to your preference.
7. Stop apps from cluttering up your home screen
The App Library is a place where you can quickly find and access all of your applications. And while apps are housed here, all newly downloaded apps also appear on your home screen. This may not be a problem if you download apps sparingly, but if you’re installing new apps on a consistent basis, they can quickly clutter up your home screen.
To stop downloaded apps from appearing on your home screen, go to Settings > Home Screen & App Library and select App Library Only. If you want to find the app, you’ll have to swipe left on your home screen until you reach the App Library.
8. Unlock your phone while wearing a face mask
If you wear a mask in public, unlocking your iPhone with Apple’s Face ID technology can be frustrating. Because half of your face is covered, Face ID just doesn’t work. And while entering your passcode to unlock your phone works, it’s not as convenient.
With iOS, you have the option to turn on a face unlock feature that makes it easy to unlock your iPhone when you’re wearing a face mask. Before the update, you could only unlock your iPhone if you owned an Apple Watch.
To unlock your iPhone with your Apple Watch, open the Settings app on your iPhone and then open the Face ID & Passcode option. Scroll down until you find the Unlock with Apple Watch section (you must be connected to an Apple Watch for the setting to appear), where you can turn on the feature for any watches linked to your iPhone.
If you have an iPhone running iOS 15.4 or later, you can unlock your iPhone while wearing a mask without an Apple Watch. Go to the Settings app and open Face ID & Passcode. From there, you can toggle on the Face ID With a Mask option. It’s pretty awesome.
9. Put the address bar in Safari back on top
The address in Safari migrated to the bottom of the screen a few years back; welcome for those with smaller hands who had difficulty reaching it with one hand at the top. This move might feel more natural, since it’s closer to the keyboard and where you typically place your thumbs, it can be off-putting since some people are used to seeing the URL bar near the top of the screen.
If you want to put the address bar back at the top of the screen, go to Settings, tap Safari and choose the Single Tab option under the Tabs subheading.
10. Add features that can be used when your iPhone is locked
There are times when you might want to have certain info handy even when your phone is locked. That’s why Apple allows you to enable some features without having to unlock your devices, such as the notification center, Control Center, the ability to reply to messages and the Wallet app.
To customize the features you’d like to access on the lock screen, launch the Settings menu, tap Face ID & Passcode and enter your passcode when prompted. Scroll down until you see the Allow Access When Locked section, and toggle the sliders based on your preferences.
11. Make your favorite email app or web browser your default
It’s not all about Safari. On your iPhone, you have the ability to choose your own default apps, at least for email and web browsing. That means that when you tap a link or an email send button, your iPhone will automatically launch the web browser or email provider of your choosing rather than Safari or Mail.
To get started, open the Settings menu and select the app you’d like to set as a default (such as Google Chrome or Outlook). You should then see a button that says Default Mail App or Default Browser App. Tap that option and select the app of your choosing instead of Safari or Mail.
12. Get full notifications on your lock screen
The first time you experience Apple’s Face ID tech, you’ll notice that you can’t see the content of new alerts and notifications on the lock screen. For example, instead of seeing who sent you a text message and what it says, you’ll only see a generic Messages alert.
By default, all iPhones with Apple’s Face ID tech will hide the content of an alert until you pick up your phone and unlock it. It’s a privacy feature that I rather enjoy, but I also understand how it could be annoying (I’ve heard a few complaints from readers and family members alike).
You can change how notifications appear on your lock screen by going to Settings > Notifications > Show Previews and selecting Always. Conversely, you can select Never if you want to keep the content of your notifications always hidden from the lock screen.
13. Turn off (or on) HDR video for sharing videos
The iPhone can record high dynamic range (HDR) video with Dolby Vision. That means your videos are typically brighter, with more accurate colors and improved contrast. That may be ideal for some, but if you don’t want videos that are automatically adjusted because you want to do it on your own, there is a way to disable the feature.
You can turn off HDR video by going to Settings > Camera > Record Video and turning the switch next to HDR Video to the Off position. Going forward, all videos will be captured in the standard dynamic range.
14. Customize your home screen with fancy wallpaper
Another home screen tweak you should make involves your wallpaper or background. Apple has many wallpapers of its own, with a pretty cool twist.
Open the Settings app on your iPhone and select Wallpaper from the list. Make sure the switch labeled «Dark Appearance Dims Wallpaper,» which you’ll see below the two thumbnail previews of your wallpaper, is turned on. Now, tap Choose a new wallpaper and select either Stills or Live. Look for the circle near the bottom of each wallpaper. It’s half black, half white.
That circle means that the wallpaper has both light and dark mode versions and will change automatically based on the system status of your phone.
You can also set live wallpapers as your background if you’re not sold on dark and light mode.
15. Turn on dark mode to save your battery
Speaking of dark mode, if you don’t want to have to repeatedly adjust your screen’s brightness, you can use your phone’s dedicated dark mode. Dark mode converts all of the white backgrounds in apps to, more often than not, a black background. In turn, your phone is able to save battery power thanks to the darker colors.
Turn it on by going to Settings > Display & Brightness and selecting the Dark option at the top of the screen. You can also just swipe down from the top-right of your iPhone and tap the Dark mode icon in the Control Center.
Apple’s apps will automatically switch to a dark color scheme, and most third-party apps have also adopted the feature.
16. Manage your notifications with Focus Mode
We get a lot of notifications every day, but not all of them are relevant all the time. That’s why Apple introduced a feature called Focus Mode. Think of it as a custom Do Not Disturb feature that’s tailored to specific circumstances.
Focus Mode blocks less relevant alerts while allowing notifications from important people and apps to come through so that you don’t miss anything. You can set up different types of Focus Modes for specific circumstances.
Apple currently offers options for Do Not Disturb, personal, sleep, work, driving, fitness, gaming, mindfulness and reading, but you can also create your own custom mode. You can schedule Focus Modes so that they turn on automatically when needed and display your status in apps so that others know you have notifications silenced.
To get started, open the Settings menu, tap Focus and choose one of the available options to set up your notification preferences. Tap the plus (+) symbol in the top right corner to add a new Focus.
17. Make your screen text bigger or smaller
With a couple of taps on your iPhone’s screen, you can adjust the font size to make it easier to read. Open Settings and go to Display & Brightness > Text Size where you can use the slider until you’re happy with the font size. For a little added oomph, you can turn on Bold Text (it’s just below the Text Size button).
18. Add an alternate appearance to Face ID
Apple’s facial recognition feature, Face ID, constantly learns different aspects of your face with each scan. If you’re struggling to get Face ID to consistently recognize you, try the Alternate Appearance option.
Go to Settings > Face ID & Passcode > enter your PIN > Set Up An Alternate Appearance and go through the process of enrolling your face again.
19. Disable auto-brightness for longer battery charge
Your iPhone’s screen brightness level can have a big impact on battery life. By default, iOS will automatically adjust the display’s brightness based on how much light its ambient sensor detects. If you want to take complete control, you can disable auto brightness, meaning the brightness level will stay where you set it until you adjust it again.
Open Settings > Accessibility > Display & Text Size and at the bottom of the page, you’ll find a switch to turn off Auto-Brightness.
Now, whenever you want to adjust your screen, you can do so by opening Control Center with a swipe up from the bottom of the screen on a device with a home button, or a swipe down from the top-right corner on newer iPhones.
20. Triage your privacy settings
The first time you set up an iPhone with all of your apps, you’re bombarded with prompts asking for permission to access personal information ranging from tracking your location to your Apple Health information or your camera roll.
It’s far too easy to get in the habit of approving everything just so you can use the app, but take a few minutes and go through your privacy settings to tailor what each app can and can’t see. We walk you through the whole privacy process in two quick steps.
21. Use the Control Center to access apps with a swipe or tap
The iPhone’s Control Center is a convenient spot to quickly change songs, turn on airplane mode, connect to Wi-Fi or start a timer, but there’s so much more to it than that. You can quickly turn on your flashlight, check on a timer or start recording your screen with a quick swipe and tap.
Customize which apps and features are available in Control Center by opening Settings > Control Center. Remove an option with a tap on the red minus button or add an option by selecting the green addition button. Drag features up or down using the three-line icon on the right side of the screen.
I like having quick access to the Wallet app and toggles for low-power mode and dark mode.
As a reminder, if you have an iPhone with a home button, like the iPhone SE, you can swipe up from the bottom of the screen to open Control Center. If you have an iPhone with Face ID, you’ll need to swipe down from the top-right corner of the screen where the battery icon is.
22. Organize alerts with Notification Summary
Apple wants to help you manage your notifications in iOS, starting with the Notification Summary feature. Rather than letting notifications pile up on your home screen, you can schedule alerts that aren’t urgent to arrive in a bundle at a specific time of day.
Important notifications like calls, direct messages and other time-sensitive alerts (like the status of your Uber or Lyft ride, for example) will still appear immediately.
To try this out, open Settings, press Notifications and tap Scheduled Summary.
23. Change Siri’s voice
If you’ve recently set up a new iPhone, you may have noticed that Siri no longer defaults to a female voice. Instead, you’ll be asked which Siri voice you want to use, including several more recent options. Once you’ve made your selection, Apple will change Siri’s voice across all of the devices linked to your Apple ID.
You can check out the voice options by going to Settings > Siri & Search > Siri Voice. To learn more, check out our complete guide to changing Siri’s sound. Apple also added a gender-neutral Siri voice option for English speakers.
For more, here are 17 hidden features on our iPhone you should know about and annoying iPhone features you can do something about.
Technologies
Let T-Mobile Pick Up the Tab. Get a Free iPhone 17 With a New Line
If you’ve been looking to add a new line or switch carriers, you can scoop up Apple’s latest flagship on T-Mobile’s dime.
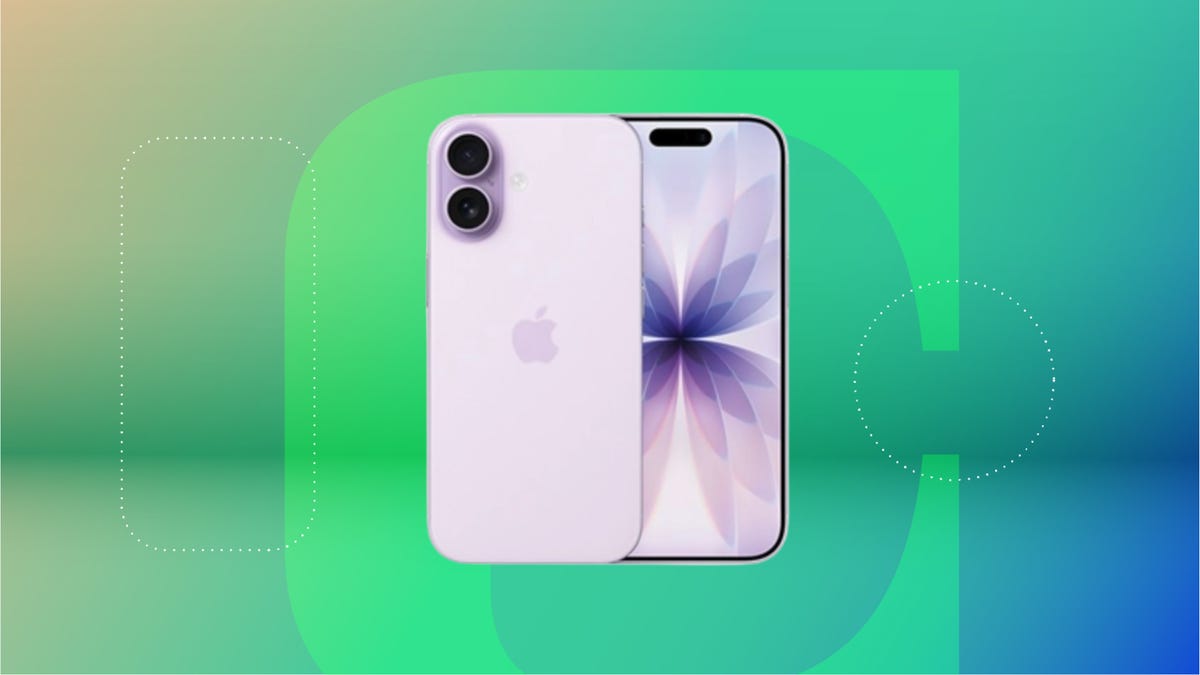
Apple’s new iPhone 17 typically costs $830 for the 256GB configuration, or up to $1,030 for the 512GB configuration. However, T-Mobile isoffering it to customers for free if they meet certain qualifications. If you’ve been looking to trade in your old device or choose an eligible plan, now is a great time to nab this deal.
T-Mobile doesn’t mention a deadline for this deal’s end, but it’s best to act fast if you’ve been wanting the latest iPhone.
To get a free iPhone 17, you’ll need to switch to T-Mobile on an Experience Beyond or Experience More plan and open a new line. You can also choose a Better Value plan, but you must add at least three lines with that plan to get your phone. You can also add a new line on a qualifying plan to score the deal, so long as you also have an eligible device to trade in.
Buyers are still responsible for the $35 activation fee. You’ll get bill credits for 24 months that amount to your phone’s cost. Additionally, you can only get up to four devices with a new line on a qualifying plan.
Note that newer phones will net you more trade-in credits, but an iPhone 6 will net you at least $400 off. The iPhone 17 Pro is also free with a trade-in of an eligible device on an Experience Beyond plan. The iPhone 17 Pro Max is just over $4 per month right now, with the same qualifications.
We’ve also got a list of the best phone deals, if you’d like to shop around.
MOBILE DEALS OF THE WEEK
-
$749 (save $250)
-
$298 (save $102)
-
$241 (save $310)
-
$499 (save $300)
Why this deal matters
The iPhone 17 series is the latest in Apple’s ecosystem. These smartphones are made to work with Apple Intelligence, include faster chips, offer improved camera performance and show off Apple’s trademark gorgeous design. Starting at $830, they’re not the cheapest phones around, so carrier deals like this one are the best way to save some serious cash.
Technologies
How Team USA’s Olympic Skiers and Snowboarders Got an Edge From Google AI
Google engineers hit the slopes with Team USA’s skiers and snowboarders to build a custom AI training tool.

Team USA’s skiers and snowboarders are going home with some new hardware, including a few gold medals, from the 2026 Olympics. Along with the years of hard work that go into being an Olympic athlete, this year’s crew had an extra edge in their training thanks to a custom AI tool from Google Cloud.
US Ski and Snowboard, the governing body for the US national teams, oversees the training of the best skiers and snowboarders in the country to prepare them for big events, such as national championships and the Olympics. The organization partnered with Google Cloud to build an AI tool to offer more insight into how athletes are training and performing on the slopes.
Video review is a big part of winter sports training. A coach will literally stand on the sidelines recording an athlete’s run, then review the footage with them afterward to spot errors. But this process is somewhat dated, Anouk Patty, chief of sport at US Ski and Snowboard, told me. That’s where Google came in, bringing new AI-powered data insights to the training process.
Google Cloud engineers hit the slopes with the skiers and snowboarders to understand how to build an actually useful AI model for athletic training. They used video footage as the base of the currently unnamed AI tool. Gemini did a frame-by-frame analysis of the video, which was then fed into spatial intelligence models from Google DeepMind. Those models were able to take the 2D rendering of the athlete from the video and transform it into a 3D skeleton of an athlete as they contort and twist on runs.
Final touches from Gemini help the AI tool analyze the physics in the pixels, according to Ravi Rajamani, global head of Google’s AI Blackbelt team. which worked on the project. Coaches and athletes told the engineers the specific metrics they wanted to track — speed, rotation, trajectory — and the Google engineers coded the model to make it easy to monitor them and compare between different videos. There’s also a chat interface to ask Gemini questions about performance.
«From just a video, we are actually able to recreate it in 3D, so you don’t need expensive equipment, [like] sensors, that get in the way of an athlete performing,» Rajamani said.
Coaches are undeniably the experts on the mountain, but the AI can act as a kind of gut check. The data can help confirm or deny what coaches are seeing and give them extra insight into the specifics of each athlete’s performance. It can catch things that humans would struggle to see with the naked eye or in poor video quality, like where an athlete was looking while doing a trick and the exact speed and angle of a rotation.
«It’s data that they wouldn’t otherwise have,» Patty said. The 3D skeleton is especially helpful because it makes it easier to see movement obscured by the puffy jackets and pants athletes wear, she said.
For elite athletes in skiing and snowboarding, making small adjustments can mean the difference between a gold medal and no medal at all. Technological advances in training are meant to help athletes get every available tool for improvement.
«You’re always trying to find that 1% that can make the difference for an athlete to get them on the podium or to win,» Patty said. It can also democratize coaching. «It’s a way for every coach who’s out there in a club working with young athletes to have that level of understanding of what an athlete should do that the national team athletes have.»
For Google, this purpose-built AI tool is «the tip of the iceberg,» Rajamani said. There are a lot of potential future use cases, including expanding the base model to be customized to other sports. It also lays the foundation for work in sports medicine, physical therapy, robotics and ergonomics — disciplines where understanding body positioning is important. But for now, there’s satisfaction in knowing the AI was built to actually help real athletes.
«This was not a case of tech engineers building something in the lab and handing it over,» Rajamani said. «This is a real-world problem that we are solving. For us, the motivation was building a tool that provides a true competitive advantage for our athletes.»
Technologies
Virtual Boy Review: Nintendo’s Oddest Switch Accessory Yet Is an Immersive ’90s Museum
No one needs a Virtual Boy. But I always wanted one. And now it’s living with me at last.
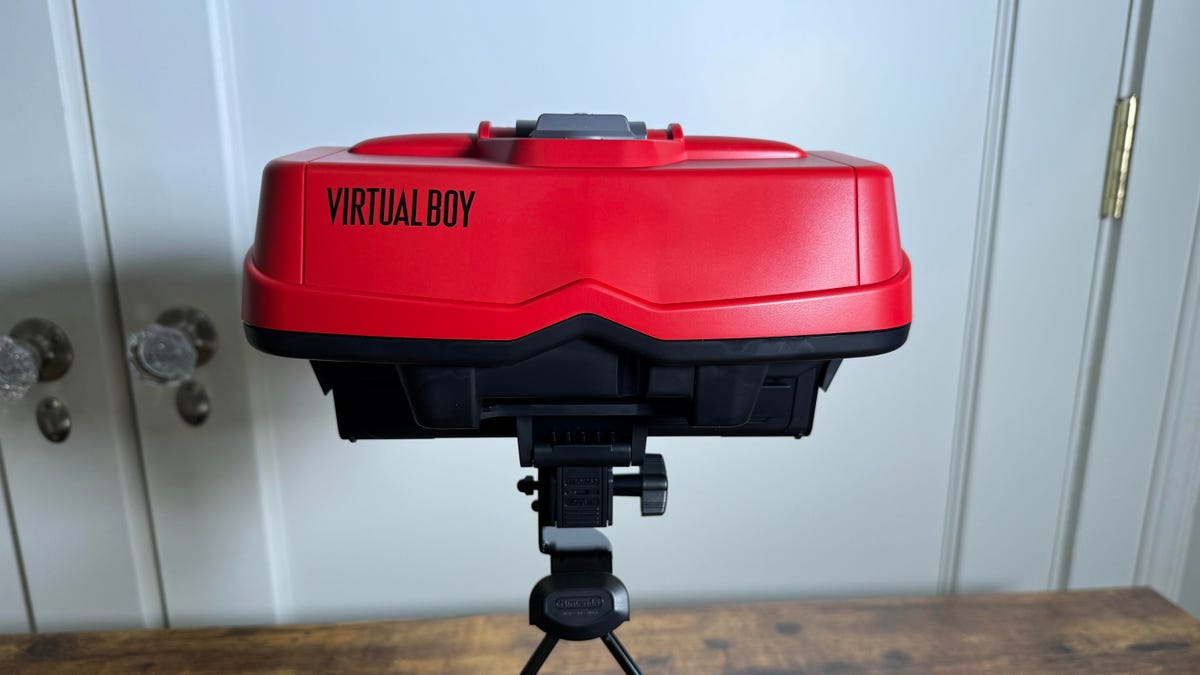
On my desk is a Nintendo device that looks like equipment stolen from a cyberpunk optical shop. It’s big, it’s red and black, it sits on a tripod, it has an eyepiece, and it has a Nintendo Switch 2 nestled inside. Hello, Virtual Boy, you’re back.
Nintendo has made a lot of weird consoles over the years, but the Virtual Boy was the weirdest. And the shortest lived. Released in 1995 and discontinued a year later, it lived for a blink of an eye during my final year in college. I never really had time to consider buying one.
It would have been perfect for me, a Game Boy fan who was in love with the idea of VR even back then. Nintendo has been flirting with virtual reality in various forms for decades, and the Virtual Boy was the biggest swing. But it wasn’t VR at all, really. It was a 3D game console in red and black monochrome, a 3D Game Boy in tripod form.
I’m setting the stage because right now you can order a $100 Virtual Boy recreation that’s a big, strange Switch accessory. It’s staring at me now, taking up a lot of space. It’s too big to fit in a bag. It’s a tabletop console, really, and Nintendo has created this Virtual Boy viewer as a way to play a set of free-with-subscription games on the Switch and Switch 2.
Is it worth your money? I’d call it a museum-piece collectible, not a serious piece of gaming hardware. Still, my kid stuck his head in, played 3D Wario Land, and came out declaring it was really cool. He loves old retro games. But I don’t know how often he’ll pop his head back in.
Nintendo’s first stab at 3D now feels like a museum piece
For comparison, I pulled my old Nintendo 3DS XL out of the drawer where it had been tucked away and booted it up, marveling again that Nintendo actually made a glasses-free 3D game handheld once upon a time. The 3DS is a far more capable and advanced game system, but consider the Virtual Boy an ancient attempt to get there first.
The Virtual Boy was a monochrome red-and-black LED display system, a tabletop-only device that was neither handheld nor TV-connected. The Nintendo Switch’s tabletop-style game modes feel like a bit of an evolutionary link to the Virtual Boy, so it’s poetic that the Switch pops into the new Virtual Boy to power the games and provide the display.
The plastic Virtual Boy is just an odd set of VR goggles for the Switch, but with a red filter on the lenses. Also, you can’t wear it. You keep your head stuck in it.
Awkward and easy to use
All the trappings on this recreation look like the old Virtual Boy but don’t work: You can see a simulated headphone jack, controller port, a sort of knob on top. I just unsnap the plastic case and slide the Switch in, carefully, and then snap it back over. That’s all it is.
To control it, you use the Switch controllers detached or another Switch-compatible controller. Launching the Virtual Boy app — free on the eShop, but you need a Switch Online Plus Expansion Pack account, which costs $50 a year, or $80 for a family membership — splits the Switch display into two smaller, distorted screens. In the Virtual Boy, it looks properly 3D. When I’m done playing, I pop the Switch back out.
As I said in my first hands-on, the big foam-covered eyepiece is more than wide enough for big glasses, and was fine to dip my face into. Getting a comfortable angle to stay playing for a while is another challenge. The Virtual Boy’s included tripod-like stand can adjust the angle, but not as wide as I’d like. I’m sort of hunched over while playing, which gives me a bit of pain. Leaning on the table with my controllers in hand helps.
The red-lensed front eyepiece can be removed, and a later software update will allow Virtual Boy games to be played in several color mixes beyond red and black. Also, you can unscrew an inner bracket to hold the Switch 2 and swap in an included Switch-sized bracket instead. The Switch Lite doesn’t work with the Virtual Boy, however.
The weirdness is my type of indie
All you get right now are seven of the 16 games Nintendo has promised to release for the Virtual Boy. Believe it or not, there were only 22 games ever released for this system. The 16 will include two that were never released before, which is a fun collector’s novelty.
But what’s amazing to me now is that, sinking into these oddball retro games with their pixelated NES-slash-Game Boy aesthetics in red and black, they feel weirdly timely. The janky, oddball, almost-parallel-universe Nintendo vibe feels like the indie retro aesthetic that’s been big for a while now. After all these years, is the Virtual Boy now finally awesome?
Games like UFO 50 (a compilation of new indie games made to feel like an archive of ’80s games for a console that never was) and indie consoles like Panic Playdate (still my favorite black and white mini handheld, a home for all sorts of homebrew retro games) match my feeling diving into these Virtual Boy games and figuring them out.
Wario Land is probably the best: A side-scrolling Wario game with multiple depth levels, it gives me Game Boy Mario game vibes. Golf has multiple holes and an aiming system, and it’s relaxed and basic (and hard to perfect). 3D Tetris has you dropping blocks down a well to fill in layers, with a Tron-like puzzle feel. Red Alert’s wireframe 3D shooter design is like Star Fox, but boiled all the way down to simple vector lines. Galactic Pinball has several tables, and it’s some lovely, very old-school 3D Nintendo pinball fun. Teleroboxer is Punch-Out with robots, with a style that also reminds me of the early Switch game Arms. And The Mansion of Innsmouth is a creepy 3D dungeon-crawling game (in Japanese) where you try to get to exits before time runs out… or monsters get you.
The remaining games coming this year include Mario Tennis, another Tetris game, a wireframe 3D racer, a 3D reinvention of the original Mario Bros. game called Mario Clash and a 3D Space Invaders. By the end of Nintendo’s release schedule, a good chunk of Virtual Boy’s catalog will be there.
A novelty that’s niche as hell
Worth it? Again, if you love weird and retro, and are intrigued by lost Nintendo 3D games, then yes. But if you’re looking for cutting-edge, then no.
Keep in mind: You can buy a cheaper $25 cardboard set of goggles for the Switch that lets you play the Virtual Boy games, too (or use the old Labo VR goggles Nintendo made in 2019, if you have them). That’s a more sensible path. There are even unofficial emulators for Virtual Boy games on the Meta Quest and Apple Vision Pro. But who said the Virtual Boy was sensible?
A Nintendo game system that’s a big set of red goggles on a tripod is inherently absurd. And I welcome its weird footprint in my home, because that’s exactly who I am. But it’s also a testament to Nintendo’s perpetual interest in the bleeding edge of gaming. VR, glasses-free 3D, AR, modular consoles… Nintendo’s poking around the edges.
Is the Virtual Boy a sign that Nintendo could make its own VR or AR game system again someday soon, or as an extension of the Switch 2? Who knows? Shigeru Miyamoto, Nintendo’s legendary video game designer, sounded intrigued and elusive about it when I asked him last year. But there’s never any real way to guess where Nintendo’s heading. The Virtual Boy is a museum-piece reminder of that.
-

 Technologies3 года ago
Tech Companies Need to Be Held Accountable for Security, Experts Say
-

 Technologies3 года ago
Best Handheld Game Console in 2023
-

 Technologies3 года ago
Tighten Up Your VR Game With the Best Head Straps for Quest 2
-
 Technologies4 года ago
Black Friday 2021: The best deals on TVs, headphones, kitchenware, and more
-

 Technologies5 лет ago
Google to require vaccinations as Silicon Valley rethinks return-to-office policies
-
 Technologies5 лет ago
Verum, Wickr and Threema: next generation secured messengers
-

 Technologies4 года ago
Olivia Harlan Dekker for Verum Messenger
-

 Technologies4 года ago
iPhone 13 event: How to watch Apple’s big announcement tomorrow
