Technologies
Apple Watch Series 8 vs. SE: Which One Is Right for You?
The Series 8’s extra health-tracking features, faster charging and always-on display separate it from the SE.
Deciding on a new Apple Watch can be challenging, especially if you’re choosing between the $399 Apple Watch Series 8 and the $249 Apple Watch SE.
Unless you’re an avid scuba diver or rock climber — or want to look like one — you’re probably not considering the $799 Apple Watch Ultra. The Series 8 and SE are both intended for everyday wearers that want to keep an eye on their health and fitness levels, but don’t need the Ultra’s larger screen, longer battery life and extra features tailored for the outdoors.
Both the Series 8 and SE run on Apple’s WatchOS 9 software, have the company’s newest chip and are among the first to detect car crashes. That’s in addition to the functionality Apple’s watches have offered for years, like the ability to track workouts, detect hard falls and mirror iPhone alerts.
Which one is right for you depends on what you want in a smartwatch. As someone who primarily uses my Apple Watch for logging exercise, viewing notifications and checking the time, there’s little that I missed when switching from the Series 8 to the SE after testing both.
The biggest reason to choose the Series 8 over the SE right now is its extra health-tracking smarts, such as its new wrist temperature measurements, blood oxygen saturation readings and the ability to take an electrocardiogram. The Apple Watch isn’t a medical device and shouldn’t be treated as such. But those who want more data on their cardiac and respiratory health to share with their doctors might find the Series 8 to be the better choice.
I think the Series 8’s main benefits will become more clear over the long term. Temperature sensing is still new, but I like the idea of being able to see how changes in my baseline temperature may correlate with how I’m feeling that day. The Series 8’s ultrawideband chip, which isn’t present in the SE, may also feel more valuable in a future where unlocking your car with your phone or watch is just as common as using Apple Pay at the checkout counter.
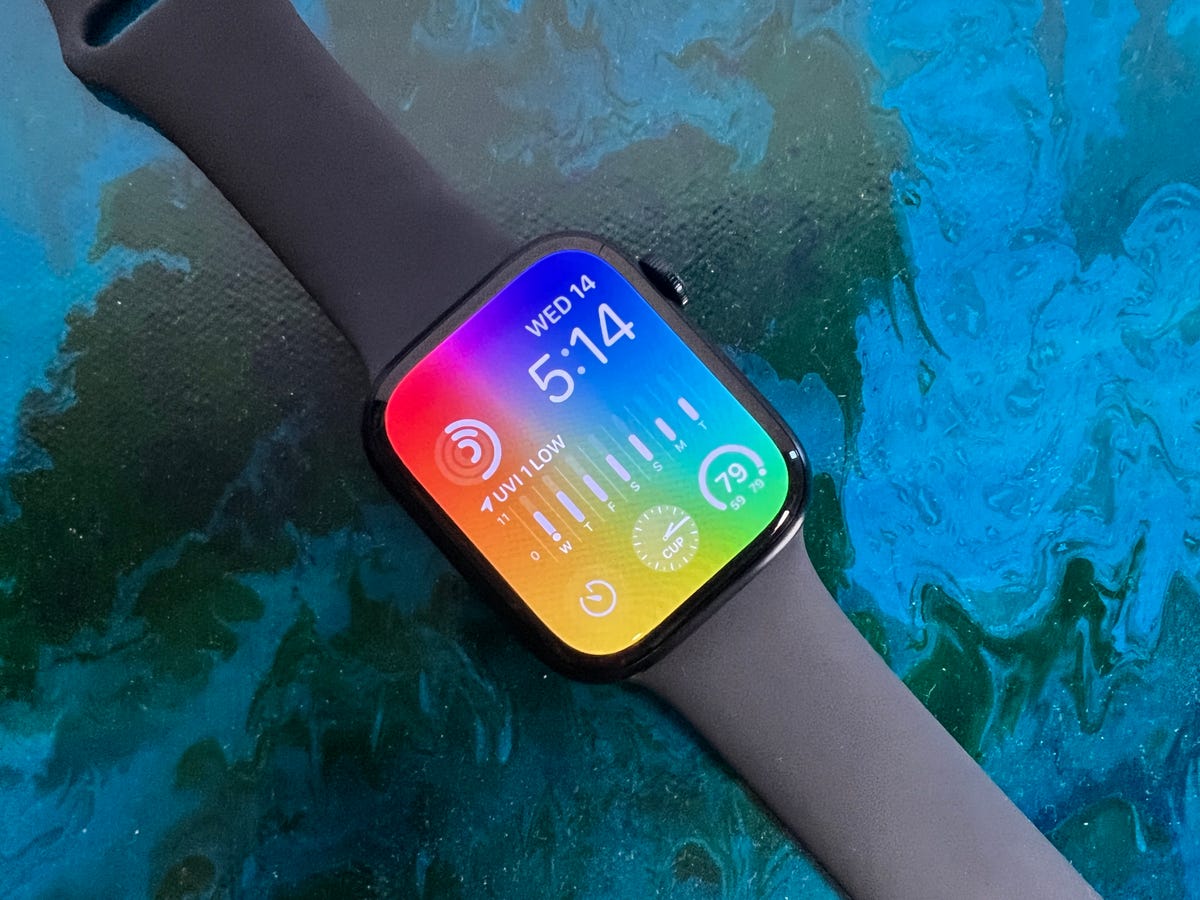
A larger screen with an always-on display
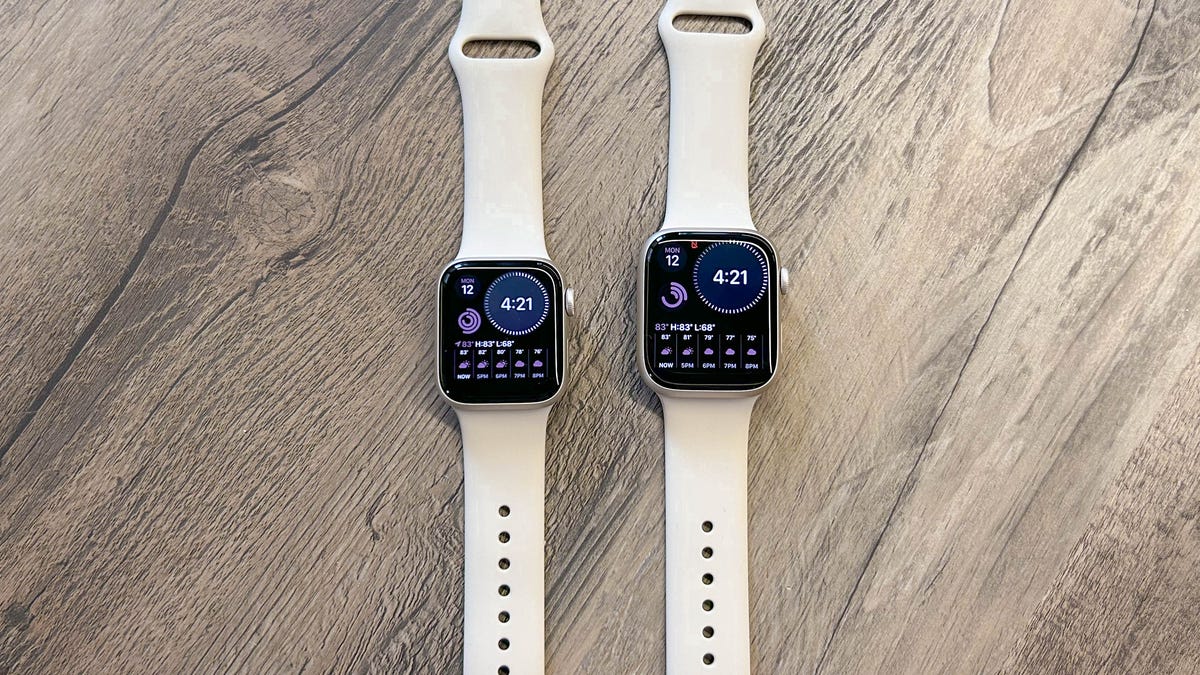
If you were to ask me what I’ve missed most about using the Apple Watch SE, it’s the always-on display found on the Series 8 and other flagship Apple Watches since 2019. Without an always-on display, the Apple Watch SE’s screen just turns into a black box on my wrist, which isn’t exactly the most attractive look.
When wearing the Series 8 (or the Series 5, 6 or 7), I can view my watch face anytime without having to raise my wrist or touch the watch. I don’t think the always-on display alone is worth paying an extra $150 if you don’t care about the other health extras that come with the Series 8. But I do wish the always-on display was standard across all Apple Watches at this point.
The Apple Watch Series 8 also has a larger display and comes in 41- and 45-millimeter case sizes, compared to the 40 or 44mm SE. Having a bigger display is nice, but the only thing I missed is the Series 8’s QWERTY keyboard for typing responses to text messages (the Series 7 has this too). On the SE, you can still scribble letters, dictate words or send canned responses, but I like the flexibility of being able to quickly type a couple of words. Those who prefer larger text sizes may also want to choose the Series 8 over the SE.
The Series 8 is also available in a pricier stainless steel finish, and the aluminum version comes in an additional Product Red color option not available on the SE.
More health tracking
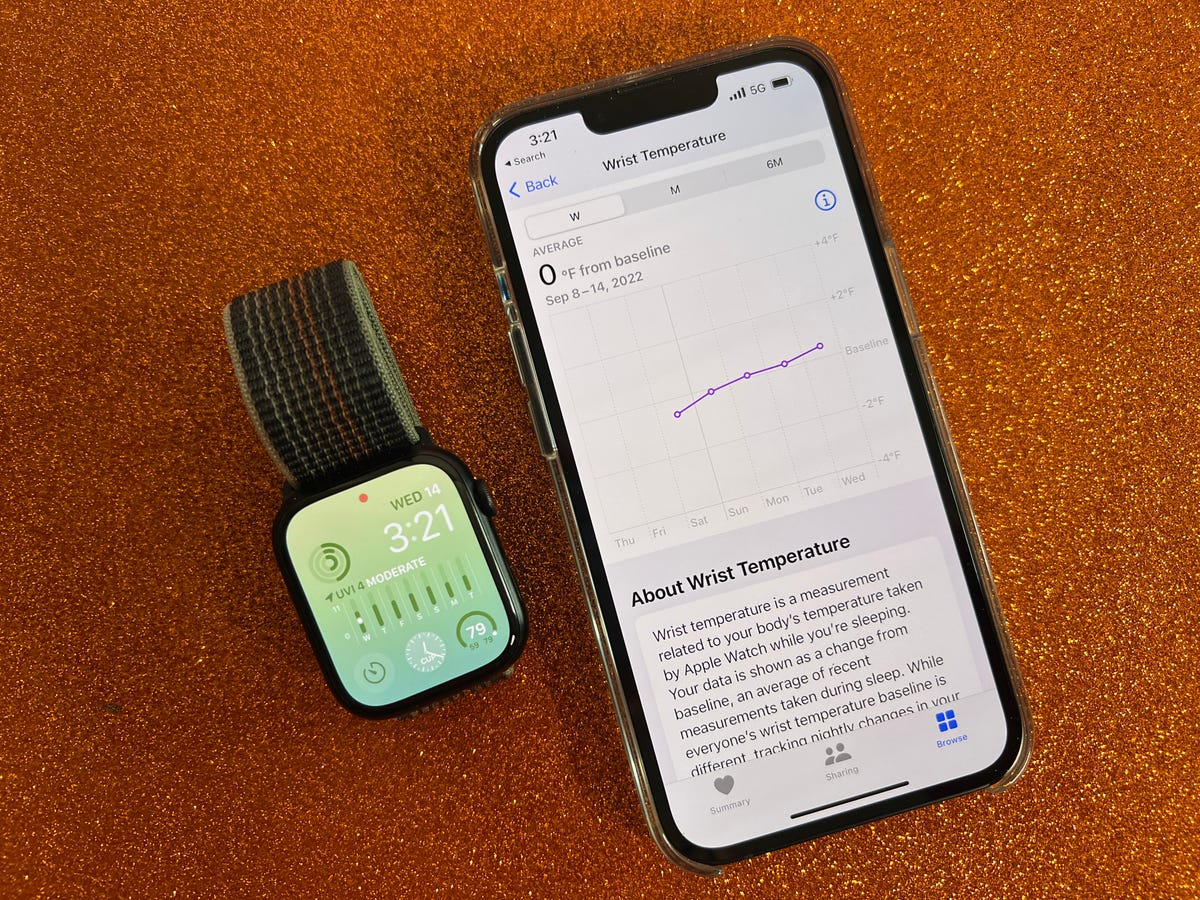
Apple’s flagship watches like the Series 8 have evolved into comprehensive health-tracking devices, with the ability to take an ECG from your wrist and monitor blood oxygen levels. The Series 8 and Ultra are the first to get temperature sensors, enabling them to check your wrist temperature overnight and show whether you’ve deviated from your baseline. It takes five nights to set up temperature sensing, since the watch needs enough time to establish your baseline wrist temperature.
Apple says nighttime wrist temperature can be an indicator of overall body temperature, and changes could possibly be caused by illness, jet lag or exercise. Since the Apple Watch doesn’t have a readiness score like Oura or Fitbit, I could see this information being useful for helping me decide whether my body needs extra rest.
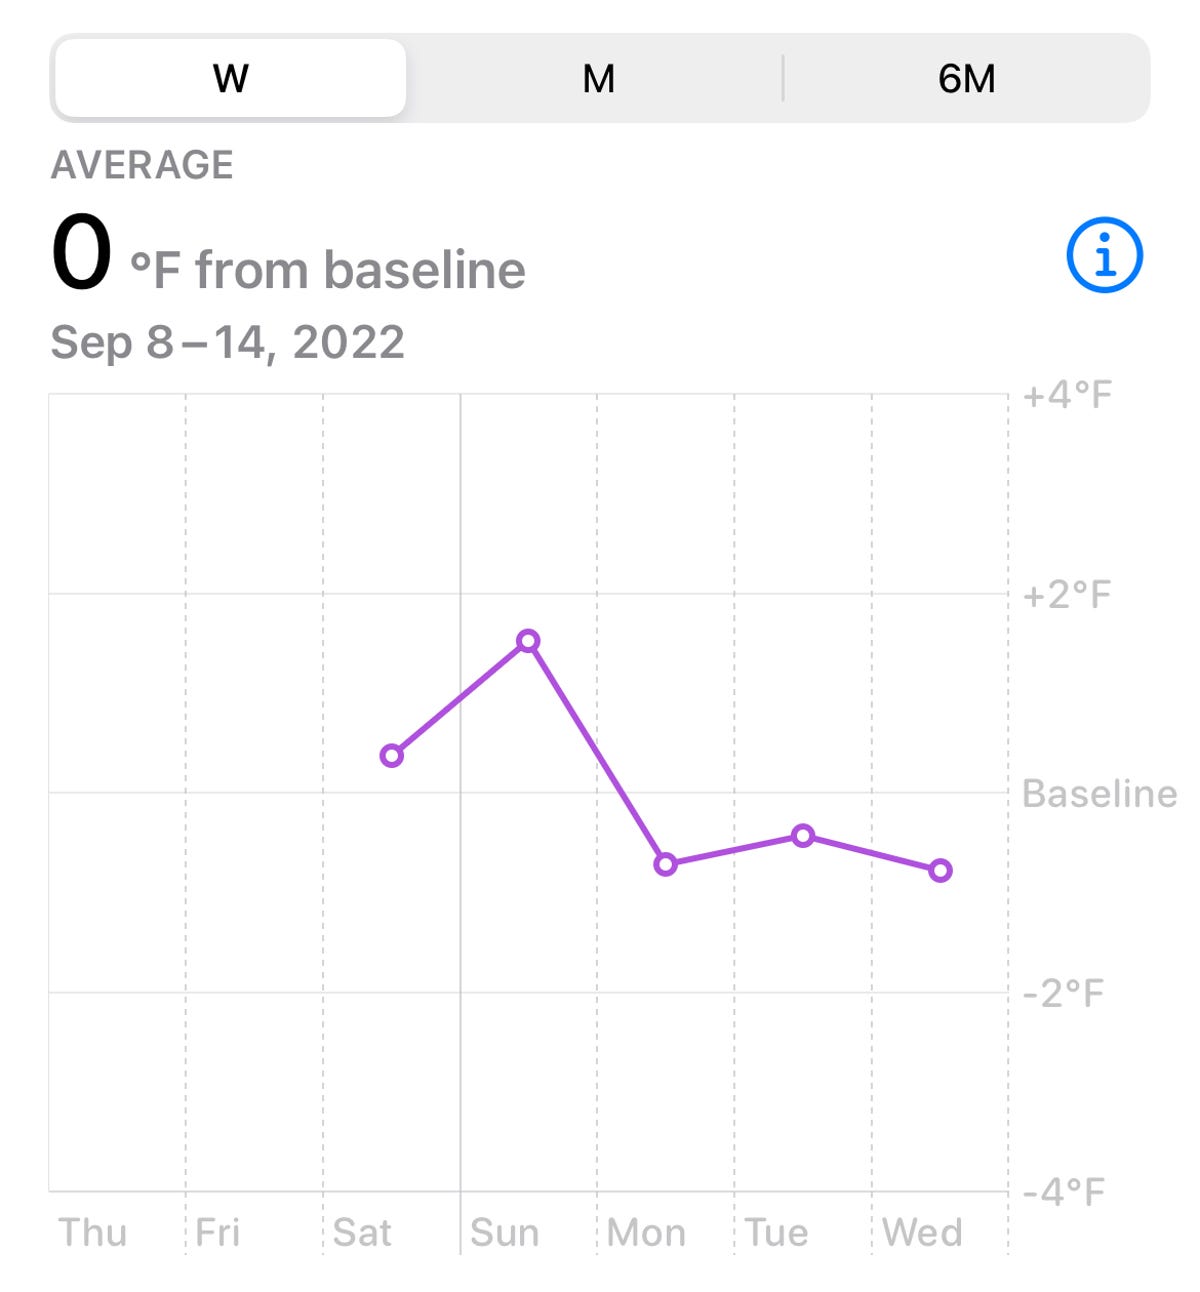
I’m hoping Apple weaves wrist temperature readings into new features and insights in the future. Right now, you can see a chart showing how your nighttime temperature readings deviate from your baseline. But it generally seems like it’s up to you to interpret these readings.
The Apple Watch isn’t a medical device and can’t alert you when you’re sick, so it can be hard to know how to use this data. That’s part of the reason why I never check my blood oxygen levels; it’s just another statistic that I’m not sure what to make of. I’ve been wearing the Apple Watch Series 8 consistently for a couple of weeks, but I’m still not sure what to do with this temperature data.
My nighttime wrist temperature is pretty close to my baseline most of the time, but it’s usually a fraction of a degree higher or lower. Sometimes my deviations are as high as 0.37 degrees Fahrenheit above my baseline or 0.55 degrees below the norm. I can’t connect the dots between those deviations and what may have happened to cause them. It’s also difficult to wear the Apple Watch Series 8 consistently overnight since I have to charge it during some evenings.
Still, having another data point like wrist temperature opens up some interesting opportunities for the future. I’m hoping Apple finds new ways to crunch all of these statistics together to enable new insights and actionable advice. Until then, nighttime wrist temperature is yet another metric you can potentially share with your doctor if you’re not feeling well, but it’s difficult to tell how useful it actually is.
For now, the biggest application for the Series 8’s temperature sensing will likely be fertility tracking. Apple says the Series 8 and Ultra can provide retrospective ovulation estimates and improved period tracking, potentially making the Series 8 a better choice for those who are interested in using it for family planning purposes. That information can be helpful because it provides users with data from their own bodies, rather than just making estimates based on the length of their cycle.
«But this actually gives you real life data because the time of ovulation can vary from person to person from month to month,» said Dr. Angela Bianco, MD, director of maternal fetal medicine at the Mount Sinai Health System. «Some people ovulate earlier in their cycles, others ovulate later in their cycles.»
Again, the Apple Watch isn’t a medical device and shouldn’t be treated as such. It also shouldn’t be used for contraception.
«I stress that women who are trying not to get pregnant should not use this because there can be errors in the data,» said Dr. Alexis Melnick, an OBGYN at NewYork-Presbyterian and assistant professor at Weill Cornell Medicine. «And you can have a cycle that is variable that may not follow the regular pattern.»
Apple says data stored in the health app — including female health statistics like ovulation estimates — is encrypted when your iPhone is locked with a passcode, Face ID or Touch ID. The same goes for data backed up to iCloud.
You’ll also want to make sure two-factor authentication is enabled for your iCloud account, which should be turned on by default. This ensures that health data is end-to-end encrypted, meaning Apple cannot read or access your data. To make sure two-factor authentication is on, open the Settings menu on your iPhone, tap your name and choose the Password & Security option.
Other extras, like faster charging and ultrawideband
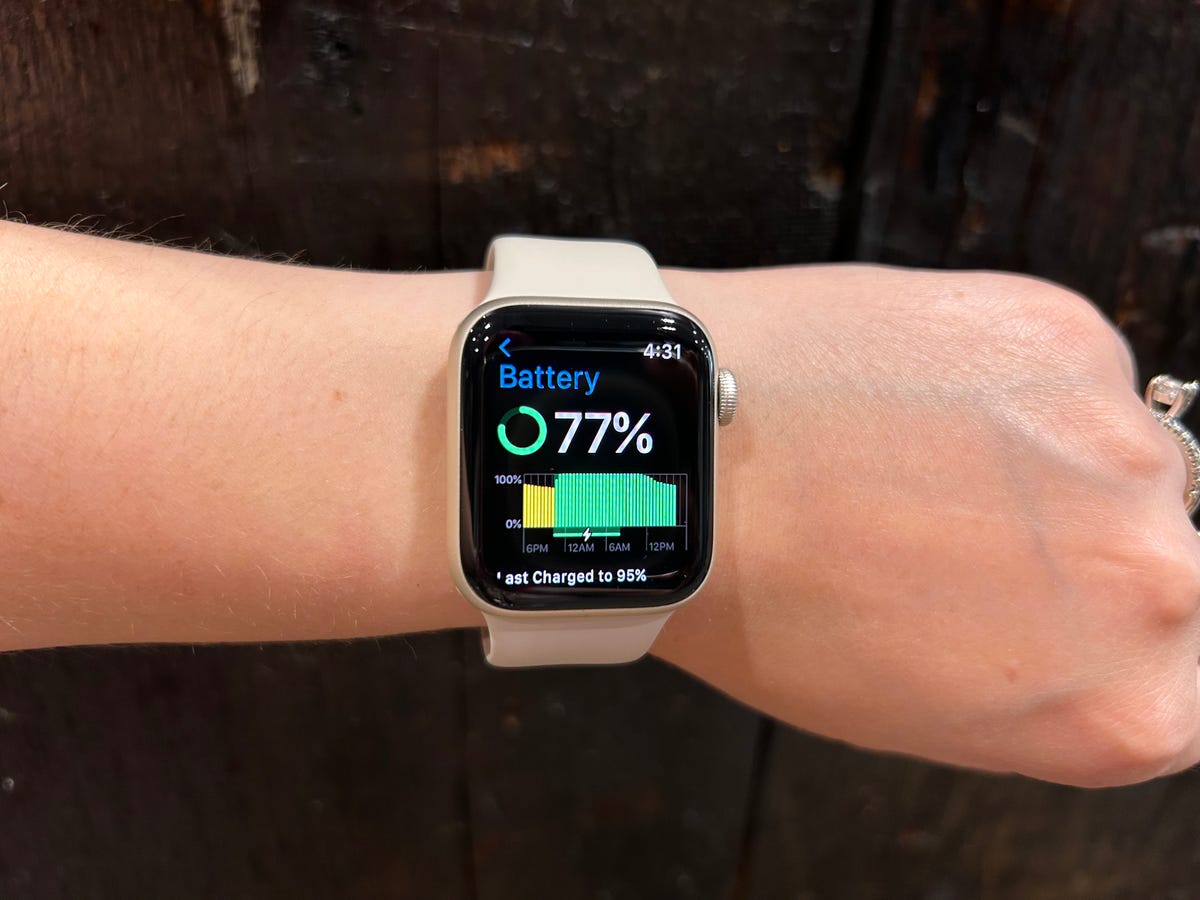
While the Series 8’s extra health sensors are the biggest reason to potentially choose it over the SE, there are a few other extras to consider. The Series 8 can charge more quickly than the SE, as it inherits the fast-charging capabilities of the Series 6 and 7. The Apple Watch Series 8 charged from 70% to 80% in 10 minutes, while the SE charged from 70% to 77% over the same time period. For each watch, I used the included charging cable and the same power adapter plugged into the same outlet. Both watches have Apple’s new low power mode, which dials back certain features like automatic workout detection to extend battery life.
The Series 8, like the Series 6 and 7, also have Apple’s U1 ultrawideband chip. Ultrawideband is a wireless protocol for proximity sensing that’s become common in new flagship phones and smartwatches. Ultrawideband is primarily used for finding misplaced items and gadgets using Apple’s Find My service, or for unlocking your car with more precision than Bluetooth.
If you have a car that’s compatible with ultrawideband, for example, you can unlock your vehicle automatically as you approach it with your Apple Watch. Ultrawideband is said to be more secure and precise than Bluetooth when functioning as a key, which you can read more about here. It’s a nice perk, but it’s likely not a necessity for everyone. At least not yet.
The bottom line
The Apple Watch Series 8 and SE have a lot in common when it comes to core features and functionality. They can both track workouts, show iPhone notifications, provide high and low heart rate notifications and detect irregular heart rhythms. They also both come with safety features like emergency SOS, fall detection and car crash detection, the latter of which is exclusive to Apple’s 2022 smartwatches. The new Compass app, which includes a new feature to help you retrace your steps, is also coming to both watches as well as the Series 7, Series 6 and first-generation SE.
If you like using Apple Pay or syncing your Apple Watch to the treadmill at your local gym through GymKit, you’ll do just fine with either the new SE or the Series 8. They both have the same processor, support low power mode and run on Apple’s new WatchOS 9 update.
The difference really comes down to health tracking. By choosing the SE, you’ll miss out on the Apple Watch’s ECG app, blood oxygen sensor and new temperature sensor. Whether those features are necessary depends on what you hope to get out of your smartwatch. Do you primarily want to track workouts, or are you looking for deeper health metrics to share with your doctor?
You’ll also get a few perks that make the Series 8 a better iPhone companion, such as a larger always-on display, faster charging and ultrawideband support. Of those features, I personally find the always-on display to be most useful.
Overall, the Series 8 seems poised to become more useful over time, especially after I’ve had more time to test the temperature sensor. Ultrawideband is another feature I’m expecting to become more useful in the long term as using mobile devices as digital keys starts to become more common. But for now, ultrawideband alone shouldn’t be a deciding factor; it’s more about the sum of how all of these parts come together.
The Series 8 is the right option for those who want more health-tracking features and are willing to pay a premium for it. The Apple Watch SE is the best choice for those who are upgrading from an older watch or are buying an Apple Watch for the first time and just want an Apple Watch that feels new and has all of the core features. But if you have a recent Apple Watch like the Series 5, you can probably hold off on upgrading entirely unless you really want Apple’s new health upgrades.
Apple Watch Series 8 vs. SE
| Apple Watch Series 8 | Apple Watch SE | |
|---|---|---|
| Starting price | $399 | $249 |
| Size | 41mm or 45mm | 40mm or 44mm |
| Finishes | Aluminum or stainless steel | Aluminum |
| Colors | Aluminum: Midnight, starlight, silver, Product Red; Stainless steel: Graphite, silver, gold | Midnight,starlight, silver |
| Software | WatchOS 9 | WatchOS 9 |
| Screen | 904 sq mm display area (41mm); 1,143 sq mm display area (45mm) | 759 sq mm display area (40mm); 977 sq mm display area (44mm) |
| Health sensors | Blood oxygen, electrical heart (ECG),third-gen optical heart, temperature | Second-gen optical heart |
| Health features | High and low heart rate notifications, irregular heart rate notifications, blood oxygen, nighttime wrist temperature deviations, cardio fitness level, cycle tracking, retrospective ovulation estimates, sleep tracking | High and low heart rate notifications, irregular heart rate notifications, cardio fitness level, cycle tracking, sleep tracking |
| Chip | Apple S8 SiP | Apple S8 SiP |
| Durability | IP6X dust resistant;water resistant up to 50m | Water resistant up to 50m |
| Safety | Emergency SOS, international emergency calling, crash detection, fall detection | Emergency SOS, international emergency calling, crash detection, fall detection |
| Battery | Up to 18 hours with fast charging, support for low power mode | Up to 18 hours, support for low power mode |
| Storage | 32GB | 32GB |
| Other features | GPS, optional cellular, Compass Backtrack, always on altimeter, Family Setup, speaker, microphone, activity and exercise tracking, Apple Pay, GymKit, ultrawideband support | GPS, optional cellular, Compass Backtrack, always on altimeter, Family Setup, speaker, microphone, activity and exercise tracking, Apple Pay, GymKit |
Technologies
Today’s NYT Mini Crossword Answers for Wednesday, March 25
Here are the answers for The New York Times Mini Crossword for March 25.

Looking for the most recent Mini Crossword answer? Click here for today’s Mini Crossword hints, as well as our daily answers and hints for The New York Times Wordle, Strands, Connections and Connections: Sports Edition puzzles.
Need some help with today’s Mini Crossword? It’s not terribly tricky, but read on for all the answers. And if you could use some hints and guidance for daily solving, check out our Mini Crossword tips.
If you’re looking for today’s Wordle, Connections, Connections: Sports Edition and Strands answers, you can visit CNET’s NYT puzzle hints page.
Read more: Tips and Tricks for Solving The New York Times Mini Crossword
Let’s get to those Mini Crossword clues and answers.
Mini across clues and answers
1A clue: Instrument in bluegrass music
Answer: BANJO
6A clue: Publication with the headline «C.I.A. Realizes It’s Been Using Black Highlighters All These Years,» with «The»
Answer: ONION
7A clue: Cut-off point for cropped jeans
Answer: ANKLE
8A clue: Hilarious person
Answer: RIOT
9A clue: Place to hibernate
Answer: DEN
Mini down clues and answers
1D clue: «Tens across the ___!»
Answer: BOARD
2D clue: 1982 film in which Carol Burnett played Miss Hannigan
Answer: ANNIE
3D clue: Japanese camera brand
Answer: NIKON
4D clue: Sudden shock
Answer: JOLT
5D clue: Final number in a countdown
Answer: ONE
Technologies
The BlackBerry-Esque Smartphone With a Full Keyboard Just Launched on Kickstarter
This Android smartphone with a tactile QWERTY keyboard has already raised over $2.1 million.
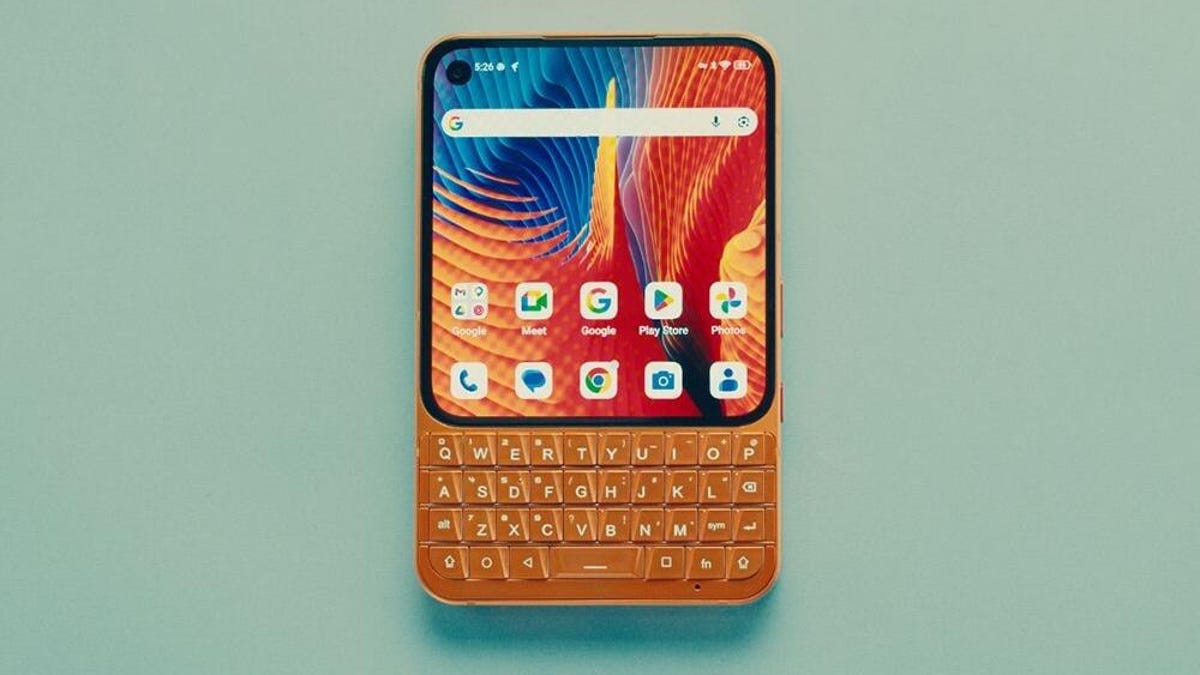
While today’s best phones are all glass touchscreens ripe for swiping, when nostalgia hits, all we want to do is get our fingers click-clacking on a BlackBerry’s tactile keyboard. Though BlackBerry discontinued its mobile line in 2016, phones with physical keyboards are making a comeback.
At Mobile World Congress 2026, CNET Mobile Managing Editor David Lumb got his hands on the Titan 2 Elite, an Android smartphone made by Chinese smartphone manufacturer Unihertz. It features a full backlit QWERTY keyboard that fits right in your pocket. On Tuesday, both the standard version and the Pro launched on Kickstarter, and have already exceeded the company’s $100,000 goal.
At the time of writing, over $2.1 million has been pledged by over 4,500 backers.
The Titan 2 Elite lets you customize its A-Z keyboard keys to create short- and long-press shortcuts that take you to different apps and assist with text editing. You can even use the keyboard to scroll and move your mouse, an upgrade from BlackBerry’s trackball. As for the red programmable side button, it can launch any app with one press.
To get your hands on an orange or black Titan 2 Elite, which is estimated to ship in June 2026, you have to pledge $396. This is discounted from the full price of $489 and is at least $403 cheaper than the iPhone 17. Shipping to the US is an extra $10.
For the Titan 2 Elite Pro, you have to pledge $486, plus shipping. Its full price is $579. The estimated delivery time is October 2026.
For both the standard and Pro phones, packages are available for couples, families (three devices), friends (five devices) and wholesale purchasers (10 devices).
The phones are currently in the process of being certified by Google, the FCC, the Conformité Européenne for EU Compliance, UK Conformity Assessed and Japan Approvals Institute for Telecommunications Equipment. These certifications are expected to be obtained by April, before trial and mass production occur in May.
The Elite vs. the Elite Pro
The Elite and Elite Pro differ only in power and storage. The standard Elite comes with a MediaTek Dimensity 7400 chip, while the Pro offers a Dimensity 8400. For storage, you get 12GB of RAM and 256GB of storage with the standard, and 12GB of RAM and 512GB of storage with the Pro.
Despite rising prices in the memory market caused by AI-driven demand, Unihertz decided to stick with 12GB of RAM. The company says that this is why the Titan 2 Elite costs more than previous Unihertz devices launched on Kickstarter.
Both the standard and Pro versions have a 4.03-inch AMOLED screen, a 50-megapixel rear camera, a 32-megapixel selfie camera, a 4,050-mAh battery, dual-band GPS, fingerprint and face unlocking, Bluetooth 6.0, global 5G coverage and support for two physical SIM cards and an eSIM. You can even swap one of your SIMs for a microSD card, giving you 2TB of extra storage.
Both the Elite and Elite Pro will ship with Android 16 OS, for which Unihertz will give five years of update support and security patches until 2031.
Technologies
A Historic Heat Dome Is Creeping Across the US. Here’s How to Prepare
After breaking heat records in 14 states, the heat wave pummeling the Southwest is moving eastward.
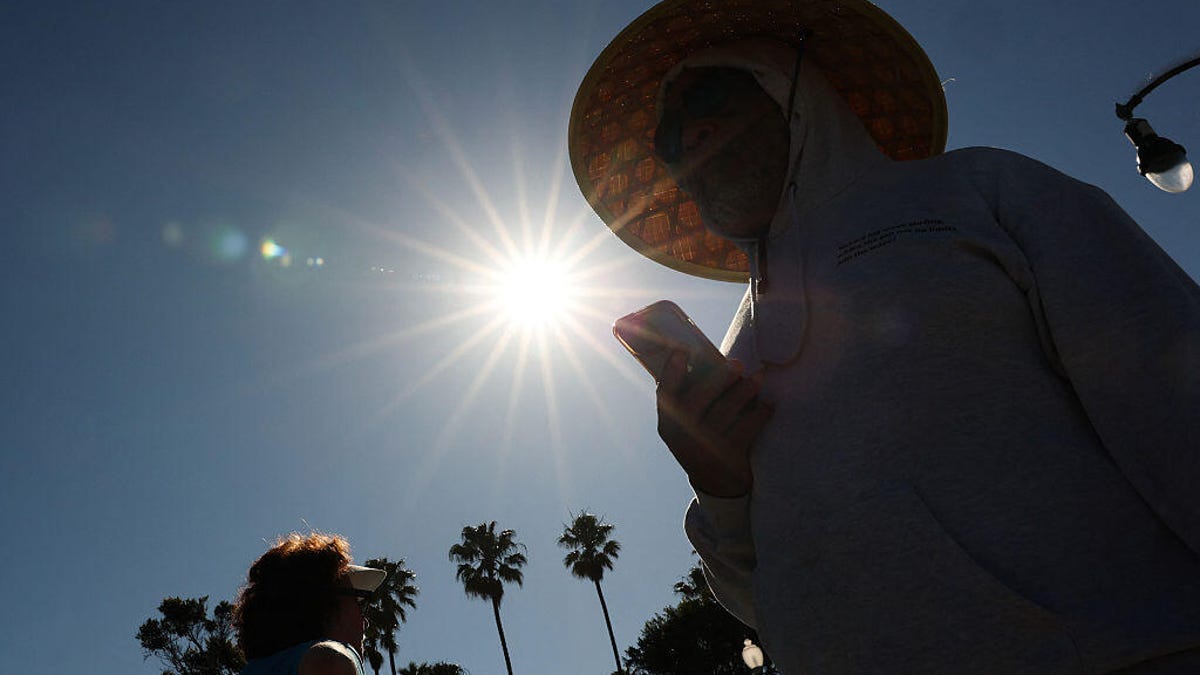
A massive heat wave has broken heat records in 14 states, including Arizona and California, reaching up to 112 degrees Fahrenheit in some areas. Now it’s creeping eastward, according to the National Weather Service.
The heat wave is continuing its journey through the Midwestern United States and is projected to affect anywhere from one-quarter to one-third of the 48 mainland states, National Weather Service meteorologist Gregg Gallina told The Associated Press. The highest temperatures recorded today are in Arizona, New Mexico and Texas — what the National Weather Service refers to as the Southern Rockies region. But the hot air is on the move.
The reason these high temperatures persist is the «heat dome» phenomenon, in which high pressure prevents hot air from rising, trapping it in a bubble above a region. As the dome of pressure moves, so too does the hot air — and right now, it’s barreling east.
The states that will be smothered by the heat dome in the coming days include those in the Southern and Central Plains regions. This means residents of Texas, Colorado, Oklahoma, Kansas and Nebraska can expect to sweat as the heat blankets them on its eastbound journey.
What the heat dome means for climate change and our health
According to Climate Central, the US has experienced rising blackout rates over the past 20 years, largely due to weather-related issues and an aging electrical grid.
As of August 2025, the US Environmental Protection Agency states that heat is the leading weather-related cause of death in the US. The World Health Organization reports that between 2000 and 2019, about 489,000 heat-related deaths occurred each year.
Fortunately, humidity levels are not as high during a summer heat wave. As humidity can contribute to dehydration, body strain and breathing difficulties, lower humidity makes this heat dome somewhat less dangerous for workers in affected areas.
The World Weather Attribution, an initiative formed by international climate change researchers and climate scientists, determined that the heat dome would be «virtually impossible without human-induced climate change.»
In a world where weather events like these cease to be impossibilities, you’ll want to prepare for future heat waves properly. Here’s how to stay safe during the heat dome.
How to prepare for the heat dome before it hits your state
There’s nothing you can do to beat the heat outside, aside from following heat safety best practices. You’ll just need to stay hydrated, wear breathable, light-colored clothing and wait out the potentially dangerous heat dome, which is expected to dissipate by the end of next week when April begins. But you can do things to batten down the hatches before the sweltering heat reaches your home.
Even if you don’t have much prep time, a couple of small items can make your home safer (and far more comfortable). Cooling towels, portable fans and countertop ice makers are must-haves during a heat wave, especially if you aren’t looking to crank the thermostat down and spend a pretty penny.
Heat waves are also extremely costly due to the sheer amount of energy used — it’s expensive to stay cool. Depending on your living situation, though, you might want to invest in heat pump installation. These HVAC system additions are extremely energy efficient, which means you can keep more money in your pocket while beating the heat.
During the middle of the heat wave, when everyone has their AC running, there’s also the potential for an early brownout (a temporary drop in electrical voltage, causing lighting to dim) or even a blackout (a complete loss of power). It’s common to feel helpless during power outages, but you can get ahead of the curve by preparing a summer blackout kit with portable chargers and alternative light sources before the heat wave hits.
Even if the historic heat wave doesn’t hit your home, these tips will help you prepare as the summer season bears down on the US in a couple of months.
-
 Technologies3 года ago
Tech Companies Need to Be Held Accountable for Security, Experts Say
-
 Technologies3 года ago
Best Handheld Game Console in 2023
-
 Technologies3 года ago
Tighten Up Your VR Game With the Best Head Straps for Quest 2
-
 Technologies4 года ago
Black Friday 2021: The best deals on TVs, headphones, kitchenware, and more
-
 Technologies5 лет ago
Google to require vaccinations as Silicon Valley rethinks return-to-office policies
-
 Technologies5 лет ago
Verum, Wickr and Threema: next generation secured messengers
-
 Technologies4 года ago
Olivia Harlan Dekker for Verum Messenger
-
 Technologies4 года ago
The number of Сrypto Bank customers increased by 10% in five days