Technologies
Stop Spending Money on Google Drive or Gmail With These Tricks
These steps can help you save money on extra digital storage.
Cleaning your Google Drive and Gmail is a nice way to kickoff spring, and it could save you some money, too. Google Drive and Gmail are packed with some of Google’s most popular services. However, you only get a combined 15GB of storage space to use for free for all those services, which can fill up fast. When you’re close to your limit, Google will ask if you want to buy more storage. But you can manage your digital space for free and save yourself some money instead.
Here’s how to free up Google Drive and Gmail space on desktop and mobile so you don’t have to pay for additional storage. We recommend doing this on desktop, as you’ll have an easier time sorting through and managing files rather than doing it on your mobile device.
Delete large files first
If you only want to delete a few items from Google Drive and Gmail to free up space, you can sort each service by file size and delete one or two large files instead of a few dozen smaller items.
Here’s how to delete files by size in Google Drive on your desktop
1. Log into your Google Drive account.
2. Once logged in, click Storage in the menu on the left side of the screen.
3. The Storage page should list your files from largest to smallest, but if not click Storage Used on the right side of the screen. The files should now be ordered from largest to smallest.
4. Click large files you want to delete to select them, then click either the trash bin in the top right of your screen or drag the large files to Trash on the left side of the screen.
5. Click Trash to go to the Trash menu.
6. Click Empty Trash in the top-right corner of your screen.
7. Click Delete forever and your files are gone.
You can do this in the Google Drive app, as well. Here’s how:
1. Open your Google Drive app and log into your account.
2. Tap Files in the bottom-right corner of the screen.
3. Tap Name underneath My Drive near the top of the screen.
4. Tap Storage Used. This will arrange your files from largest to smallest.
5. Tap the three dots (…) next to the item you want to delete.
6. Tap Remove.
7. Tap the hamburger icon in the top-left corner of the screen next to Search in Drive.
8. Tap Trash.
9. Tap the three dots (…) in the top-right corner of the screen.
10. Tap Empty trash.
Whether you need to make room, or just to keep your Gmail tidy, it’s easy to make room for storage in the service.
James Martin/CNETYou can also arrange and delete files by size in Gmail on the desktop. Here’s how:
1. Log into your Gmail account.
2. Type has:attachment larger:10MB into the search bar and hit Search. This will show you all emails that have attachments larger than 10 MB from largest to smallest. You can use this format to filter by other size files, not just 10 MBs.
3. Check the boxes to the left of each email you want to delete, then click the Trash icon in the top-right corner of the screen.
4. Click Trash on the left side of the screen to go to the Trash menu. If you don’t see Trash, click More and Trash should be in the expanded menu.
5. Once in Trash, click Empty trash now at the top of the screen.
Here’s how to arrange and delete files by size in the Gmail app:
1. Open your Gmail app and log into your account.
2. Type has:attachment larger:10MB into the search bar and hit Search. This will show you all emails that have attachments larger than 10MB, from largest to smallest. You can use this format to filter by other size files too, not just 10MBs.
3. Tap into the email you want to delete.
4. Tap the trash bin icon in the top-right corner of your screen.
5. Tap < in the top-left corner of your screen.
6. Tap the hamburger icon in the top-left corner of the screen next to Search in mail.
7. Tap Trash.
8. Tap Empty trash now.
Note that once a file goes to Trash, it will automatically delete after 30 days.
Empty your Gmail spam folder
It’s easy to forget about emptying your spam folder, and it can double the amount of data your Gmail account uses. Emptying your spam folder (or your social or promotions folders) is an easy way to make space.
Here’s how to empty your spam folder on your desktop:
1. Log into your Gmail account.
2. Once logged in, click Spam on the left side of the screen. If you don’t see Spam, click More, and Spam should be in the expanded menu.
3. In your Spam folder, click Delete all spam messages now.
Here’s how to empty your spam folder in the mobile app:
1. Open the Gmail app and log into your account.
2. Tap the hamburger icon in the top-left corner of the screen next to Search in mail.
3. Tap Spam.
4. Tap Delete all spam messages now or Empty spam now.

Don’t let spam bog your Gmail down.
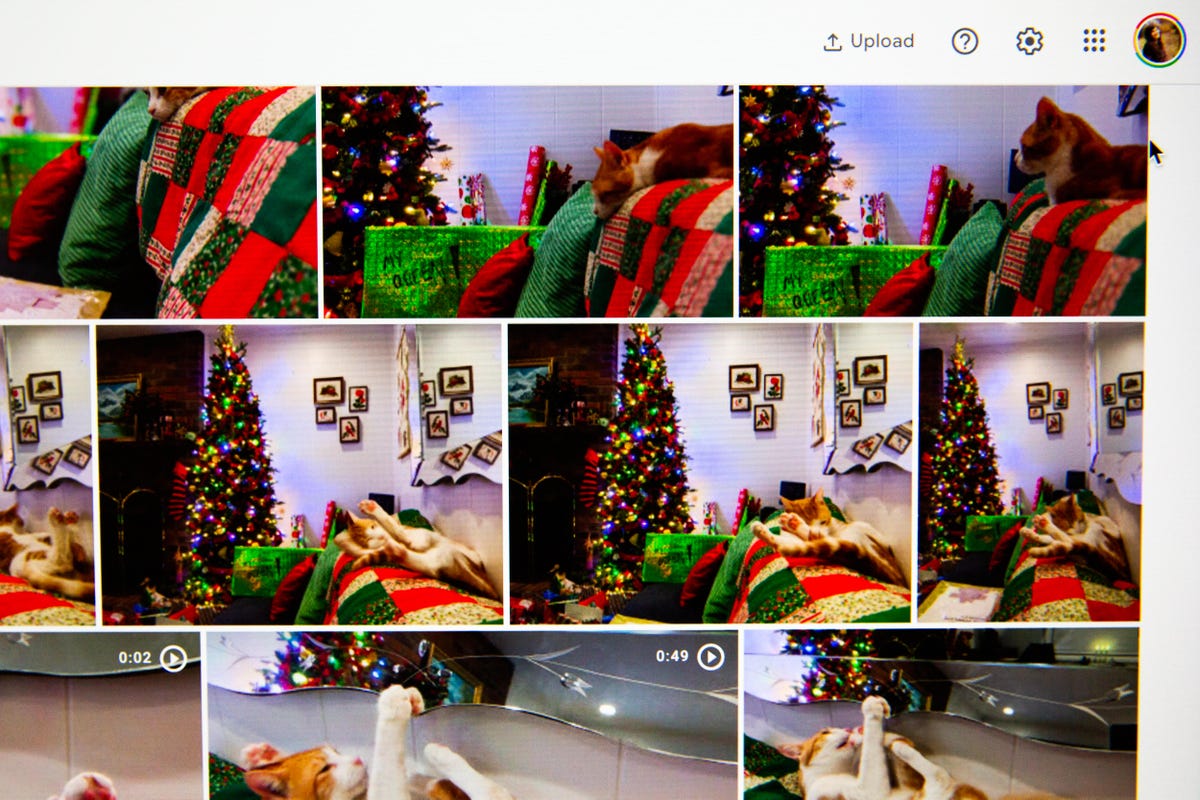
Getty ImagesClean up your Google Photos
Google also includes Google Photos in the 15GB of free storage it gives its users. Photos and videos can take up more space than text-based files so it’s a good idea to go through and delete old photos and videos to make room.
Unfortunately, there’s no option to arrange your photos and videos from largest to smallest like in Google Drive and Gmail, so you will have to go through and delete items manually.
Here’s how to delete photos and videos from Google Photo on your desktop:
1. Open and log into Google Photos.
2. Scroll your mouse over photos and videos you want to delete and click the gray check mark icon in the top left corner of the photo or video.
3. Click the trash icon in the top right corner of the screen.
4. Click Move to trash.
5. Click Trash on the left side of the screen.
6. Click Empty trash near the top-right corner of your screen.
7. Click Empty trash again, and you’re set.
Here’s how to delete photos and videos from the Google Photo mobile app:
1. Open and log into Google Photos.
2. Tap the photo or video you want to delete.
3. Tap the trash icon in the bottom-right corner of the screen.
4. Tap Delete.
5. Tap Library in the bottom-right corner of the screen.
6. Tap Trash.
7. Tap the three dots (…) in the top-right corner of the screen.
8. Tap Empty trash.
9. Tap Delete.
If you don’t click or tap Empty trash on either platform, the photos and videos you’ve deleted will automatically delete after 60 days.
Photos and videos in Google Photos can take up a lot of storage.
Sarah Tew/CNETWhen all else fails, download your files
If your storage is still almost full and you can’t part with any more items from your Google Drive, Gmail or Google Photos, you can download your items and store them directly on your computer.
Here’s how to download your Google Drive files for storage on another hard drive.
1. Open and log into your Google Drive account on your desktop.
2. Select the files you want to download.
3. Click the three stacked dots in the upper-right corner of your screen.
4. Click Download.
5. Once the items are downloaded, feel free to delete them from your Google Drive.
You can also download your emails from Gmail. Here’s how:
1. Open and log into your Gmail account on your desktop.
2. Click and open an email you want to download.
3. Click the three stacked dots next to the date of the email.
4. Click Download message.
5. Once the emails are downloaded, you can delete them from your Gmail.
Here’s how to download photos and videos from Google Photos:
1. Open and log into your Gmail account on your desktop.
2. Click and open a photo or video you want to download.
3. Click the three stacked dots in the top-right corner of the screen.
4. Click Download.
5. Once the items are downloaded, you’re free to delete them from your Google Photos.
For more, check out these 10 Gmail tips and tools, nine Google Drive features you might have missed and five Google Photos features to try now.
Technologies
Google’s Pixel 10A Is Coming to Japan With an Exclusive Blue Edition and Special Wallpaper
This model comes with creatively designed stickers and a special look for Pixel’s 10th anniversary.
Don’t be blue: Google is releasing an Isai blue edition of the Pixel 10A to celebrate the Android phone line’s 10th anniversary, setting it apart with its own sticker set, specialized wallpaper and custom icons. But it’ll only be available in Japan.
Announced Tuesday on the Google Japan blog, the Isai blue Pixel 10A has a dark blue look and includes bonus decorations designed in collaboration with Japan’s Heralbony art company. These include an exclusive bumper case and stickers for customization.
This edition of the Pixel 10A will arrive in Japan on May 20, following the April 14 release of the Pixel 10A in its original colors of lavender, berry, fog and obsidian. The Isai blue model costs 94,900 yen, which roughly translates to $595, and includes 256GB of storage.
This makes it slightly less expensive than the US model’s 256GB edition, but it comes with a number of fun extras at no additional cost.
Google’s creation of a country-specific model for Japan may also reflect strong sales in that market. In 2023, the IDC analytics firm (via 9to5Google) reported that the Pixel 7 series accounted for 10.7% of the country’s market share, a 527% increase from 2022.
Technologies
Can’t Wait for New Emoji? Here’s How to Create Your Own on iPhone
Apple Intelligence-enabled iPhones can create custom emoji in a few easy steps.
Apple brought new emoji to all iPhones when the company released iOS 26.4 on March 24. The new emoji include «» orca, «» distorted face and «» hairy creature — or as we might normally call it, Sasquatch. According to Emojipedia, there are 3,953 emoji with more on the way, including a pickle. But there’s no emoji for a dog wearing pajamas, a plate with burgers and fries and many other things. But if you have Genmoji on your iPhone you can create these emoji and many more.
Apple released iOS 18.2 in 2024 and the company introduced its own emoji generator, called Genmoji, to Apple Intelligence-capable iPhones at that time. The Unicode Standard, a universal character encoding standard, is responsible for creating new emoji, and approved emoji are added to all devices once a year. With Genmoji, you don’t have to wait for new emoji to appear on your iPhone each year. You can just create them as you need them.
Read on to learn how to use Genmoji on iPhone to create your own custom emoji. Just note that only iPhones with Apple Intelligence, like the iPhone 17 lineup, can use Genmoji at this time.
Note: The new emoji may not display correctly for Apple users whose devices aren’t on a 26.4 software version.
How to make custom emoji
1. Open Messages and go into a chat.
2. Tap the plus (+) button next to your text box.
3. Tap Genmoji.
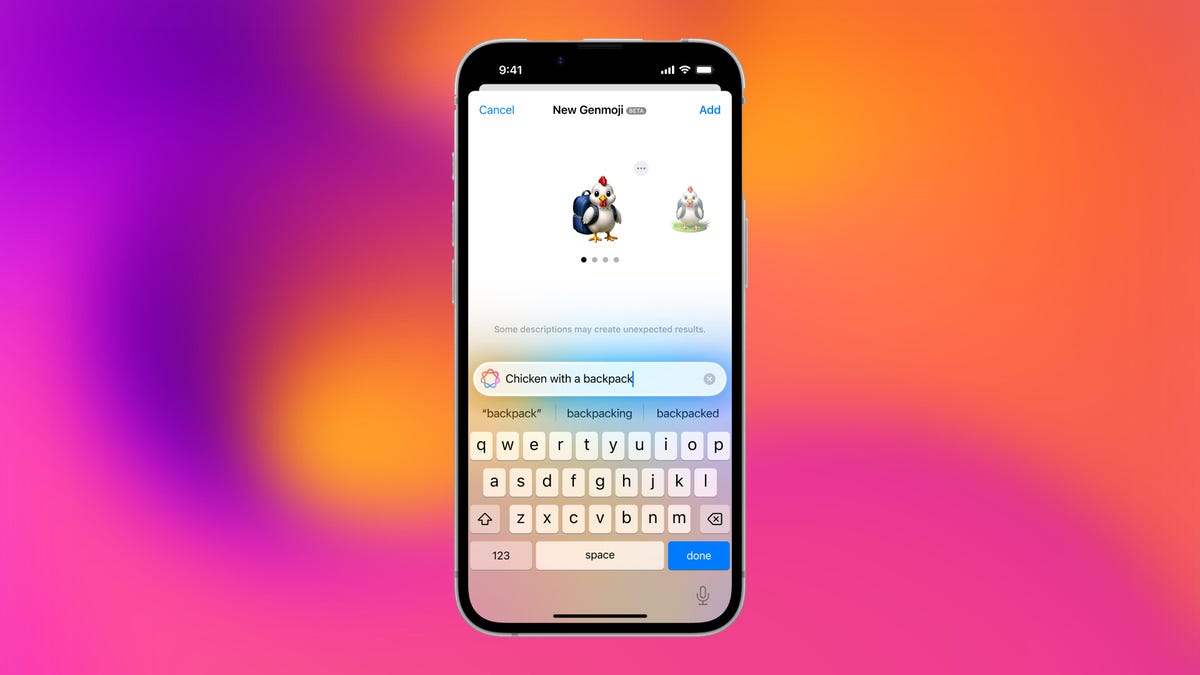
You can then type a description of an emoji into the text box near the bottom of your screen and tap the check mark on your keyboard to enter that description into Genmoji. You can also tap different suggestions and themes that are right above the text box. And with iOS 26 or later, you can also combine and use emoji to create others rather than describing a new emoji or using suggestions.
Your iPhone will generate a series of new emoji for you to pick from according to your description, and you can swipe through these new emoji. When you find the one you want, tap Add in the top right corner of your screen and the new emoji will be available to use as an emoji, tapback or a sticker. Now you don’t have to wait for the Unicode Standard to propose, create and bring new emoji to devices.
For more iOS news, here’s what to know about iOS 26.4 and iOS 26.3. You can also check out our iOS 26 cheat sheet for other tips and tricks.
Technologies
Save Over 20% on This Handy 10,000-mAh Anker Nano Power Bank
Keep your devices charged on the go with this Anker Nano power bank, now down to just $46.
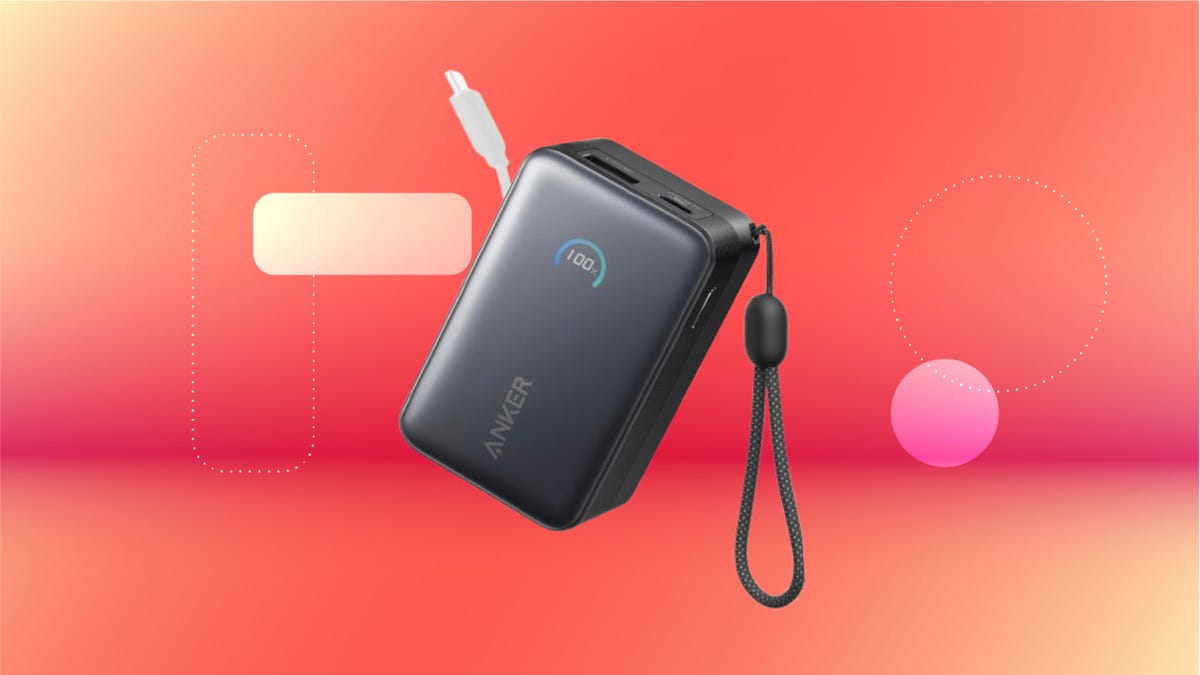
We’ve just spotted the Anker Nano 45-watt portable power bank for just $46 at Amazon right now. This saves you $14 — a 23% discount on its list price. Though it’s $6 more than the lowest-ever price we saw during Black Friday, it’s still a solid discount when you take the rising cost of tech accessories into account. It also matches the lowest price we’ve seen in 2026. It comes in four colors: black, green, pink and white. They’re all on sale for the same price.
This Anker Nano portable charger weighs approximately 8.2 ounces and measures a compact 3.21×1.99×1.42 inches. Despite its small size, it has a retractable cable and supports fast charging in compatible Apple, Samsung, Google Pixel and other smartphones. It also has a large 10,000-mAh capacity and a smart display so you always know how much juice is left in your power bank.
The Nano can charge an iPhone 17 to up to 50% battery in an estimated 20 minutes, and is powerful enough to charge tablets and laptops. Need to charge your devices while charging your power bank? You can do so safely thanks to pass-through charging so you’ll never have to go without battery life.
We’ve also compiled a list of the best power banks for iPhones and for Android, in case this deal isn’t quite a fit for you.
Why this deal matters
If you travel, have a long commute time or are otherwise always on the go, a portable charger can help you keep your devices fully powered. This 45-watt Anker Nano power bank is compact, includes a loop that lets you keep track of it easily and has a built-in cable so you don’t have to keep up with extra cords. Amazon’s $14 discount makes this a solid deal for anyone looking for a compact power bank.
-
 Technologies3 года ago
Tech Companies Need to Be Held Accountable for Security, Experts Say
-
 Technologies3 года ago
Best Handheld Game Console in 2023
-
 Technologies3 года ago
Tighten Up Your VR Game With the Best Head Straps for Quest 2
-
 Technologies4 года ago
Black Friday 2021: The best deals on TVs, headphones, kitchenware, and more
-
 Technologies5 лет ago
Google to require vaccinations as Silicon Valley rethinks return-to-office policies
-
 Technologies5 лет ago
Verum, Wickr and Threema: next generation secured messengers
-
 Technologies4 года ago
Olivia Harlan Dekker for Verum Messenger
-
 Technologies4 года ago
The number of Сrypto Bank customers increased by 10% in five days