Technologies
God of War: Ragnarok’s Emotional Ending Explained
Kratos and Atreus’ second adventure ends in spectacular fashion. Heavy God of War: Ragnarok spoilers inside.
It’s only November, but it’s already Christmas time for PlayStation owners. God of War: Ragnarok, the most anticipated PlayStation exclusive of the year, is finally here. The game is highly acclaimed, with a score of 94 on Metacritic, having received glowing reviews from publications such as ours.
God of War: Ragnarok is lauded for a lot, but its touching and thoughtful story perhaps most of all. «Touching» and «thoughtful» may be surprising descriptors for a game called «God of War,» but anyone who played Ragnarok’s 2018 predecessor likely would expect as much. As the title suggests, God of War: Ragnarok is about a cataclysmic war known in Norse mythology as Ragnarok.
At its core, however, it’s much more about the relationship between a father and his son. That father just happens to be an unstoppable killing machine. It goes without saying, but I’ll say it anyway: Massive God of War: Ragnarok spoilers below.
The short version of God of War: Ragnarok’s ending
After spending much of God of War: Ragnarok fiercely rejecting the idea of war, Kratos is eventually pulled into participating in Ragnarok — the great war against Asgard. Before that happens, it’s revealed that Tyr, the Norse god of war who’s been staying at Kratos & Co’s headquarters, has actually been Odin all along. Odin used his godly powers to disguise himself as Tyr, and spent the whole game spying on Kratos, Atreus and Freya.
Odin makes his grand revelation by stabbing and killing Brok. That turns Sindri, normally gregarious and deferential, into an angry Dwarf, deeply resentful of Kratos, Atreus and their role in setting up Brok’s death. Sindri helps them out at Ragnarok, but only because he wants revenge on Odin. He uses a tool that gives the gang a way to penetrate through the wall that surrounds Asgard.
Inside, Kratos battles and defeats Thor. Just as Thor begins to repent for his sins and heed Kratos’ plea to be a better god, Odin appears and kills Thor. Kratos, Freya and Atreus then battle and defeat Odin. Atreus uses Giant magic to trap Odin’s spirit in a marble, then Sindri appears, snatches the marble and smashes it to bits with a hammer. Like I said, angry Dwarf.
The gang manages to escape Asgard thanks to Angrboda, a Giant who Atreus meets early in the game. After the battle, Angrboda tells Atreus she knows he’s had Giant visions, and that she needs to tell Kratos. He does so, informing his father that there are other Giants out there, and that he alone needs to find them. In the moment of Ragnarok, Kratos embraces his son and tells him he’s ready for his own adventure.
Atreus says goodbye, and Kratos sees on a shrine revealed to him by Agrboda that the Giants long ago prophesized him as the hero of Ragnarok.
Santa Monica Studio, God of War’s developer, has said Ragnarok is the end, and that God of War won’t be spun into another trilogy. But the way the game ended absolutely opens up the possibility of a follow-up that focuses on Atreus — possibly with Sindri as a villain. Dwarf magic is established as immensely powerful in God of War: Ragnarok, and Sindri’s obvious hatred of Kratos and Atreus is one of the conspicuous threads left untied by Ragnarok’s end.
That’s the short version of God of War: Ragnarok’s ending. Read on for a more comprehensive look at how God of War: Ragnarok played out.
The lead up to Ragnarok
To understand God of War: Ragnarok’s story trajectory, you need to understand a little about how its story is told. Unlike the 2018 God of War, in which Atreus is by Kratos’ side for almost all of the adventure, the two go their separate ways for a lot of Ragnarok’s story.
About halfway through the game, Atreus hatches a plan. Odin at the beginning of God of War: Ragnarok invites Atreus to Asgard. What if Atreus goes to Asgard, pretends to switch sides, buddies up with Odin and learns his Ragnarok plans?
Atreus gets into Asgard by having Odin’s ravens transport him there. After climbing the giant wall that surrounds Asgard’s city, Atreus learns that Odin is motivated by a tear into another dimension. «The rift, possibly the birthplace of reality,» he tells Atreus of the tear. «I looked inside and something was there looking back at me.»
Entering the tear, Odin says, will grant infinite knowledge. Odin knows he has to die at some point, but he needs to know what’s next before he does. The rift can grant that knowledge, but going in there without requisite protective gear means sure death: Odin tells Atreus that peeking into the tear is how he lost his eye. Odin has a fragment of a mask he reckons will protect his face enough. The mask fragment is inscribed with Giant script that Odin can’t read — which is why he needs Atreus.
Odin tasks Atreus with finding the other mask fragments. To do that, he needs to work with both Thor and Heimdall, who’s blessed with the ability to read people’s intentions. While Atreus does that, Kratos and Freya, who are now a team again after Kratos helped break Odin’s curse that trapped Freya in Midgard, are left to their own devices.
Much of the game’s plot revolves around destiny. The previous God of War ended with Kratos seeing a Giant’s prophecy that he would die at Ragnarok. Kratos scoffs at such predictions, and says that we make our own fate. Just to be sure, however, Kratos, Faye and Mimir visit the Norns, the masters of fate. The Norns agree with Kratos — that there is no such thing as fate — but the choices people make are so predictable so as to make prophesizing easy business. More importantly, they reveal that Heimdall intends to kill Atreus.
With his son’s life at risk, Kratos makes his decision. Heimdall must die — even if that kicks off war with Asgard.
The big twist
To protect his son, Kratos has to kill Heimdall. Heimdall can read people’s intentions, so attacking him is hard. Kratos asks Sindri and Brok if they could forge a new weapon to help him beat the Aesir god, and the two Dwarfs come up with the Draupnir Spear. To create it, Brok escorts Kratos to Svartalfheim, where they gather materials and get a weird Mermaid creature to craft the Spear. It’s a whole thing.
Kratos gets his chance to use the weapon when Heimdall confronts him in Vanaheim. It’s a success! Heimdall can read people’s intentions, so can catch the spear every time Kratos throws it at him. But the spear can implode and regenerate, which allows Kratos to harm and ultimately kill Heimdall. (Yes, if Heimdall could truly read intentions he would know Kratos intends to implode the spear, and so he’d avoid it rather than catch it. Don’t think too hard about it.) He tries unsuccessfully to walk away from the defeated Heimdall, but Heimdall won’t relent. Kratos has no choice but to strangle him to death.
After collecting one of the two missing mask fragments, Atreus tells Odin he wants to go home. Odin allows it. But with Heimdall dead, Atreus decides he should return to Asgard. Odin will soon figure out that Kratos killed Heimdall, and that will surely lead to war. In the brief period of time before that happens, Atreus wants to head to Asgard to help Odin complete the mask. That can both distract Odin and allow Atreus to learn more of his plans — and possibly steal the mask, too.
On his return to Asgard, Odin gets Atreus and a superdrunk Thor to travel through Niflheim. Atreus locates the final fragment. At that moment, Odin appears and asks for the mask. The next moment, Thor’s wife Sif appears and reveals that Kratos killed Heimdall. Thor goes into a rage, trying to attack Atreus. Atreus uses a gadget given to him by Sindri to escape at the very last second.
Back at Sindri’s house, Atreus, Kratos, Tyr and Freya devise a plan. If they can go to Asgard, they can lure Odin out with the mask and kill him. That way they won’t have to initiate Ragnarok, and war can be avoided. Tyr, keen to avoid war at all costs, says this is a fabulous idea. And in fact, he has just the thing: a secret path to Asgard.
Everyone is hyped except for Brok. Brok wonders why Tyr never mentioned this path to Asgard before, and why Tyr is calling Atreus «Loki.» Tyr says he’ll show them the path after he collects his «things,» but Brok points out that he has no things — what a burn — and slaps the mask out of Tyr’s hands. As everyone surrounds Brok, treating him like a crazy Dwarf, Tyr fatally stabs Brok and reveals that he’s not actually Tyr — Odin has been pretending to be Tyr the whole time.
After a standoff, Odin takes the mask and goes back to Asgard. Ragnarok it is.
Ragnarok cometh
It’s prophesized that Surtr, the fire demon of Muspelheim, kicks off Ragnarok with an attack on Asgard. Kratos and Atreus travel to Muspelheim and, after some wrangling, convince Surtr to mount his attack. After that, it’s officially on.
Kratos is named general of the army attacking Asgard: It’s comprised of Freya, her brother Freyr, the Valkeries, the dark and light elves of Alfheim, the World Serpent Jormungandr, Angrboda, the Hel-Walkers from Helheim, and Surtr. Using Gjallarhorn, a horn which Kratos took off Heimdall after killing him, Kratos is able to open a portal to Asgard in Tyr’s Temple.
Sindri has been understandably morose after the death of Brok. «You don’t know what sorry means,» Sindri snaps at Atreus when the latter tries to apologize for Brok’s death. «I gave you everything: my skills, my friendship, my home, my secrets, my treasures, and you just kept taking. And now what have I got? Not even my family.» Still, Sindri said he’d enlist the help of the Dwarfs. When he arrives in Asgard, though, he’s on his lonesome. His people have shed enough blood for others, he says. Luckily, Sindri didn’t come empty-handed, as he has a that reveals a flaw in the giant wall that surrounds Asgard. Atreus is able to exploit the flaw and enter Asgard, where Kratos almost immediately gets in a fight with Thor.
Kratos wins, but spares Thor. «No more,» Kratos says, putting his Leviathan Ax away. «For the sake of our children, we must be better.» Before Thor can say anything though, Odin appears and berates him for talking. «You don’t talk, you don’t think! I think, you kill,» Odin says. Thor drops his hammer and says he won’t be Odin’s killing machine anymore — which prompts Odin to fatally impale Thor, his son, with a spear.
That kicks off the final battle against Odin, a two-part boss fight in which Kratos, Atreus and Freya are victorious. Atreus beseeches Odin to be better — like father, like son — but Odin refuses. «I have to know what’s next. I will not stop,» Odin says. «Why’d you have to say that?» Atreus replies regretfully.
Atreus uses Giant magic to remove Odin’s spirit and forge it into a marble. Kratos, Freya and Atreus go back and forth on what to do with it. Kratos lets Freya decide, but Freya puts the decision on Atreus’ young shoulders. Before the lad can decide, however, Sindri appears out of nowhere, puts the marble on a table and smashes it with his hammer. «That’s what comes next,» he says before vanashing on the spot.
The bad guy is beaten, but unfortunately Surtr, now a giant and uncontrollable fire demon, is still wrecking Asgard. They all need a way out. Agrboda is the gang’s ticket outta there: She arrives with Garm and opens a rift into another realm. (When Kratos asks how, she simply replies: «Giant stuff.») Everyone makes it out except Freyr, who sacrificed himself holding off Surtr so the rest could make it out.
God of Peace
After the cataclysm ends, Atreus wakes up in Midgard. He walks along a spiral path, passing by all the friends he met in God of War: Ragnarok, until he gets to the top, where Angrboda is waiting. She tells him she knows he’s been seeing Giant visions, and that he needs to tell his father.
«Every part of me is telling me this is what I have to do, I just don’t know how to say it,» Atreus says.
Kratos walks in at that inopportune moment, but before Atreus can speak, Angrboda says she wants to show them both something. It’s a shrine that reveals that Faye long ago destroyed Atreus’ shrine in Jotunheim, allowing the pair to forge their own path. This is a little confusing, because Faye didn’t destroy Atreus’ shrine — it was there, clear to see for both Atreus and Kratos at the end of God of War, but that’s fine.
Atreus has a heart-to-heart with his dad. «There are other Giants out there, and I’ve got to find them,» Atreus says to Kratos, giving Sony the option to follow up with a Loki game. «I think I know where to look, but they’re my responsibility. I need to do this alone.»
Atreus says he’s frightened by the idea of a solo adventure, but Kratos says that’s why he must do it. Kratos says they only survived Ragnarok because of Atreus’ decisions, and that he’s ready to fend for himself. They embrace. It’s deeply emotional.
Atreus scampers off with Agrboda before bidding his father Adieu. Left on his own, Kratos closes the shrine, only to find a second side on the back. There the Giants show Kratos to be the hero of Ragnarok — more god of peace than god of war. Kratos is overwhelmed, even letting out a few tears and whimpers at the vision of him as a savior instead of an instrument of death and destruction, as he was in Greece.
«What did you see in there brother?» Mimir asks Kratos. «A path,» Kratos replies. «One I had never imagined.»
Epilogue
Credits roll after Atreus leaves you, but the story isn’t over quite yet. Remnants of Odin’s forces have landed aross the realms, and finishing the main quest unlocks the side quest of clearing out this riffraff. If you travel to Niflheim, where Odin’s Ravens chill, you’ll see a new area can be accessed.
If you follow the new path, it’ll take you to a secret prison. Get to the main cell at the bottom and you’ll discover none other than Tyr, the real Tyr. Tyr doesn’t say much. Mimir gives him the TL;DR of God of War: Ragnarok — that Odin is dead thanks to Kratos — and Tyr responds by saying he needs space to process this information. If you visit the other realms, you’ll sometimes bump into Tyr. I found him doing some Tai Chi stuff in Vanaheim and Helheim.
The other sidequest that opens up after the main story ends is a funeral for Brok. This is quick and easy. You go to Svartalfheim, to Durlin’s office, and then you’re directed to a beach area, where Brok gets a final send-off into Valhalla. Kratos places Brok into a little raft. Before Brok is pushed off, Sindri materializes, cries over his brother’s body and says he loves him.
Sindri holds a flaming torch for Freya, who lights an arrow and shoots it into the now floating boat, lighting it aflame. Kratos puts his hand on Sindri’s shoulder and tries to offer consoling words, but Sindri peels Kratos’ hand off and gives him a look of scorn. He says nothing, walks a few steps and then vanishes.
Earlier in the game, Brok had given Mimir a riddle. What gets bigger the more you take away? It bedevilled Mimir for a long time, but finally Mimir gets the answer. «A hole.» The screen fades to black as the credits roll again.
Technologies
2 Cases Show Supreme Court Isn’t Holding ISPs Responsible for Piracy
Technologies
Today’s NYT Connections Hints, Answers and Help for April 8, #1032
Here are some hints and the answers for the NYT Connections puzzle for April 8, No. 1032.

Looking for the most recent Connections answers? Click here for today’s Connections hints, as well as our daily answers and hints for The New York Times Mini Crossword, Wordle, Connections: Sports Edition and Strands puzzles.
Today’s NYT Connections puzzle is kind of tough. The purple category is a fun one, once you see the connection. Read on for clues and today’s Connections answers.
The Times has a Connections Bot, like the one for Wordle. Go there after you play to receive a numeric score and to have the program analyze your answers. Players who are registered with the Times Games section can now nerd out by following their progress, including the number of puzzles completed, win rate, number of times they nabbed a perfect score and their win streak.
Read more: Hints, Tips and Strategies to Help You Win at NYT Connections Every Time
Hints for today’s Connections groups
Here are four hints for the groupings in today’s Connections puzzle, ranked from the easiest yellow group to the tough (and sometimes bizarre) purple group.
Yellow group hint: In the group.
Green group hint: Appearance details.
Blue group hint: Often found in gyms.
Purple group hint: They help you see.
Answers for today’s Connections groups
Yellow group: Cohort member.
Green group: Aesthetic.
Blue group: Kinds of bar apparatuses.
Purple group: Eyewear in the singular.
Read more: Wordle Cheat Sheet: Here Are the Most Popular Letters Used in English Words
What are today’s Connections answers?
The yellow words in today’s Connections
The theme is cohort member. The four answers are associate, colleague, fellow and peer.
The green words in today’s Connections
The theme is aesthetic. The four answers are design, look, scheme and style.
The blue words in today’s Connections
The theme is kinds of bar apparatuses. The four answers are monkey, parallel, pull-up and uneven.
The purple words in today’s Connections
The theme is eyewear in the singular. The four answers are contact, goggle, shade and spectacle.
Technologies
Today’s Wordle Hints, Answer and Help for April 8, #1754
Here are hints and the answer for today’s Wordle for April 8, No. 1,754.
Looking for the most recent Wordle answer? Click here for today’s Wordle hints, as well as our daily answers and hints for The New York Times Mini Crossword, Connections, Connections: Sports Edition and Strands puzzles.
Today’s Wordle puzzle is a tough one. The first letter isn’t the rarest letter ever, but its placement threw me off. If you need a new starter word, check out our list of which letters show up the most in English words. If you need hints and the answer, read on.
Read more: New Study Reveals Wordle’s Top 10 Toughest Words of 2025
Today’s Wordle hints
Before we show you today’s Wordle answer, we’ll give you some hints. If you don’t want a spoiler, look away now.
Wordle hint No. 1: Repeats
Today’s Wordle answer has no repeated letters.
Wordle hint No. 2: Vowels
Today’s Wordle answer has two vowels.
Wordle hint No. 3: First letter
Today’s Wordle answer begins with I.
Wordle hint No. 4: Last letter
Today’s Wordle answer ends with T.
Wordle hint No. 5: Meaning
Today’s Wordle answer can refer to a small arm of the sea.
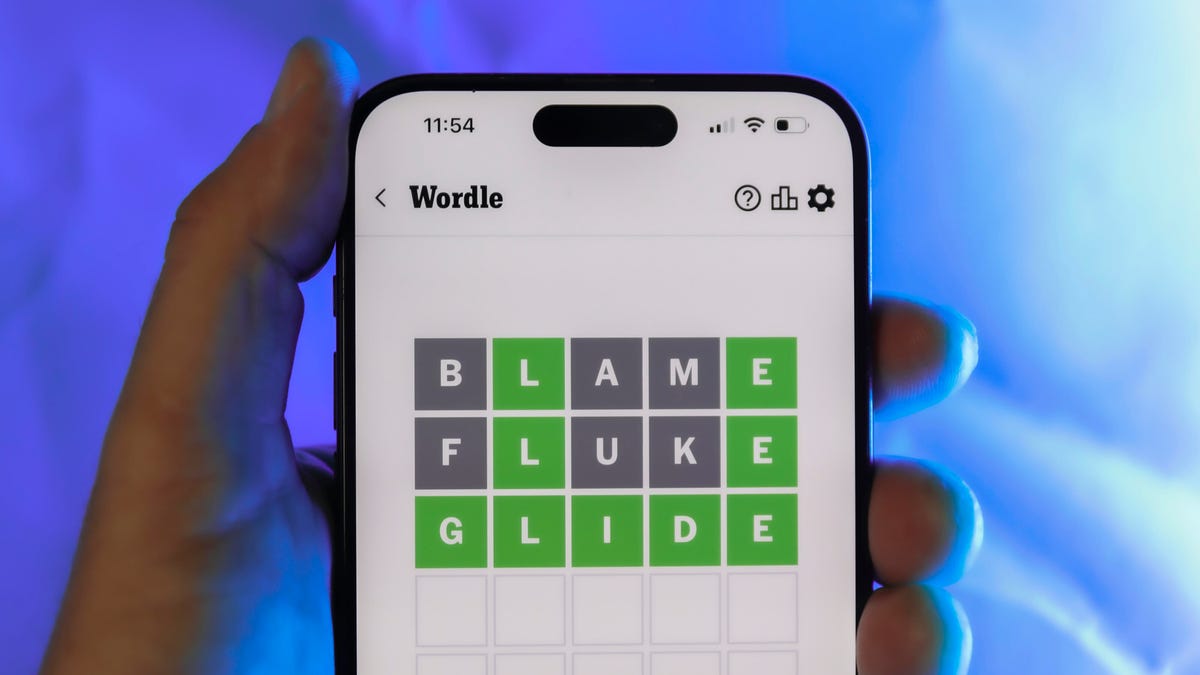
TODAY’S WORDLE ANSWER
Today’s Wordle answer is INLET.
Yesterday’s Wordle answer
Yesterday’s Wordle answer, April 7, No. 1753, was DENSE.
Recent Wordle answers
April 3, No. 1749: SINGE
April 4, No. 1750: SANDY
April 5, No. 1751: ENVOY
April 6, No. 1752: SWORN
-
 Technologies3 года ago
Tech Companies Need to Be Held Accountable for Security, Experts Say
-
 Technologies3 года ago
Best Handheld Game Console in 2023
-
 Technologies3 года ago
Tighten Up Your VR Game With the Best Head Straps for Quest 2
-
 Technologies4 года ago
Black Friday 2021: The best deals on TVs, headphones, kitchenware, and more
-
 Technologies5 лет ago
Google to require vaccinations as Silicon Valley rethinks return-to-office policies
-
 Technologies5 лет ago
Verum, Wickr and Threema: next generation secured messengers
-
 Technologies4 года ago
Olivia Harlan Dekker for Verum Messenger
-
 Technologies4 года ago
The number of Сrypto Bank customers increased by 10% in five days