Technologies
You Can Open Any App By Tapping the Back of Your iPhone: Here’s How
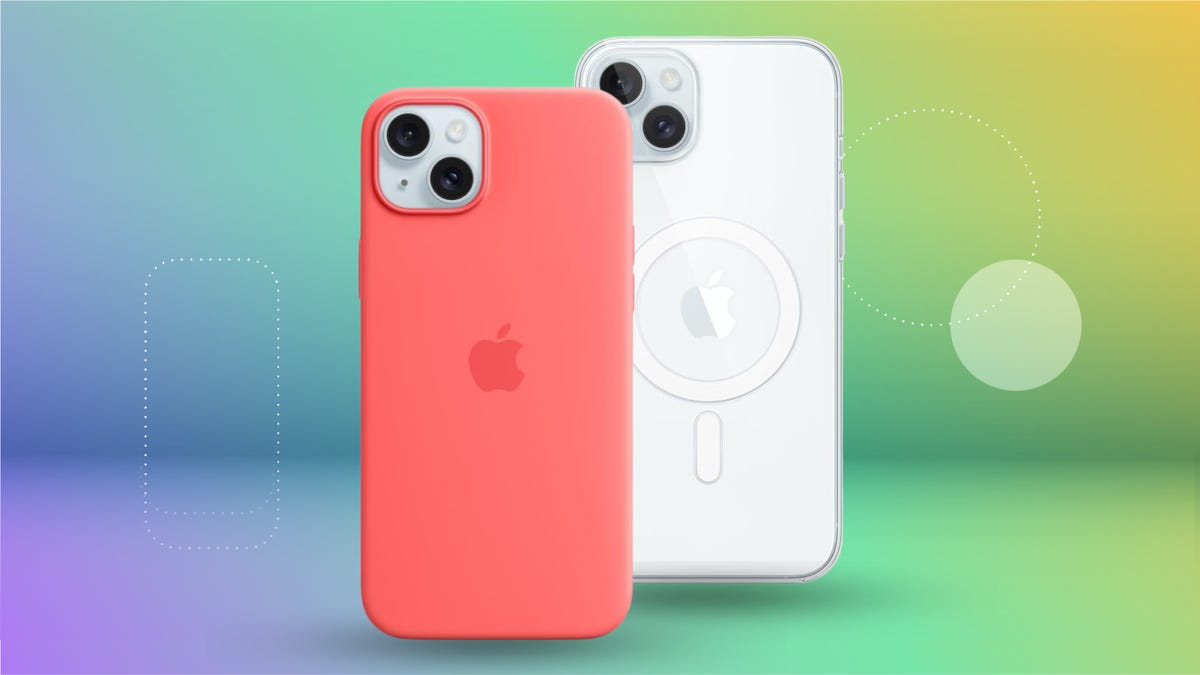
The entire back of your iPhone acts as a secret «button» (and yes, it still works with a case).
The newest iPhones made headlines for the addition of the Camera Control button. But there’s already a way to open the camera app without unlocking your device or touching the screen — and it works even if you’re using an iPhone that’s several years old.
In fact, if you have a Shortcut for it, you can open any app just by tapping the back of your iPhone. All you need to do is set up the secret «button».
You can use this feature to not only launch apps, but also turn on your flashlight or activate Shazam to identify a song before it ends. You can summon your iPhone’s Control Center or Notification Center without having to swipe down from the top of your screen. With a little bit of imagination, you can use this feature to perform almost any of your phone’s functions.
The feature is called Back Tap, and like the Action Button on newer iPhones, it gives you one more way to interact with your device without touching the screen. You can activate it by tapping anywhere on the back of your phone, including on the camera module. The best part is that it works even if you have a fairly thick case on your iPhone.
Back Tap is available on iPhones as old as iPhone 8, as long as they’re running iOS 14 or later. We’ll show you how to enable it and how to use it with your Shortcuts app for nearly endless possibilities.
Read more: All the Ways the iPhone 16’s Camera Control Button Will Change Your iPhone Photography
What is the iPhone Back Tap feature?
Back Tap is an iPhone feature introduced in iOS 14. It lets you perform shortcuts on your iPhone by double or triple tapping on the back of the device.
You can customize Back Tap on your iPhone to easily perform common actions like pulling up the Control Center or Notification Center, especially useful if you have a larger phone and can’t swipe down from the top of the screen without some complex finger gymnastics. You can even have two separate functions enabled at the same time: Back Tap can distinguish between a Double Tap and a Triple Tap.
Depending on the number of times you touch the back of your iPhone, you can set Double Tap to open your Notification Center and Triple Tap to take a screenshot. Or, you can make Double Tap open the Control Center and Triple Tap launch the Magnifier app. Experiment with Back Tap to find the right combinations of taps and functions that best fit your needs.
And you aren’t limited to just the Back Tap options that are available by default. Thanks to the Shortcuts app, you can set up Back Tap to perform specific functions or launch any app. For example, you can create a simple shortcut that opens Shazam or starts a voice recording, then activate it with a quick Double Tap or Triple Tap. You can also use Back Tap to trigger a more elaborate shortcut, such as automatically sending photos and videos to specific photo albums.
How do I set up Back Tap on my iPhone?
To enable Back Tap, go to your Settings app. Then go to Accessibility → Touch → Back Tap. There, you’ll find a list of options for configuring Double Tap and Triple Tap.
Here is the full list of functions that you can map to a Double Tap or Triple Tap:
-
None
-
Accessibility Shortcut
System
-
App Switcher
-
Camera
-
Control Center
-
Flashlight
-
Home
-
Lock Rotation
-
Lock Screen
-
Mute
-
Notification Center
-
Reachability
-
Screenshot
-
Shake
-
Spotlight
-
Volume Down
-
Volume Up
Accessibility
-
AssistiveTouch
-
Background Sounds
-
Classic Invert
-
Color Filters
-
Control Nearby Devices
-
Dim Flashing Lights
-
Live Captions
-
Live Speech
-
Magnifier
-
Smart Invert
-
Speak Screen
-
VoiceOver
-
Zoom
-
Zoom Controller
Scroll Gestures
-
Scroll Down
-
Scroll Up
At the bottom of the menu, you’ll also see a list of Shortcuts. These options will vary depending on what’s available in your Shortcuts app.
The one potential downside to Back Tap is that you don’t get any tactile feedback when you use it, so you might accidentally trigger it at the wrong time and not realize it until later. For instance, you might double tap without meaning to and set off your flashlight by accident. In that case, you might want to remap your Double Tap to a less conspicuous function. Or, you can leave Double Tap off and only use Triple Tap, which you probably won’t trigger as often.
How do I use Back Tap to take a quick photo?
One way to set up Back Tap is to map Double Tap to the Camera and Triple Tap to Volume Up or Volume Down. Because you can press either of the volume buttons to instantly take a picture, you can get the same effect if your volume buttons are mapped to Back Tap. With this combination, you can capture a photo with five quick taps on the back of your iPhone (though you’ll have to pause briefly between performing the Double Tap and Triple Tap, so that your phone can distinguish between the two actions).
This Back Tap combination even works if your phone is locked. Again, spend some time trying out different combinations of taps and features to find which ones are most useful for you.
Technologies
Google Upgrades Maps Features With More Gemini and Faster Photo Uploads
Google Maps strengthens its crowdsourcing efforts for its 500 million contributors.
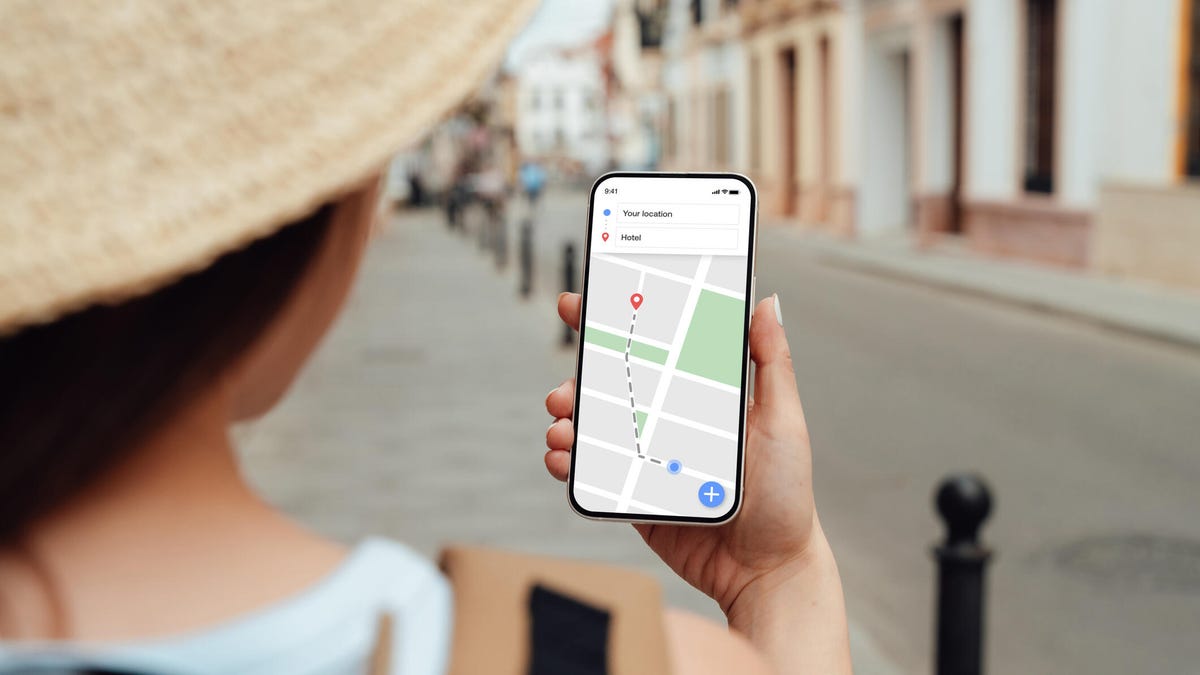
Google announced three new features for Maps on Tuesday that should streamline sharing your experiences. Despite being a strong maps application itself, Google relies on everyday users to contribute their reviews, photos and videos so others doing research can make more informed decisions about places they plan to visit. With the new updates to Google Maps, you can access your photos faster to contribute to information about places you’ve been. You can also choose to have Google’s AI model, Gemini, caption your photos and more quickly check the contributions you’ve made in the past.
New photo and video recommendations
It’s not hard to share photos or videos for a location on Google Maps, but the app will now offer photo and video suggestions from your saved images — if you give it permission to do so. The new feature will appear on the Contribute tab at the bottom of the maps app. When scrolling through the view, you’ll see photo and video recommendations or the option to upload other photos.
How the specific photo and video recommendations are determined isn’t clear, but the new feature will likely use a photo’s geolocation if that setting is enabled in your camera’s settings.
A Google representative didn’t immediately respond to a request for comment.
This feature is now available globally on Android and will expand to iOS in the coming months.
Gemini will auto-caption your photos
Google’s giving your photos some Gemini power by automatically analyzing and captioning them once you’ve selected them to share. This could be helpful in situations where you have selected several photos you don’t care to caption.
If you don’t like what Gemini comes up with, you can edit or remove the caption completely before publishing your photos to Maps.
Gemini captions are available in English on iOS and will expand to other languages globally and Android in the future.
New ways to view your contributions
You can now show off your prior contributions to Google’s Local Guide community program.
When you contribute, you gain points, and the more you contribute, the more you can level up as a Local Guide. All your points and badges are now prominently displayed on your profile. Google’s also adding gold profiles for high-level contributors, so you know you’re reading reviews from experienced users.
The new contributor updates are rolling out now on Android, iOS and desktop.
Technologies
This New Health-Tracking Pet Collar Is Like a Smartwatch for Dogs and Cats
Tractive announces two new smart collars armed with GPS tracking, AI-powered health monitoring and other tech tools.

Our pets can’t speak up and tell us how they’re feeling, or why and where they are hiding. Tractive, an Austria- and Seattle-based tech company that creates GPS tracking devices for pets, announced on Wednesday two new smart collars that, according to the press release, «will redefine pet care for millions of families.»
Is your pet stressed, breathing unusually or scratching too much? Much like the basic health-tracking features you can find on a smartwatch, the collars — the Cat 6 Mini ($79) and Dog 6 XL ($89) — are designed to track this behavior and communicate the issues to help maintain your dog or cat’s quality of life.
«Pets can’t tell us when something is wrong, but their bodies can,» Michael Hurnaus, CEO and founder of Tractive, said in a statement. «With cutting-edge sensors on every tracker, learnings from millions of pets and AI-powered insights, we’re turning one of the world’s largest pet data platforms into clear, simple information so pet parents can act sooner and care even better.»
When it comes to tracking collars, dogs have usually been the target pet audience for such devices. Tractive’s new Cat 6 Mini collar aims to provide the same service for your feline friend. You can use it to monitor your cat’s respiratory rate and resting heart rate and identify any health concerns early. It’s expected to ship on May 31.
The Dog 6 XL collar, an upgrade from the company’s previous dog wearable, is designed for dogs weighing over 55 pounds. It’s more durable for outdoor use and offers up to four weeks of battery life between charges. It comes equipped with a scratch-monitoring system that flags unusual scratching behavior caused by allergies, skin irritants and other stressors.
You can also use the app to access your pet’s travels and mark safe zones regarding walks, entries and exits. An AI-powered health hub displays your pet’s overall health stats and also acts as a GPS tracker in case your dog or cat goes missing.
How would a veterinarian interact with the data collected on the device?
A Tractive representative told CNET, «In our experience, veterinarians are most interested in baseline resting heart and respiratory rate, so it’s less about monitoring these vitals in real time during recovery from anesthesia/acute care and more about understanding if the baseline is changing day to day to identify the onset of new conditions or manage existing ones.»
Even though the collars use a SIM card and require a strong cellular connection to work properly, they can capture activity, sleep and health data while offline. However, without connectivity, the devices «ultimately will not provide any utility,» the representative confirmed.
You’ll need to download the accompanying app and select a separate subscription plan at an added cost. The one-year plan costs $120, the two-year plan costs $168, and the five-year plan costs $300.
Technologies
Today’s NYT Strands Hints, Answers and Help for April 9 #767
Here are hints and answers for the NYT Strands puzzle for April 9, No. 767.
Looking for the most recent Strands answer? Click here for our daily Strands hints, as well as our daily answers and hints for The New York Times Mini Crossword, Wordle, Connections and Connections: Sports Edition puzzles.
Today’s NYT Strands puzzle could be tough, unless you’re an artist. Even then, some of the answers are difficult to unscramble, so if you need hints and answers, read on.
I go into depth about the rules for Strands in this story.
If you’re looking for today’s Wordle, Connections and Mini Crossword answers, you can visit CNET’s NYT puzzle hints page.
Read more: NYT Connections Turns 1: These Are the 5 Toughest Puzzles So Far
Hint for today’s Strands puzzle
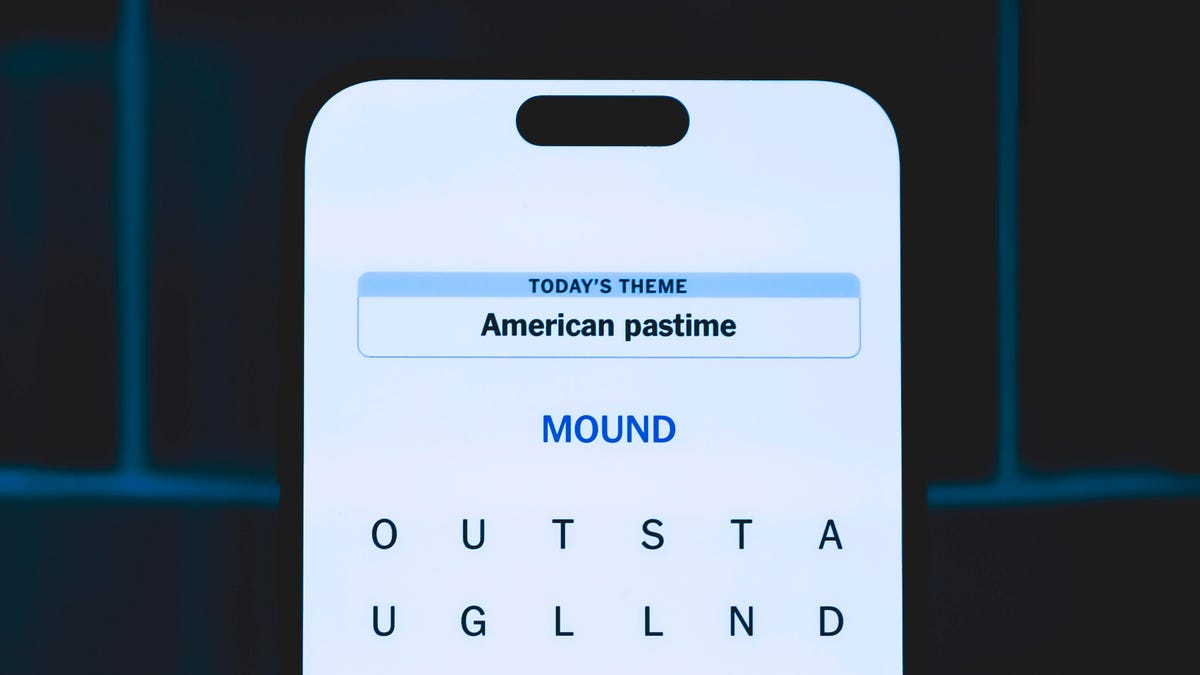
Today’s Strands theme is: In the paint.
If that doesn’t help you, here’s a clue: Hand me a brush.
Clue words to unlock in-game hints
Your goal is to find hidden words that fit the puzzle’s theme. If you’re stuck, find any words you can. Every time you find three words of four letters or more, Strands will reveal one of the theme words. These are the words I used to get those hints but any words of four or more letters that you find will work:
- COME, PATS, SPAT, SLOE, MEAN, LEAN, MANE, RATE, PEER, LATE, RATER
Answers for today’s Strands puzzle
These are the answers that tie into the theme. The goal of the puzzle is to find them all, including the spangram, a theme word that reaches from one side of the puzzle to the other. When you have all of them (I originally thought there were always eight but learned that the number can vary), every letter on the board will be used. Here are the nonspangram answers:
- FRESCO, PASTEL, ENAMEL, ACRYLIC, TEMPERA, WATERCOLOR
Today’s Strands spangram
Today’s Strands spangram is MEDIUM, the art term! To find it, start with the M that’s four letters down on the far-left vertical row, and travel straight across.
-
 Technologies3 года ago
Tech Companies Need to Be Held Accountable for Security, Experts Say
-
 Technologies3 года ago
Best Handheld Game Console in 2023
-
 Technologies3 года ago
Tighten Up Your VR Game With the Best Head Straps for Quest 2
-
 Technologies4 года ago
Black Friday 2021: The best deals on TVs, headphones, kitchenware, and more
-
 Technologies5 лет ago
Google to require vaccinations as Silicon Valley rethinks return-to-office policies
-
 Technologies5 лет ago
Verum, Wickr and Threema: next generation secured messengers
-
 Technologies4 года ago
Olivia Harlan Dekker for Verum Messenger
-
 Technologies4 года ago
The number of Сrypto Bank customers increased by 10% in five days