Technologies
Every Parent Should Know These 3 iPhone and iPad Parental Controls
Apple’s newest updates make it easy to remotely manage your child’s screen time, content access and even set location alerts. Here’s how to use these features and where to find them.

As a parent of three young kids with limited screen time, the prospect of handing them their very own iPad or iPhone sends me into an anxiety-induced spiral. The prospect of having to micromanage screen time (and the overstimulated meltdowns that follow), plus trying to protect them on social media and against all the other horrors lurking online, is enough to make me want to swear off screens altogether. But I’m also a realist and know I can’t fend off screens forever. In fact, their peak device years are just ahead. So when that time comes, I want to be prepared with all the tools.
Fortunately, Apple already has a surprising number (at least to me) of guardrails and parental controls in place, with features like child accounts, screen time settings, and communication limits that help parents create safer digital environments. And there’s more on the way.
Apple’s latest tools, rolling out to the iPhone and iPad with iOS 26 and iPadOS 26 respectively, help parents set age-appropriate content filters, monitor app use, limit communication, and even blur explicit images before they appear on-screen. Here’s how to find them, set them up and feel more confident handing over that screen to your kids — no matter what age they are.
Setting up a child account: The key to unlocking parental controls
Setting up a child account is the key that unlocks all these great parental control features so if you haven’t already, make sure you do this first. Apple lets you create a dedicated child account for an iPhone, iPad, or Apple Watch, giving parents full control over settings remotely through their own device. If it’s a shared iPhone or iPad, you’ll need to choose between setting it up as an adult or child account — unlike an Apple TV, there’s no multi-user option. Starting in September, iOS 26 and iPadOS 26 will also let you convert an existing device into a child account without needing to reset it — meaning you can keep whatever content that you already have on your Apple device.
There are three ways to set up a child account on a new device:
- The first (and simplest) is using your own device. As soon as you bring the two devices close together, setup instructions should automatically appear on screen using Quick Start.
- If you’re not using Quick Start, you can still set it up directly on the new device. Just choose Set Up Without Another Device and follow the on-screen instructions. If you’re setting up a device for a child age 12 or younger, it must be linked to your adult account.
- You can also create a child account in advance, even without the child’s device nearby. Go to Settings > [your name] > Family, then tap the Add User icon in the top right corner. Select Create Child Account and follow the prompts.
Screen Time: the command center for parental controls
When you create a child account, you’ll be asked to select an age range: 12 or younger or 13–17. This automatically sets baseline filters for content and services but you can fine-tune things even more through the Screen Time settings on your own device. From here, you can manage what your child watches, how long they use their device and who they can communicate with (among many others).
To access Screen Time controls, go to Settings > Family, tap on your child’s name and select Screen Time.
Once you’re in, here’s everything you can take charge of:
-
Downtime: Schedule breaks from screen time. You can schedule specific times and days when your kid won’t have access to certain apps (determine which ones in the Always Allowed section) or choose to block the devices entirely. They’ll get a five minute heads up when downtime is coming.
-
Always Allowed: Choose which apps and contacts your child can access and at what time.
-
Screen Distance: Alerts your child when they’re holding the device too close to their face to help protect their still maturing eyesight.
-
Communication Limits: Sets detailed rules about who your child can contact and when. For example, you can allow calls from parents or emergency contacts during Downtime, even when everything else is blocked.
-
Communication Safety: Detects nudity in photos before they’re sent or received and alerts your child, offering a moment to pause and consider whether they want to view. This one’s a no brainer and one you’ll want to keep on at all times. It also suggests age-appropriate resources to inform the child without Apple ever seeing the content.
-
Content & Privacy Restrictions: Micromanage purchases and downloads. You choose whether or not your kid can download and purchase apps, and then restrict in-app purchases for the ones they have access to, or block access to the App Store altogether. You can also disable features like AirDrop under Allowed Apps & Features.
-
App Store, Media, Web & Games: Set age-based ratings restrictions for everything from TV shows and movies to games, books and apps (anything from G to NC-17, or the equivalent). You can even block music videos or restrict private messaging in games to prevent sneaky workarounds with unapproved contacts.
-
Managing Screen Time: Receive an alert if your child enters the Screen Time passcode so if they’ve guessed it, you’ll know. This is part of iOS 26 and will be available this fall. In the meantime you can still change the code remotely if you suspect they’ve cracked the code, without needing access to your child’s device.
Beyond that, you’ll find options to manage which subscriptions your child can access, and whether they can send and receive Apple Cash, or remove the option entirely from the menu.
Location Sharing: Get a heads-up about your child’s whereabouts in real time
Whether it’s an iPhone, Apple Watch or even an iPad, one of the biggest benefits of giving your child their own device is being able to keep a watchful eye on their whereabouts (just make sure they know about it too). Not only can you check where they are, you can also set alerts to notify you when they’ve arrived at or left a specific location.
You’ll find the Location Sharing option under your child’s profile in your Family account settings (it’s the last option on the list). From here you can block your kid from changing their location settings, but to take full advantage of the feature, you’ll want to jump into the Find My app.
Once you open Find My, tap on your child’s name to see their location. Next, swipe up to reveal the full menu, tap Add Notification > Notify Me. From here, you can choose to get alerts when your child arrives at or leaves a certain location like home, school or a friend’s house. Tap New Location to enter an address manually or tap the screen to drop a pin on the map. You can choose whether to receive the alert just once or every time they come and go.
Want to return the favor? Tap Notify [your kid’s name], and follow the same steps. Your phone will automatically let your child know when you’ve arrived or left a designated location too.
The exact settings may vary slightly depending on the age range you choose but the core controls remain the same.
With iOS 26 and iPadOS 26, Apple is adding even more granular parental tools. The nudity filters will be expanded to FaceTime (and potentially third-party apps), you’ll get alerts when your child enters a Screen Time passcode and you’ll be able to revoke app permissions remotely even after your child has already started using the app.
There are already enough things to worry about as a parent (especially with online risks), but hopefully, these features will help take at least one worry off your plate. Just remember that even the best tech tools aren’t a substitute for in-person guidance from a parent or caregiver. When introducing screens to kids, make sure you’re having age appropriate conversations about online safety and helping them build healthy screen time habits of their own.
Technologies
This Two-Faced Watch Band Lets You Hide an Apple Watch Under Your Rolex
The $418 Smartlet literally bridges the gap between your elegant analogy and your nerdy smartwatch.
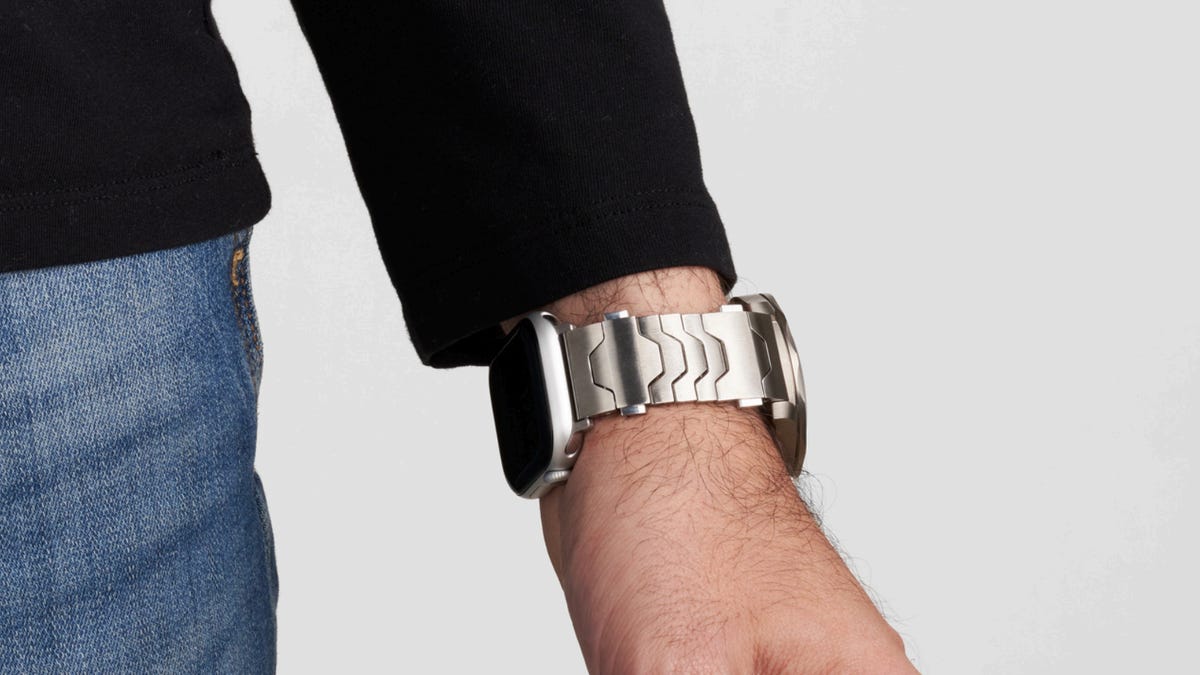
The Consumer Electronics Show is never short on ambitious ideas, but Smartlet may be one of the more unusual ones this year: a modular watch strap that lets you wear a traditional mechanical watch and a smartwatch on the same wrist, simultaneously. One on top of the other.
The Paris-based startup announced Smartlet at the 2026 CES in Las Vegas, pitching it as a solution for people who love the look of an analog watch but also want the practicality of a smartwatch for notifications, fitness tracking and mobile payments. Instead of choosing between the two, Smartlet’s system lets you mount an old-school timepiece on the front of your wrist while hiding a smartwatch or fitness tracker on the underside.
The stainless steel strap starts at $418 and doesn’t include a smartwatch or a mechanical watch. What you’re really buying is the strap system, which is compatible with most major smartwatches and fitness trackers, including Apple Watch, Samsung Galaxy Watch, Google Pixel Watch, Garmin models, Fitbit Charge devices and Whoop. On the analog side, it supports watches with lug widths from 18 to 24 mm, which includes high-end models from brands such as Omega, Tudor, TAG Heuer and Rolex.
The idea comes from founder David Ohayon, who says he was tired of having to play favorites every morning, choosing between his analog and Apple Watch. Smartlet, in theory, offers the best of both worlds, letting you toggle from fitness nerd to polished executive with the flick of a wrist.
In practice, it raises some serious questions, the biggest one being bulk. Smartlet says the system adds between 9 and 12 mm of height to the underside of the wrist once a connected device is attached. As someone who already manages to scratch watches without trying, the idea of strapping a second device to the underside of my wrist, where it regularly comes in contact with desks, armrests and tabletops, sounds like a walking nightmare.
There’s also the aesthetic. Smartlet is clearly aimed at what it calls the «modern gentleman,» with marketing language that leans heavily into luxury watch culture and phrases like «from the boardroom to the weekend.» Translation: This is a watch for wealthy men who want to show off their investment piece without sacrificing their gym gain tracking.
And while it may not be the most practical, or budget-friendly solution for most people, Smartlet is one of those highly niche, standout products that had us doing a double take at this year’s CES.
Technologies
Today’s NYT Strands Hints, Answers and Help for Dec. 25 #662
Here are hints and answers for the NYT Strands puzzle for Dec. 25, No. 662.
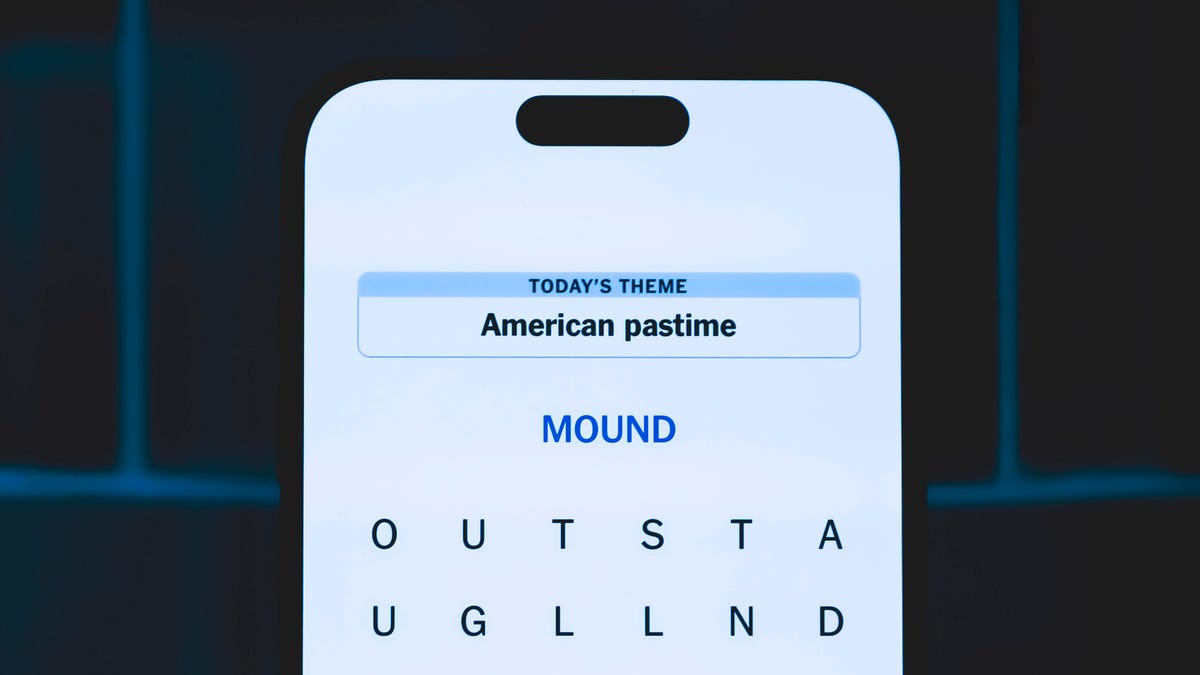
Looking for the most recent Strands answer? Click here for our daily Strands hints, as well as our daily answers and hints for The New York Times Mini Crossword, Wordle, Connections and Connections: Sports Edition puzzles.
Today’s NYT Strands puzzle has a holiday theme, and if you know a certain Christmas carol, you’ll quickly determine which words to hunt down. Some of the answers are difficult to unscramble, so if you need hints and answers, read on.
I go into depth about the rules for Strands in this story.
If you’re looking for today’s Wordle, Connections and Mini Crossword answers, you can visit CNET’s NYT puzzle hints page.
Read more: NYT Connections Turns 1: These Are the 5 Toughest Puzzles So Far
Hint for today’s Strands puzzle
Today’s Strands theme is: Carolers count.
If that doesn’t help you, here’s a clue: Five golden rings.
Clue words to unlock in-game hints
Your goal is to find hidden words that fit the puzzle’s theme. If you’re stuck, find any words you can. Every time you find three words of four letters or more, Strands will reveal one of the theme words. These are the words I used to get those hints but any words of four or more letters that you find will work:
- RIMS, HIMS, MARS, CHIME, CHIMES, MADS, DATE, DIAL, WAIL
Answers for today’s Strands puzzle
These are the answers that tie into the theme. The goal of the puzzle is to find them all, including the spangram, a theme word that reaches from one side of the puzzle to the other. When you have all of them (I originally thought there were always eight but learned that the number can vary), every letter on the board will be used. Here are the nonspangram answers:
- LORDS, MAIDS, SWANS, LADIES, PIPERS, DRUMMERS
Today’s Strands spangram
Today’s Strands spangram is CHRISTMASDAYS. To find it, look for the C that’s three letters down on the far-left row, and wind across.
Don’t miss any of our unbiased tech content and lab-based reviews. Add CNET as a preferred Google source.
Toughest Strands puzzles
Here are some of the Strands topics I’ve found to be the toughest in recent weeks.
#1: Dated slang, Jan. 21. Maybe you didn’t even use this lingo when it was cool. Toughest word: PHAT.
#2: Thar she blows! Jan.15. I guess marine biologists might ace this one. Toughest word: BALEEN or RIGHT.
#3: Off the hook, Jan. 9. Similar to the Jan. 15 puzzle in that it helps to know a lot about sea creatures. Sorry, Charlie. Toughest word: BIGEYE or SKIPJACK.
Technologies
Judge Blocks Texas App Store Age-Check Law
A preliminary injunction found the Texas law, set to begin Jan. 1, is «more likely than not unconstitutional.»

A new Texas state law set to take effect on Jan. 1 would have required app stores to implement age verification processes. But the law has been put on hold, at least temporarily, by a federal court judge.
As reported by the Texas Tribune, Senate Bill 2420, also known as the Texas App Store Accountability Act, is the subject of a temporary injunction issued by US District Judge Robert Pitman.
Pitman said in his decision that the law as written is broad, vague and «more likely than not unconstitutional.» However, he also wrote the court «recognizes the importance of ongoing efforts to better safeguard children when they are on their devices.»
Don’t miss any of our unbiased tech content and lab-based reviews. Add CNET as a preferred Google source.
The Texas law, signed into law by Governor Greg Abbott in May, requires app store operators — including Apple, Google, Nintendo, Steam and more — to build age verification processes for the storefronts and to only allow downloads to minors who obtain parental consent. The injunction is a ruling in an October lawsuit filed by the Computer & Communication Industry Association.
CCIA senior vice president Stephanie Joyce said in a statement, «This Order stops the Texas App Store Accountability Act from taking effect in order to preserve the First Amendment rights of app stores, app developers, parents, and younger internet users. It also protects parents’ inviolate right to use their own judgment in safeguarding their children online using the myriad tools our members provide.»
Other individuals and the advocacy group Students Engaged in Advancing Texas also filed suits over the law, the Texas Tribune reported.
App Store Accountability Act
The bill author, State Senator Angela Paxton, said the bill was meant to give parents «common sense tools to protect their kids and to survive court challenges by those who may have lesser priorities.»
The language of Texas Senate Bill 2420 does not only include mobile app stores from Apple or Google, but any «website, software application, or other electronic service that distributes software applications from the owner or developer of a software application to the user of a mobile device.»
By that definition, websites with links to browser games or mobile game consoles with download options would fall under the Texas law as written. The law also defines mobile devices as including phones and tablets, as well as any other handheld device capable of transmitting or storing information wirelessly.
The parental consent aspect of the law requires those under 18 to have an app store account affiliated with a parent or guardian to purchase or download applications.
Age verification elsewhere
In an effort to keep adult materials out of reach of minors and to protect children from potentially harmful content and interactions, tech companies have been compelled by law or through legal action to verify the age of users.
Roblox, which has a huge audience of minors, began rolling out stricter age verification after investigations and lawsuits hurt its reputation as a safe gaming space. Australia is perhaps the most large-scale example of a government restricting access to online content. In December, Australia began restricting social media access to those 16 and older. Reddit recently challenged that law.
In the US, age verification laws have primarily targeted adult sites. Texas already has a law on the books that requires adult sites to age-block their content. The Supreme Court upheld that law in a June ruling. The UK has also enacted age restriction rules for adult sites as have other US states.
-

 Technologies3 года ago
Tech Companies Need to Be Held Accountable for Security, Experts Say
-

 Technologies3 года ago
Best Handheld Game Console in 2023
-

 Technologies3 года ago
Tighten Up Your VR Game With the Best Head Straps for Quest 2
-

 Technologies4 года ago
Black Friday 2021: The best deals on TVs, headphones, kitchenware, and more
-

 Technologies4 года ago
Verum, Wickr and Threema: next generation secured messengers
-

 Technologies4 года ago
Google to require vaccinations as Silicon Valley rethinks return-to-office policies
-

 Technologies4 года ago
Olivia Harlan Dekker for Verum Messenger
-

 Technologies4 года ago
iPhone 13 event: How to watch Apple’s big announcement tomorrow
