
Technologies
Missed the Solar Eclipse? How to Stream the Recap and Prepare for the Next Eclipse
The great American eclipse was the last total solar eclipse that will be visible over North America for 20 years. But there will be others across the globe.

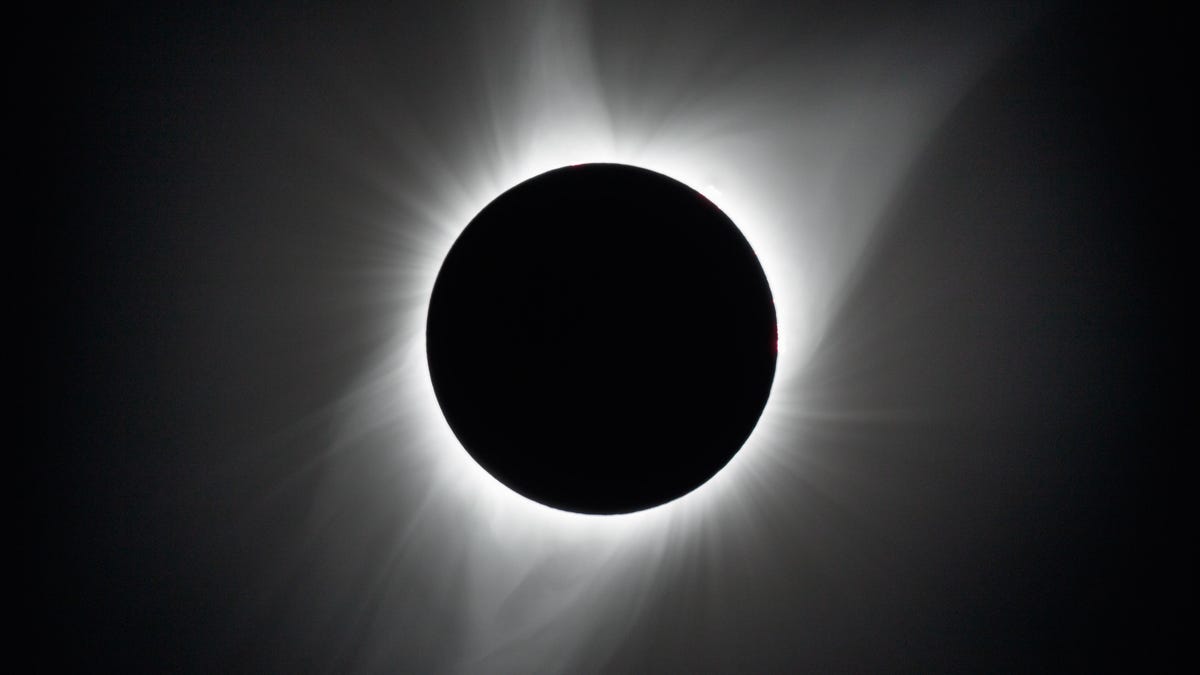
The «great American eclipse» graced our skies on Monday, and if you let this rare celestial event pass you by, it’ll be quite a wait for the next one. Another total solar eclipse over North America won’t happen until 2044. The good news is you can rewatch the event with footage from the best vantage points, check out all the stunning photos of the eclipse and start preparing to see the next one.
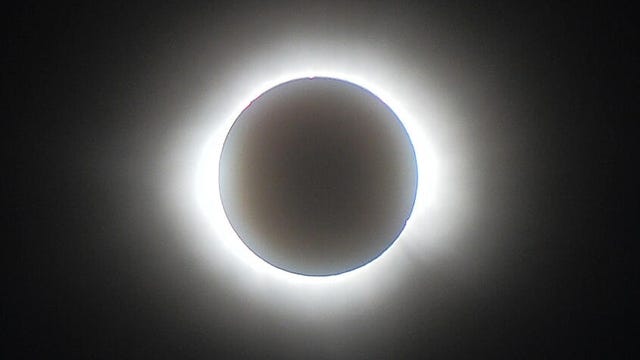
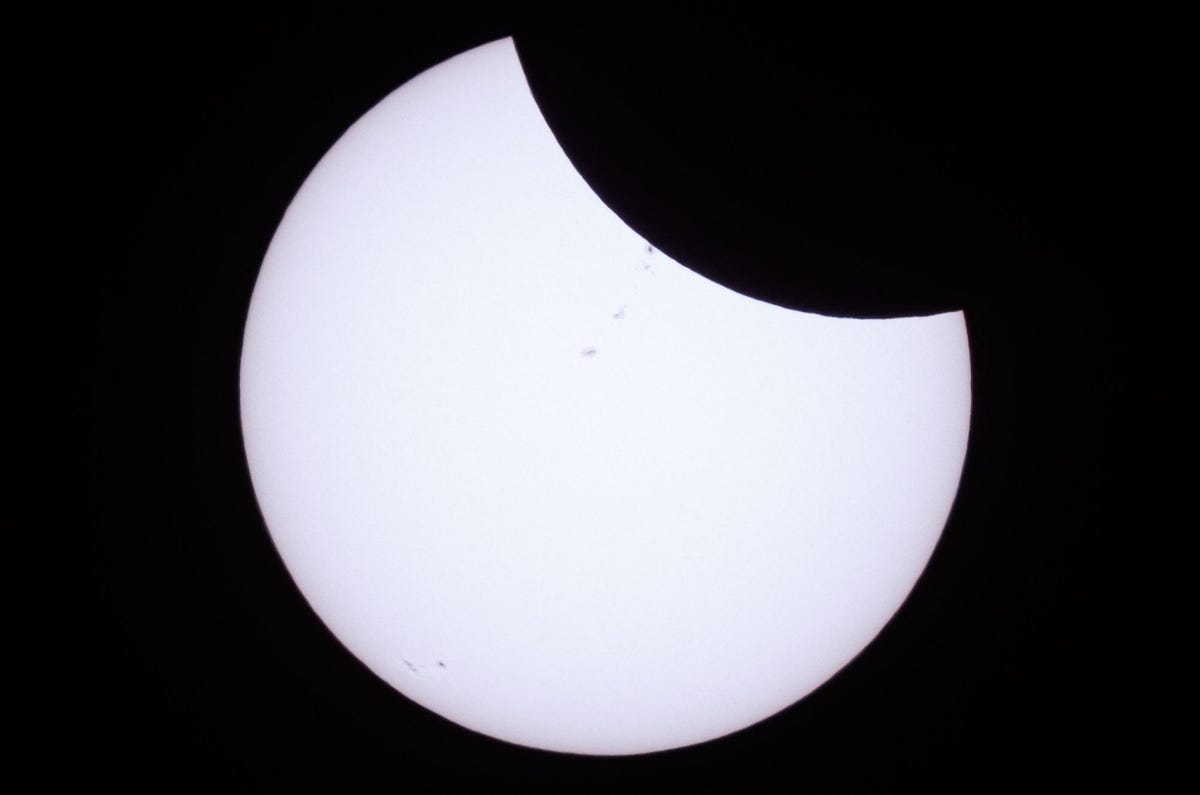
A total solar eclipse happens when the moon passes between the Earth and the sun, blocking the sun and turning an otherwise sunny day to darkness for a short period of time. Depending on the angle at which you’re viewing the eclipse, you may see the sun completely shrouded by the moon (called totality) or some variation of it. The more off-angle you are and the farther you are from the path of the eclipse, the less likely you’ll be to see the totality.
The 2024 total solar eclipse reached the Mexican Pacific coast on April 8 at 11:07 a.m. PT (2:07 p.m. ET), and then traversed the US in a northeasterly direction from Texas to Maine and on into easternmost Canada.
If you weren’t in that path of totality, here are a look at some of the options to rewatch it online, or where you’ll have to travel for the next eclipse.


Total solar eclipse path in 2024
The eclipse crossed over the Pacific coast of Mexico and headed northeast over mainland Mexico. The eclipse made its way over San Antonio at approximately 2:30 p.m. ET on April 8 and moved through Texas, over the southeastern part of Oklahoma and northern Arkansas by 2:50 p.m. ET.
By 3 p.m. ET, the eclipse was over southern Illinois, and just 5 minutes later, was traveling over Indianapolis. Folks in northwestern Ohio were treated to the eclipse around 3:15 p.m. ET, and it then traveled over Lake Erie and Buffalo, New York, at around 3:20 p.m. ET. Over the following 10 minutes, the eclipse was seen over northern New York state, then over Vermont. By 3:35 p.m. ET, the eclipse worked its way into Canada and off the eastern coast of North America.
How to rewatch the solar eclipse online
NASA hosted a three-hour live stream of the eclipse, which included commentary by NASA experts, astronauts on the international space station, celebrities and looks at watch parties across the nation. It featured views from locations in the path of totality, including Dallas and Kerrville, Texas; Russellville, Arkansas; NASA’s Glenn Research Center in Ohio; Indianapolis; Carbondale, Illinois; Niagara Falls, New York; and Houlton, Maine.
You can rewatch the live broadcast on streaming service NASA Plus or on NASA’s website, or rewatch the stream on CNET’s YouTube channel.

Where and when is the next solar eclipse?
While the next total solar eclipse won’t be visible over North America for 20 years, there will be other partial, annular and total eclipses across the world. Here are the next five:
- Oct. 2, 2024: An annular solar eclipse, visible from South America; and a partial eclipse, visible in South America, Antarctica, the Pacific Ocean, the Atlantic Ocean and North America.
- March 29, 2025: A partial solar eclipse, visible from Europe, Asia, North America, South America, Africa, the Atlantic Ocean and the Arctic Ocean.
- Sept. 21, 2025: A partial solar eclipse, visible in Australia, Antarctica, the Pacific Ocean and the Atlantic Ocean.
- Feb. 17, 2026: An annular solar eclipse, visible in Antarctica; and a partial eclipse, visible in Antarctica, Africa, South America, the Pacific Ocean, the Atlantic Ocean and the Indian Ocean.
- Aug. 12, 2026: The next total solar eclipse will be visible from Greenland, Iceland, Spain, Russia and a small area of Portugal; a partial eclipse will be visible from Europe, Africa, North America, the Atlantic Ocean, the Arctic Ocean and the Pacific Ocean.
Best places to watch an eclipse
When evaluating the best places to watch one of those upcoming eclipses, you’ll first want to determine where you’ll have the best angle to see the totality. The farther off-angle you are — in other words, the farther north or south of the eclipse’s path — the less of an impact you can expect.
Therefore, if you want to have the best chance of experiencing the eclipse, you’ll want to be in its path. When the eclipses come closer, check for details on what cities will have the best vantage points.
Eclipse eye safety and photography
When preparing for the next solar eclipses, it’s critical you keep eye safety in mind.
During an eclipse, and especially during the periods before and after totality, don’t look directly at the sun without special eye protection. Also, be sure not to look at the sun through a camera (including the camera on your phone), binoculars, a telescope or any other viewing device. This could cause serious eye injury. Sunglasses aren’t enough to protect your eyes from damage.
If you want to view the eclipse, you’ll instead need solar viewing glasses that comply with the ISO 12312-2 safety standard. Anything that doesn’t meet that standard or greater won’t be dark enough to protect your eyes.
If you don’t have eclipse viewing glasses handy, you can instead use indirect methods for viewing the eclipse, like a pinhole projector.
Read more: A Photographer’s Adventure With the Eclipse
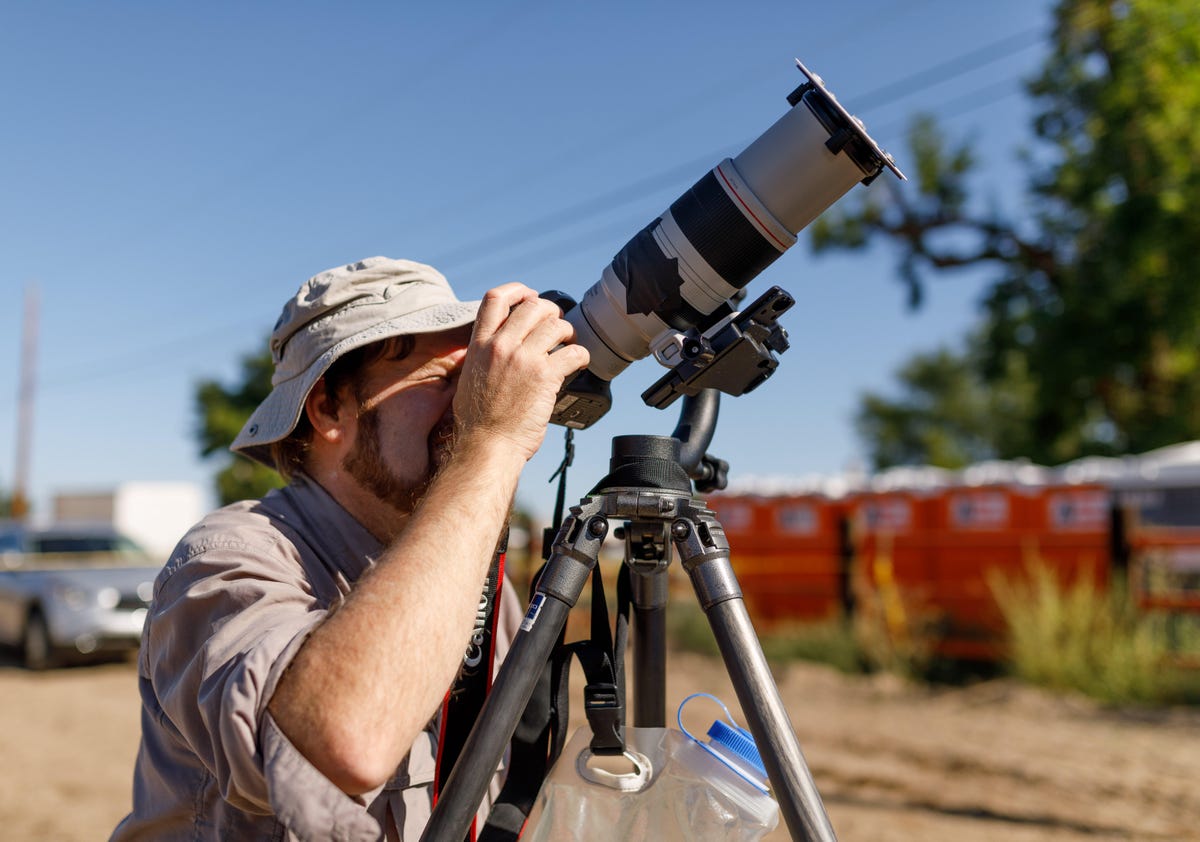
In the event you want to take pictures of the eclipse, attach a certified solar filter to your camera. Doing so will protect your eyes and allow you to take photos while you view the eclipse through your lens.
There’s also a new app to help you both protect your eyes and take better photos of the eclipse on your phone. Solar Snap, designed by a former Hubble Space Telescope astronomer, comes with a Solar Snap camera filter that attaches to the back of an iPhone or Android phone, along with solar eclipse glasses for protecting your eyesight during the event. After you attach the filter to your phone, you can use the free Solar Snap Eclipse app to zoom in on the eclipse, adjust exposure and other camera settings, and ultimately take better shots of the eclipse.

2024 eclipse compared to 2017
The previous total solar eclipse occurred in 2017, and many Americans had a great view. Although there are plenty of similarities between the 2017 total solar eclipse and the one on April 8, there were a handful of differences. Mainly, the 2024 eclipse covered more land and lasted longer.
The 2017 eclipse started over the northwest US and moved southeast. Additionally, that eclipse’s path was up to 71 miles wide, compared with a maximum width of 122 miles for this year’s eclipse. Perhaps most importantly, the moon completely covered the sun for just 2 minutes, 40 seconds in 2017. This year, maximum totality lasted for nearly four-and-a-half minutes.
For more on the Great American Eclipse, check out CNET’s coverage on expert eye protection and viewing tips, where to get free solar eclipse glasses, how to figure out if your eclipse glasses are safe or fake and whether your solar panels will be affected by the total solar eclipse.
Technologies
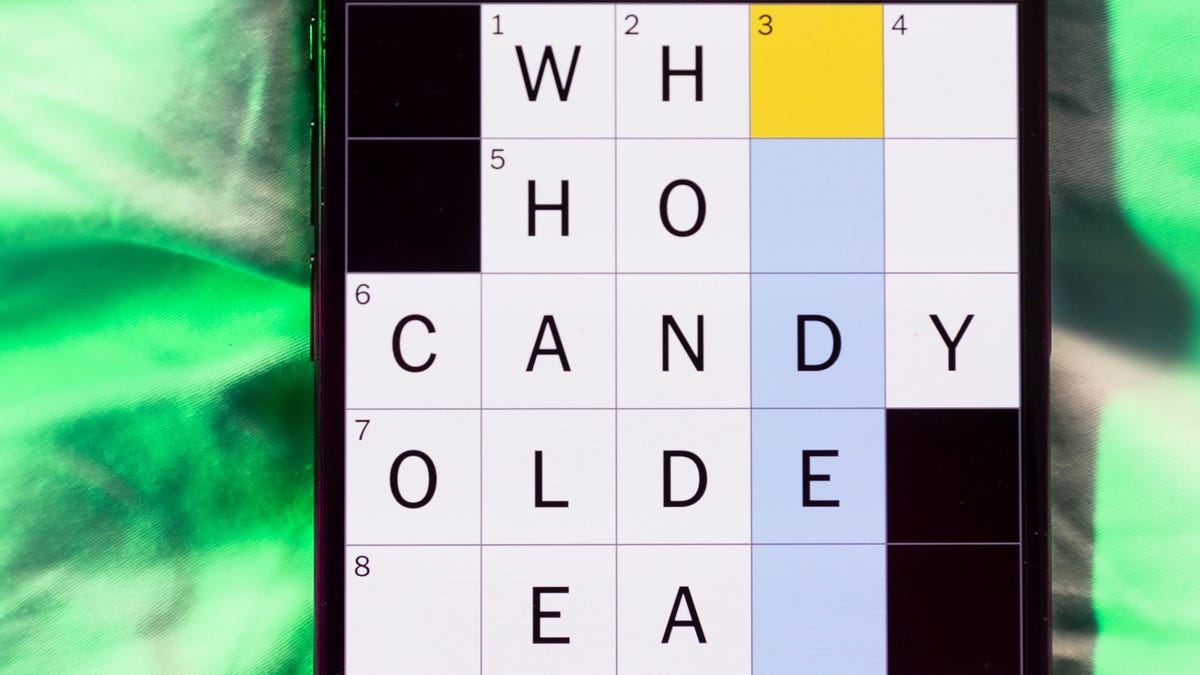
Today’s NYT Mini Crossword Answers for Wednesday, Oct. 22
Here are the answers for The New York Times Mini Crossword for Oct. 22.
Looking for the most recent Mini Crossword answer? Click here for today’s Mini Crossword hints, as well as our daily answers and hints for The New York Times Wordle, Strands, Connections and Connections: Sports Edition puzzles.
Need some help with today’s Mini Crossword? It’s one of those with absolutely no empty spaces, just a grid of letters, which means if you correctly answer all the Across answers, you’ve solved the Down answers, too. Need help? Read on. And if you could use some hints and guidance for daily solving, check out our Mini Crossword tips.
If you’re looking for today’s Wordle, Connections, Connections: Sports Edition and Strands answers, you can visit CNET’s NYT puzzle hints page.
Read more: Tips and Tricks for Solving The New York Times Mini Crossword
Let’s get to those Mini Crossword clues and answers.
Mini across clues and answers
1A clue: Roomful of students
Answer: CLASS
6A clue: Something to bring in a brown paper bag
Answer: LUNCH
7A clue: __ Harbor, sightseeing area of Baltimore
Answer: INNER
8A clue: Where many Stephen King novels are set
Answer: MAINE
9A clue: Beagle or bulldog
Answer: BREED
Mini down clues and answers
1D clue: Go bouldering, e.g.
Answer: CLIMB
2D clue: ___ New Year
Answer: LUNAR
3D clue: Redhead of musical/movie fame
Answer: ANNIE
4D clue: Something an actor might steal
Answer: SCENE
5D clue: Tear to pieces
Answer: SHRED
Technologies
These Small Tweaks Can Give Your Old Android a Big Speed Boost
Instead of buying a new phone, try clearing some space, updating your software and changing a few battery settings.
If your Android is a few years old and starting to feel sluggish, it doesn’t mean you have to rush out and buy the newest flagship model. Thanks to longer software support from brands like Google and Samsung, older models can still run smoothly, as long as you give them a little attention.
Before you start shopping for a replacement, try a few simple adjustments. You might be surprised by how much faster your phone feels once you clear out unused apps, optimize battery use and turn off background drains.
Whether you use a Samsung Galaxy, Motorola or OnePlus phone, chances are you can still improve battery life and overall speed without buying something new. Just remember that Android settings vary slightly from brand to brand, so the menus may look a little different depending on your phone.
Don’t miss any of our unbiased tech content and lab-based reviews. Add CNET as a preferred Google source.
Settings to improve your battery life
Living with a phone that has poor battery life can be infuriating, but there are some steps you can take to maximize each charge right from the very beginning:
1. Turn off auto screen brightness or adaptive brightness and set the brightness level slider to under 50%
The brighter your screen, the more battery power it uses.
To get to the setting, pull down the shortcut menu from the top of the screen and adjust the slider, if it’s there. Some phones may have a toggle for auto brightness in the shortcut panel; otherwise, you need to open the settings app and search for «brightness» to find the setting and turn it off.
2. Use Adaptive Battery and Battery Optimization
These features focus on learning how you use your phone, including which apps you use and when, and then optimizing the apps and the amount of battery they use.
Some Android phones have a dedicated Battery section in the Settings app, while other phones (looking at you, Samsung) bury these settings. It’s a little different for each phone. I recommend opening your settings and searching for «battery» to find the right screen. Your phone may also have an adaptive charging setting that can monitor how quickly your phone battery charges overnight to preserve its health.
Why you should use dark mode more often
Another way to improve battery life while also helping save your eyes is to use Android’s dedicated dark mode. Any Android phone running Android 10 or newer will have a dedicated dark mode option.
According to Google, dark mode not only reduces the strain that smartphone displays cause on our eyes but also improves battery life because it takes less power to display dark backgrounds on OLED displays (used in most flagship phones) than a white background.
Depending on which version of Android your phone is running, and what company made your phone, you may have to dig around the settings app to find a dark mode. If your phone runs Android 10 or newer, you’ll be able to turn on system-wide dark mode. If it runs Android 9, don’t despair. Plenty of apps have their own dark mode option in the settings that you can use, whether or not you have Android 10.
To turn it on dark mode, open the Settings app and search for Dark Mode, Dark Theme or even Night Mode (as Samsung likes to call it). I suggest using dark mode all the time, but if you’re not sure, you can always set dark mode to automatically turn on based on a schedule, say from 7 p.m. to 7 a.m. every day, or allow it to automatically switch based on your location at sunset and sunrise.
Keep your home screen free of clutter
Planning to hit up the Google Play Store for a bunch of new Android apps? Be prepared for a lot of icon clutter on your home screen, which is where shortcuts land every time you install something.
If you don’t want that, there’s a simple way out of this: Long-press on an empty area of your home screen and tap Settings. Find the option labeled something along the lines of Add icon to Home Screen or Add new apps to Home Screen and turn it off.
Presto! No more icons on the home screen when you install new apps. You can still add shortcuts by dragging an app’s icon out of the app drawer, but they won’t appear on your home screen unless you want them to.
Read more: Best Android Phones You Can Buy in 2024
Set up Do Not Disturb so that you can better focus
If your phone routinely spends the night on your nightstand, you probably don’t want it beeping or buzzing every time there’s a call, message or Facebook alert — especially when you’re trying to sleep. Android offers a Do Not Disturb mode that will keep the phone more or less silent during designated hours. On some phones, this is referred to as the Downtime setting or even Quiet Time.
Head to Settings > Sounds (or Notifications), then look for Do Not Disturb or a similar name. If you can’t find it, search for it using the built-in search feature in your settings.
Using the feature, you can set up a range of hours when you want to turn off the digital noise. Don’t worry, any notifications you get while Do Not Disturb is turned on will still be waiting for you when you wake up. Also, you can typically make an exception that allows repeat callers and favorite contacts’ calls to go through. Turn that on. If someone is calling you in an emergency, odds are they are going to keep trying.
Always be prepared in case you lose your phone or it’s stolen
Is there anything worse than a lost or stolen phone? Only the knowledge that you could have tracked it down if you had turned on Google’s Find My Device feature.
To prepare for a successful recovery, here’s what you need to do: Open the Settings app and then search for Find My Device. It’s usually in the Security section of the Settings app.
If you have a Samsung device, you can use Samsung’s Find My Mobile service, which is found in Settings > Biometrics and security > Find My Mobile.
Once that’s enabled, you can head to android.com/find from any PC or mobile device and sign in to your account. Samsung users can visit findmymobile.samsung.com to find a lost phone.
If you have trouble setting any of this up, be sure to read our complete guide to finding a lost Android phone.
Assuming your phone is on and online, you should be able to see its location on a map. From there, you can make it ring, lock it, set a lock screen note to tell whoever has it how to get it back to you, or, worst-case scenario, remotely wipe the whole thing.
And always keep your phone up to date
As obvious as it may seem, a simple software update could fix bugs and other issues slowing down your Android device.
Before you download and install the latest software update, make sure your device is connected to Wi-Fi, or else this won’t work.
Now, open the Settings application and type in Update. You’ll then either see Software update or System update — choose either one. Then just download the software, wait for a few minutes and install it when it’s ready. Your Android device will reboot and install the latest software update available.
There’s a lot more to learn about a new phone. Here are the best ways to boost your cell signal, and here’s a flagship phone head-to-head comparison. Plus, check out CNET’s list of the best cases for your Samsung phone. More of an Apple fan? We have tips for boosting your iPhone’s performance, too.
Technologies
I’m Finally Using the iPhone 17 Pro’s Camera Control, Thanks to These iOS 26 Settings
In just a month, I’ve already used Camera Control on my iPhone 17 Pro Max more than I did in a whole year with the iPhone 16 Pro.
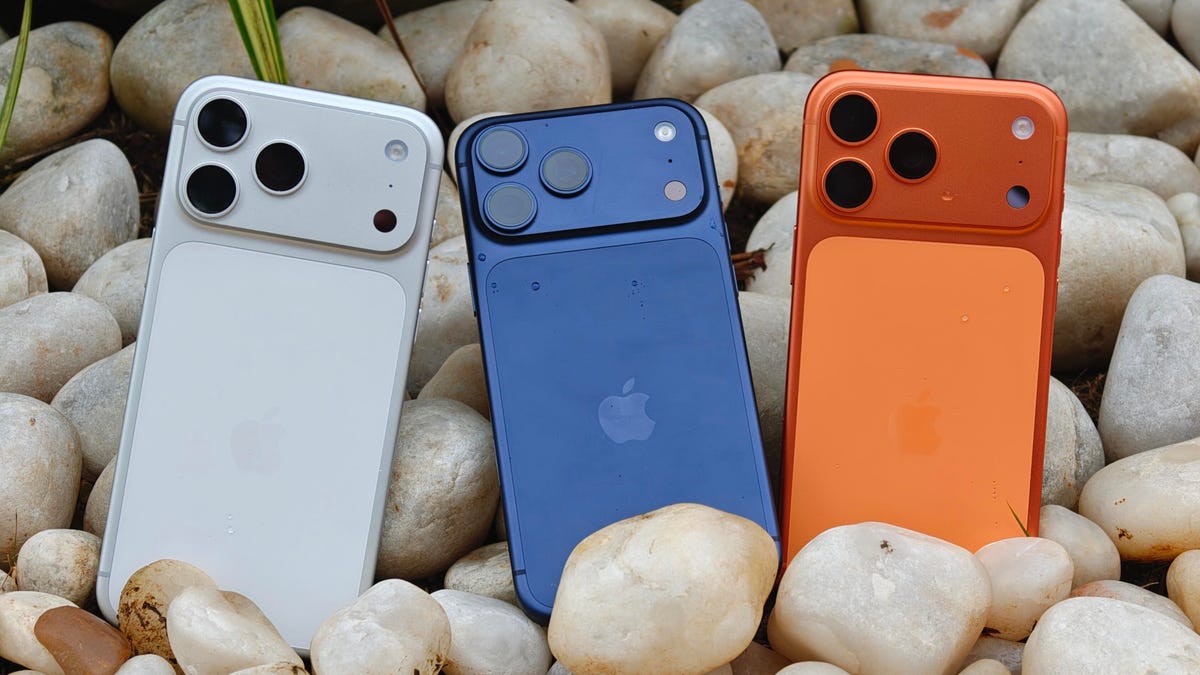
I was keen on using the Camera Control button when it first debuted on the iPhone 16 Pro. But in over a year of use, it caused more accidental swipes and presses than its intended use cases to take photos and adjust camera settings. I was frustrated with the experience and hoped that Apple would remove it from the iPhone 17 lineup. Instead, the Cupertino, California-based company made its touch-sensitive capacitive control surface more customizable with iOS 26. And I’m happy to report that it helped!
I’ve been using the iPhone 17 Pro since launch and spent 5 to 10 minutes customizing the Camera Control to my liking. The result? Minimized accidental swipes and more conscious usability.
I transformed my Camera Control experience by changing a few iOS 26 settings
When setting up a new iOS 26-supported iPhone, Apple includes a toggle (now turned off by default) called Light press to adjust Zoom, Exposure and more. This is what used to cause a lot of fake input earlier. I’m glad it is turned off by default.
Apple now also lets you customize the Camera Control further from the Settings menu. I tweaked settings there to personalize my shortcuts, functionalities and more.
For example, I’ve set the Camera Control to launch a Code Scanner on Double Click without requiring the screen to be on. This allows me to scan and pay at payment kiosks (my most frequently used mode of payment) without needing to open the payment app and then tap on a menu to scan a code. If I enter the Code Scanner without Face ID, it requires authentication before making the payment, so it is still as secure as ever.
Earlier, I had set an Action Button shortcut to open Google Pay, but I realized I still need a one-press solution to turn the phone to silent mode. Adding a Code Scanner shortcut to Camera Control frees the Action Button to be my Silent Switch again. Moreover, Code Scanner lets you select from multiple apps to pay a vendor, which could be useful for people who use multiple payment apps.
Secondly, I have turned off the Swipe gesture and selected only three controls that I use most often. Now, when I open the Camera app, I can lightly press on the Camera Control button and then swipe between my selected controls. It doesn’t register swipes from the get-go. This has reduced fake touches and my frustrating experience with the swipe gesture.
To further streamline my controls, I chose Exposure, Styles and Tone, and left out Depth, Zoom and Cameras. This way, I have access to hidden viewfinder settings with a single press-and-swipe gesture at my fingertips.
I also turned off the Clean Preview toggle, so I can still switch between cameras with a single tap, and switched on the Lock Focus and Exposure toggle for a light press-and-hold gesture.
Customizing these settings helped me personalize Camera Control and use it more often. Now, it appeals to me with the settings I need and the way I need them, instead of being an overcrowded mess. And you can personalize your Camera Control, too. Here’s how:
Change Camera Control launch functionality
You can use Camera Control as another Action Button to launch an app of your choice. The only requirement is that the app should have access to the camera.
- Go to Settings > Camera > Camera Control.
- Under Launch Camera, select the app you need.
- Go back and select Single Click or Double Click to open the said app.
I rely on Double Click so I don’t accidentally trigger an app when taking out the iPhone from my pocket. In my opinion, it is the safer and more convenient choice.
Under the same Launch Camera menu, you can also choose if you want the screen to be on or off when opening the app. I have turned it off to save the extra step of scanning my face to access the said app.
Choose the Controls that you want to appear on Camera Control
Apple allows you to choose from six controls, namely, Exposure, Depth, Zoom, Cameras, Styles and Tone. I have chosen three because the other three are available as on-screen toggles in the viewfinder.
- Go to Settings > Camera > Camera Control.
- Under Controls, make sure Camera Adjustments is turned on.
- Tap on Customize.
- Under Gesture, turn on Light Press and toggle off Swipe.
- Under Controls, choose the functionalities you need.
- Now, turn off the Clean Preview toggle if you require the viewfinder toggles to remain accessible.
You can further adjust the Camera Control pressure by going into Settings> Camera > Camera Control > Accessibility.
Turn on Lock Exposure and Focus with Camera Control
This setting will help you lock the exposure and focus without needing to press and hold on the viewfinder. It can be beneficial when you need consistent settings, especially when moving the camera from one subject to another.
- Go to Settings > Camera > Camera Control.
- Swipe down to Lock Exposure and Focus.
- Tap on the toggle to turn it on.
For me, Camera Control was a hot mess when it debuted last year because I was either using on-screen controls or the new button. That’s why room for more personalization and customizability has been a game-changer. I realized I could access on-screen toggles while adding hidden settings to one-tap access. On my iPhone 17 Pro, I now use the Camera Control to open my payments app, adjust Exposure and Styles as well as trigger Visual Intelligence when needed.
-
 Technologies3 года ago
Tech Companies Need to Be Held Accountable for Security, Experts Say
-
 Technologies3 года ago
Best Handheld Game Console in 2023
-
 Technologies3 года ago
Tighten Up Your VR Game With the Best Head Straps for Quest 2
-
 Technologies4 года ago
Verum, Wickr and Threema: next generation secured messengers
-
 Technologies4 года ago
Black Friday 2021: The best deals on TVs, headphones, kitchenware, and more
-
 Technologies4 года ago
Google to require vaccinations as Silicon Valley rethinks return-to-office policies
-
 Technologies4 года ago
Olivia Harlan Dekker for Verum Messenger
-
 Technologies4 года ago
iPhone 13 event: How to watch Apple’s big announcement tomorrow


